• Home
  • About
  • Archives - Wading Through
  • Archives - The Craft Sea

Wading Through...

  • Home
  • About
  • Archives - Wading Through
  • Archives - The Craft Sea

Mini Magazine-style Card Holder

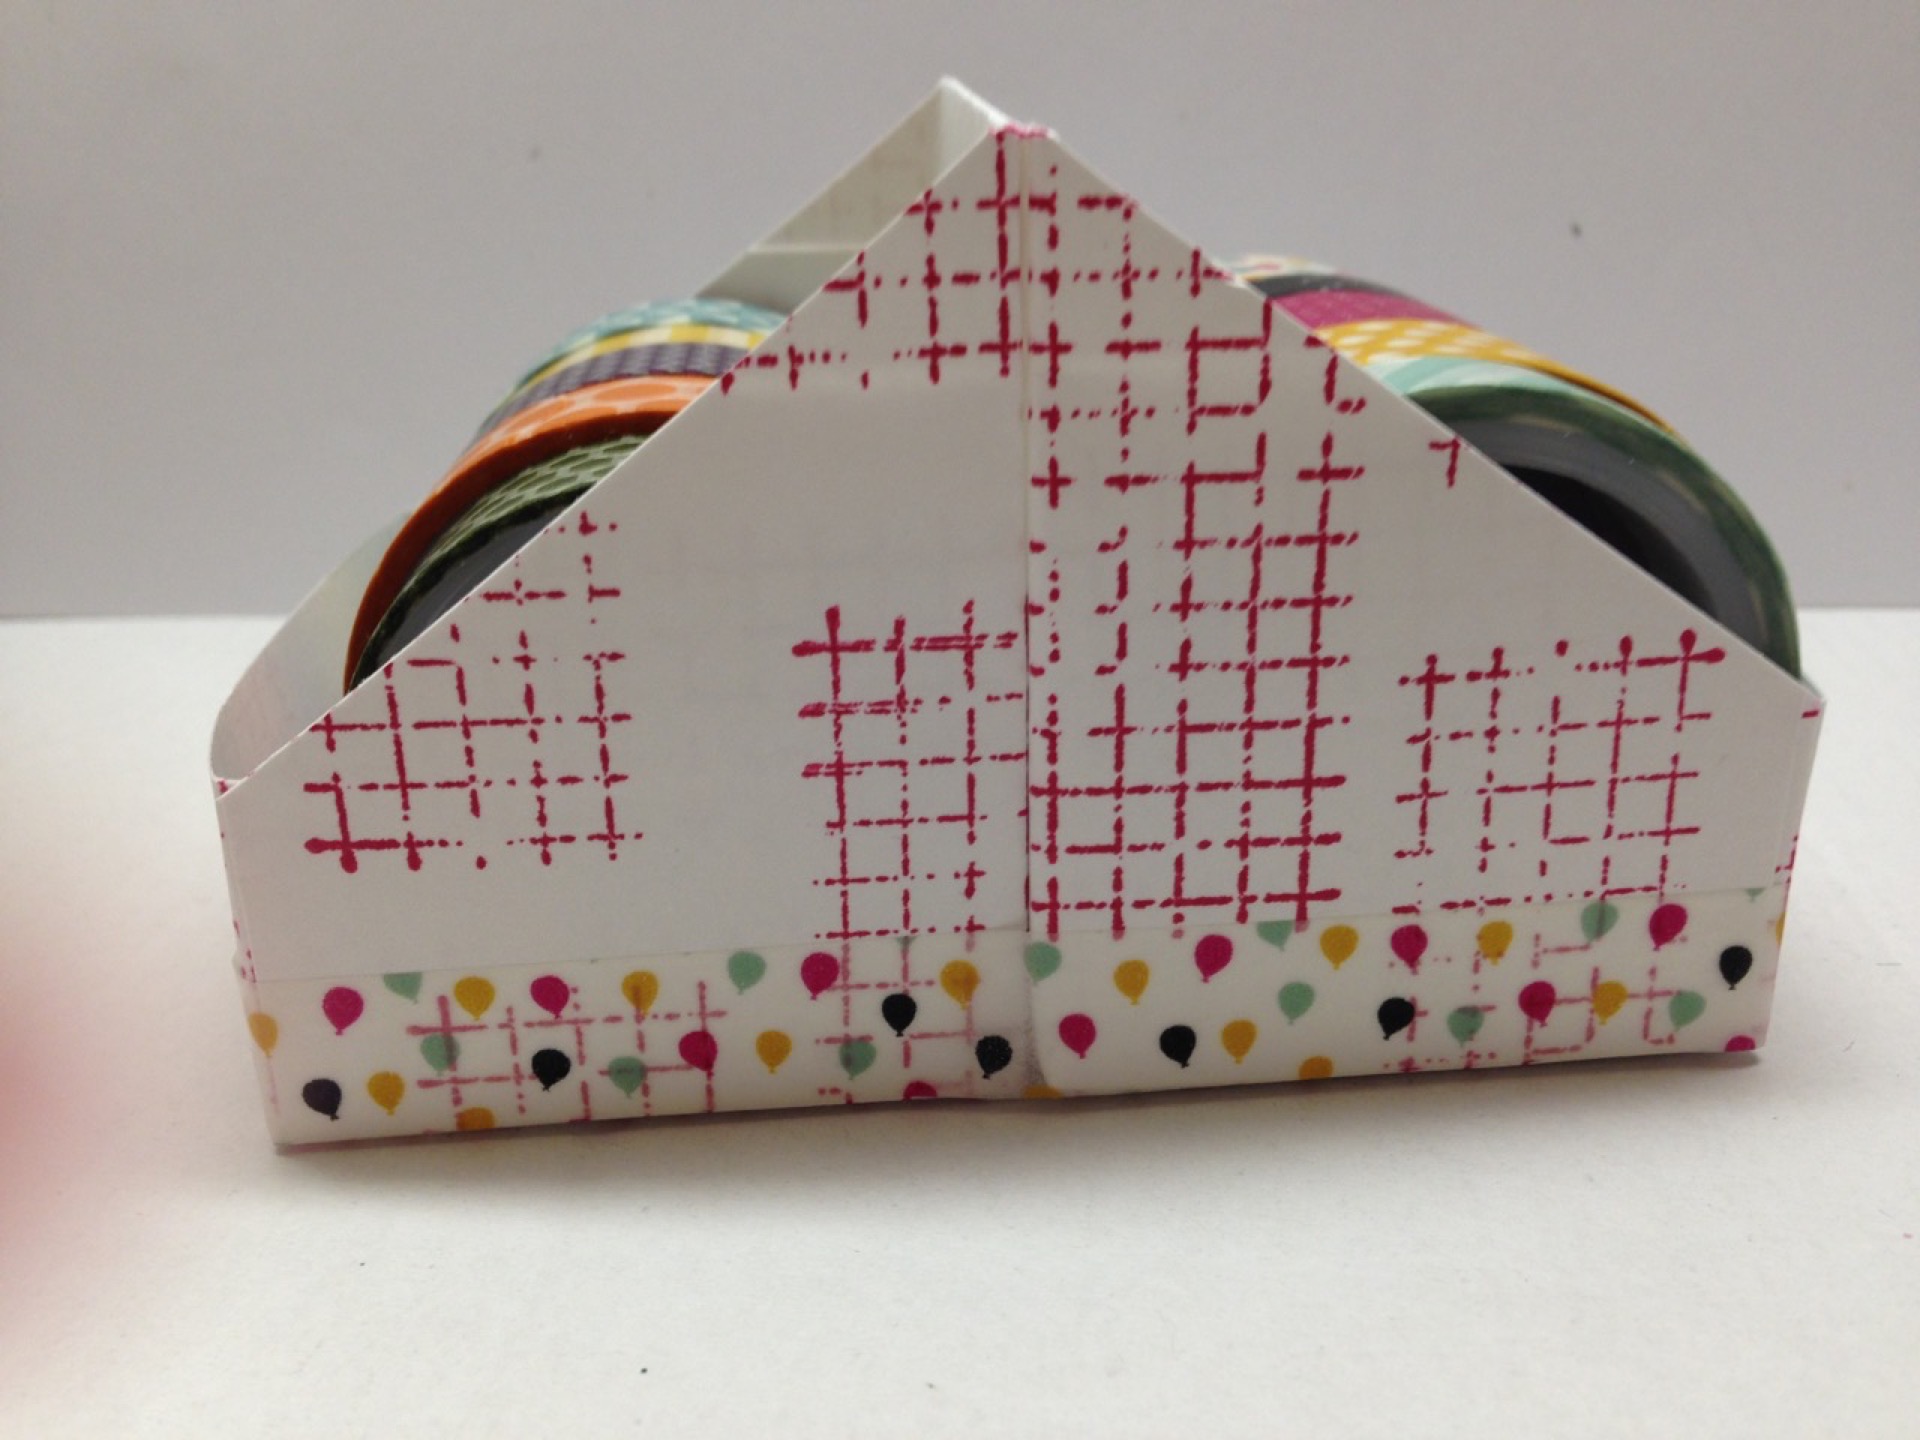
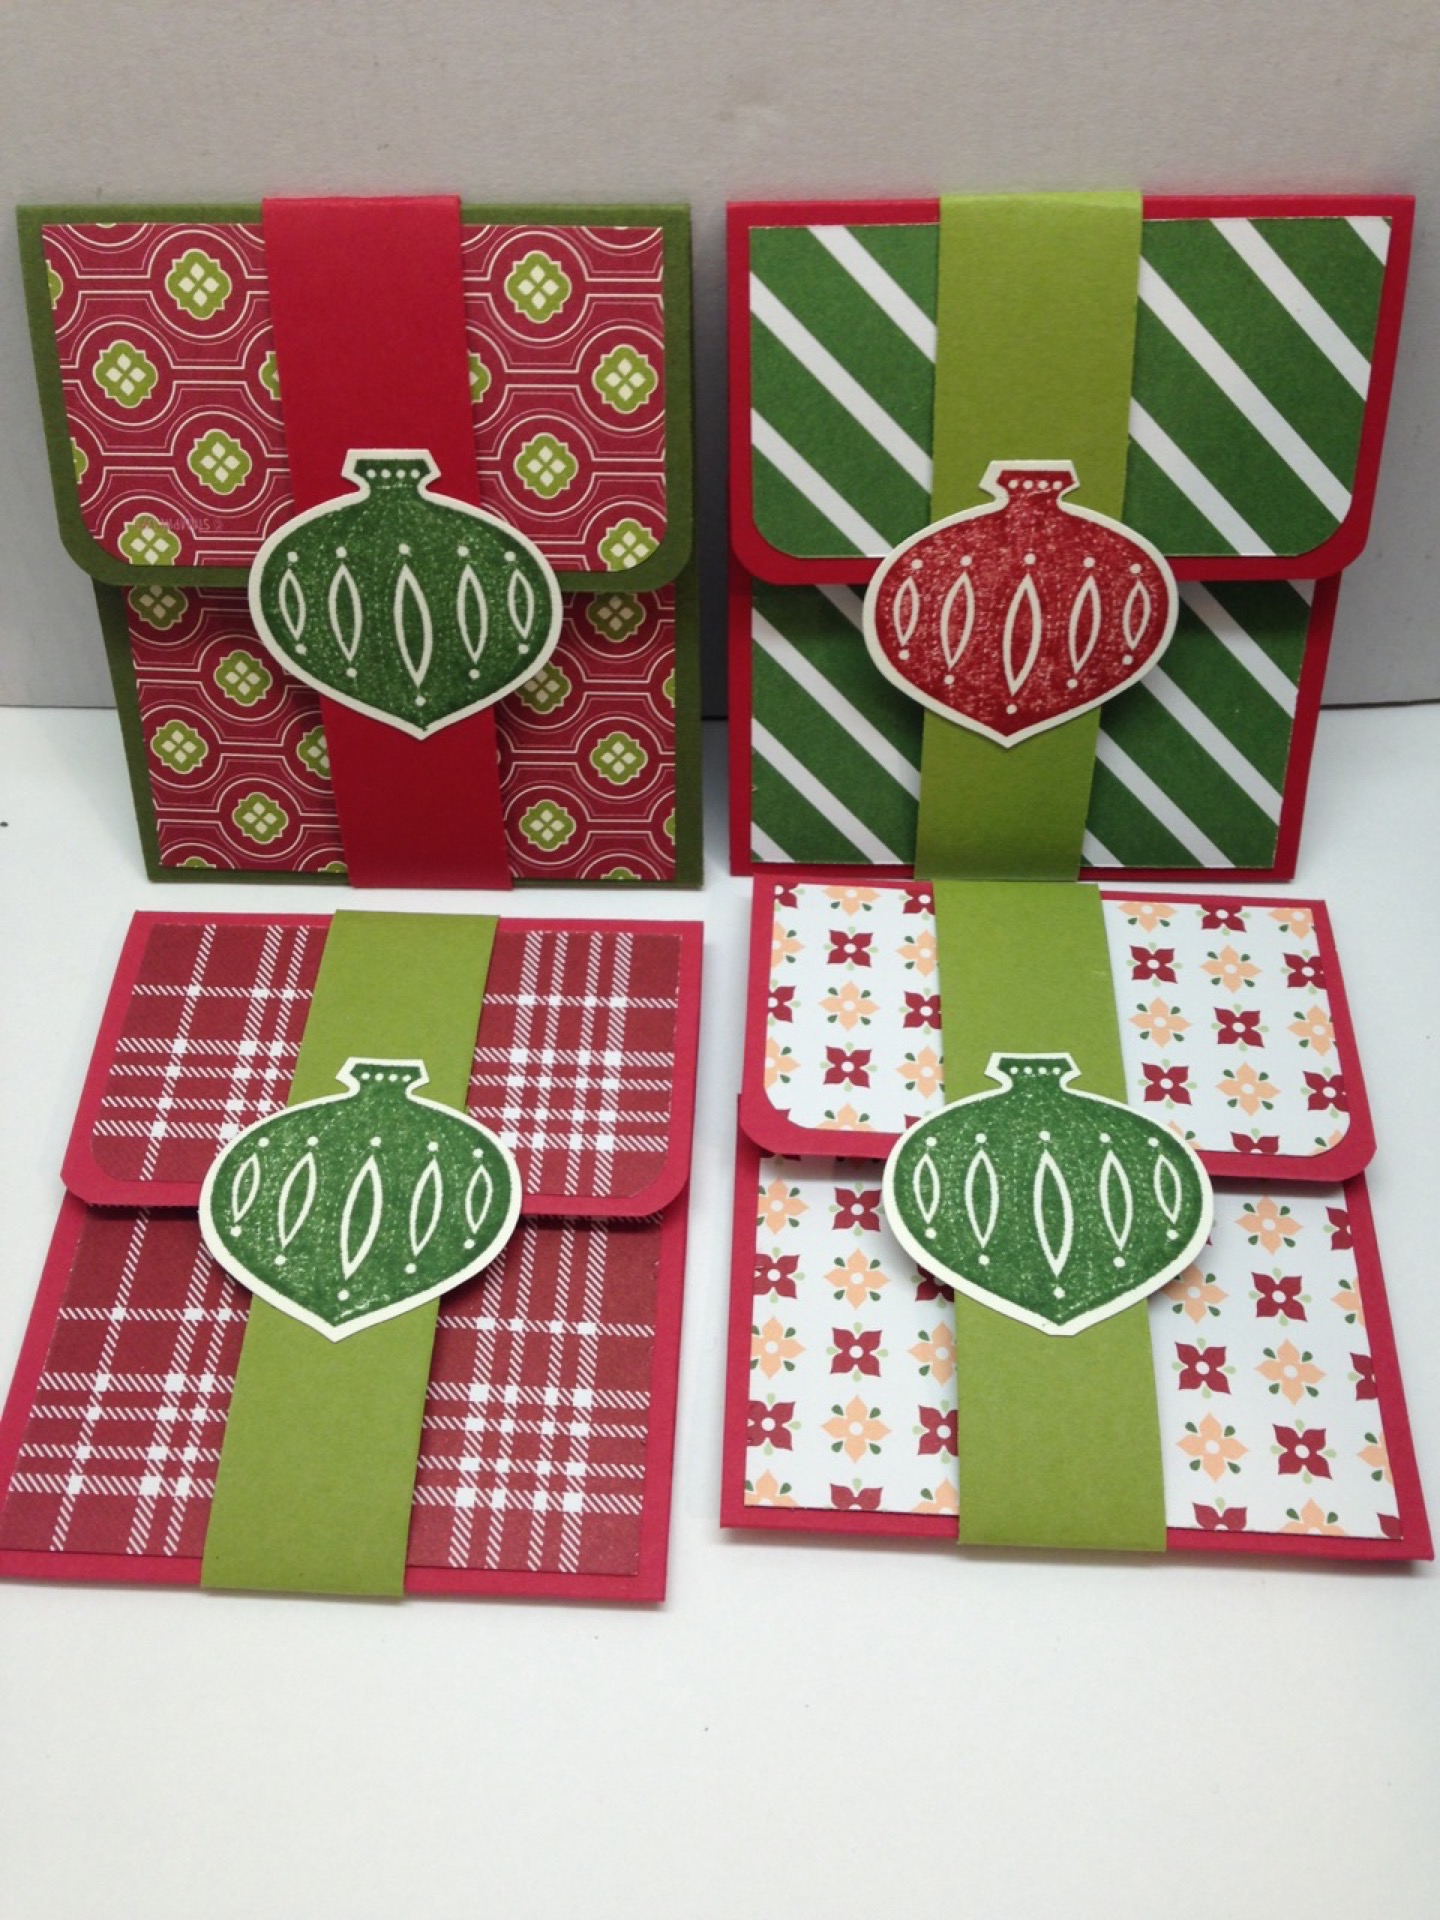
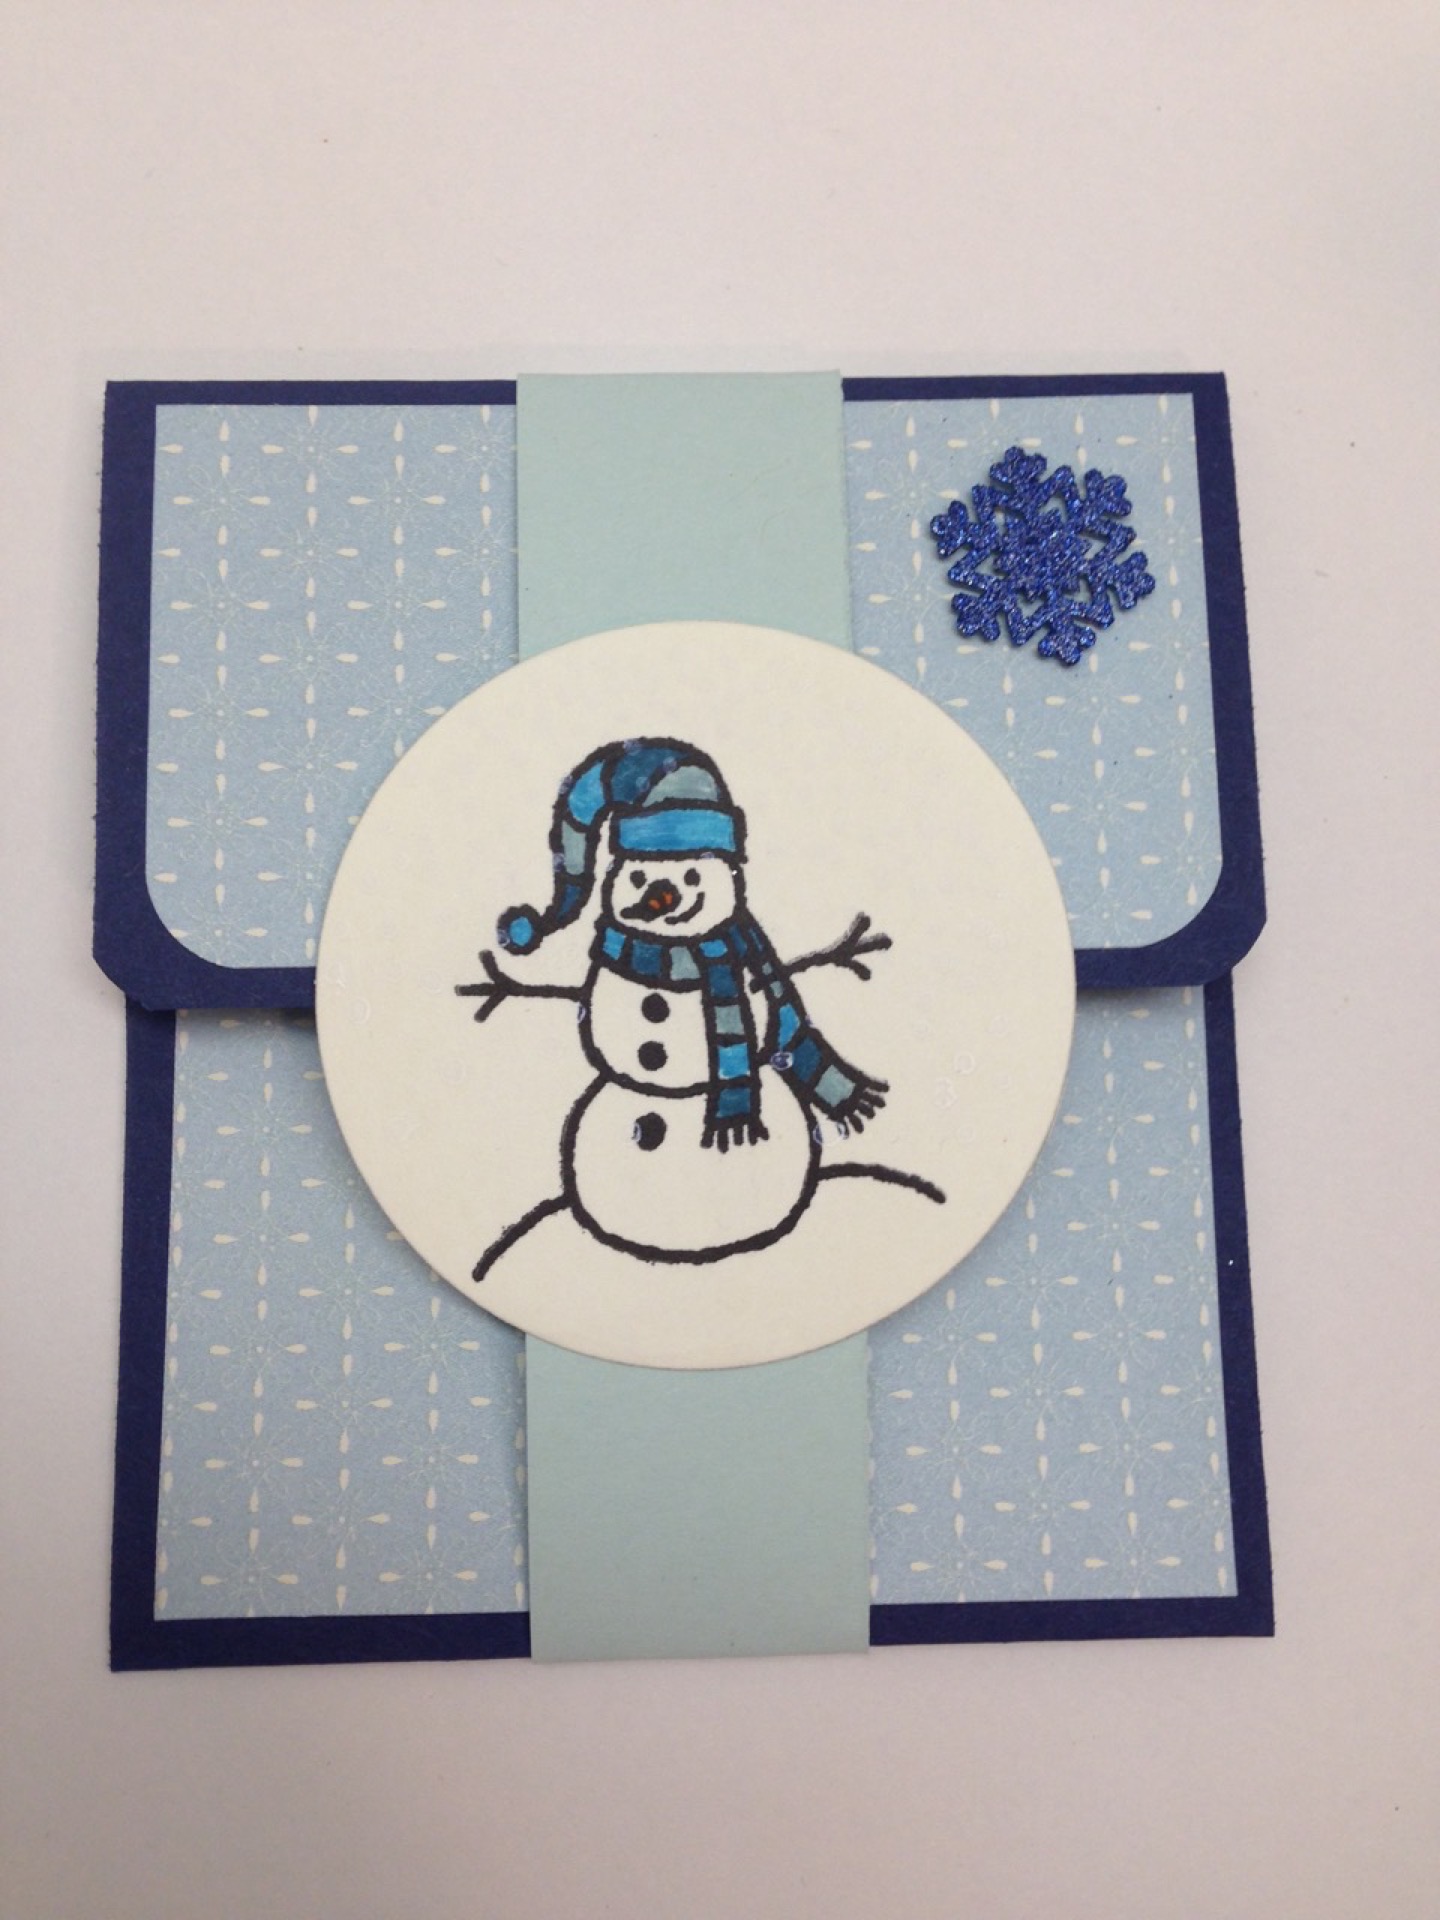
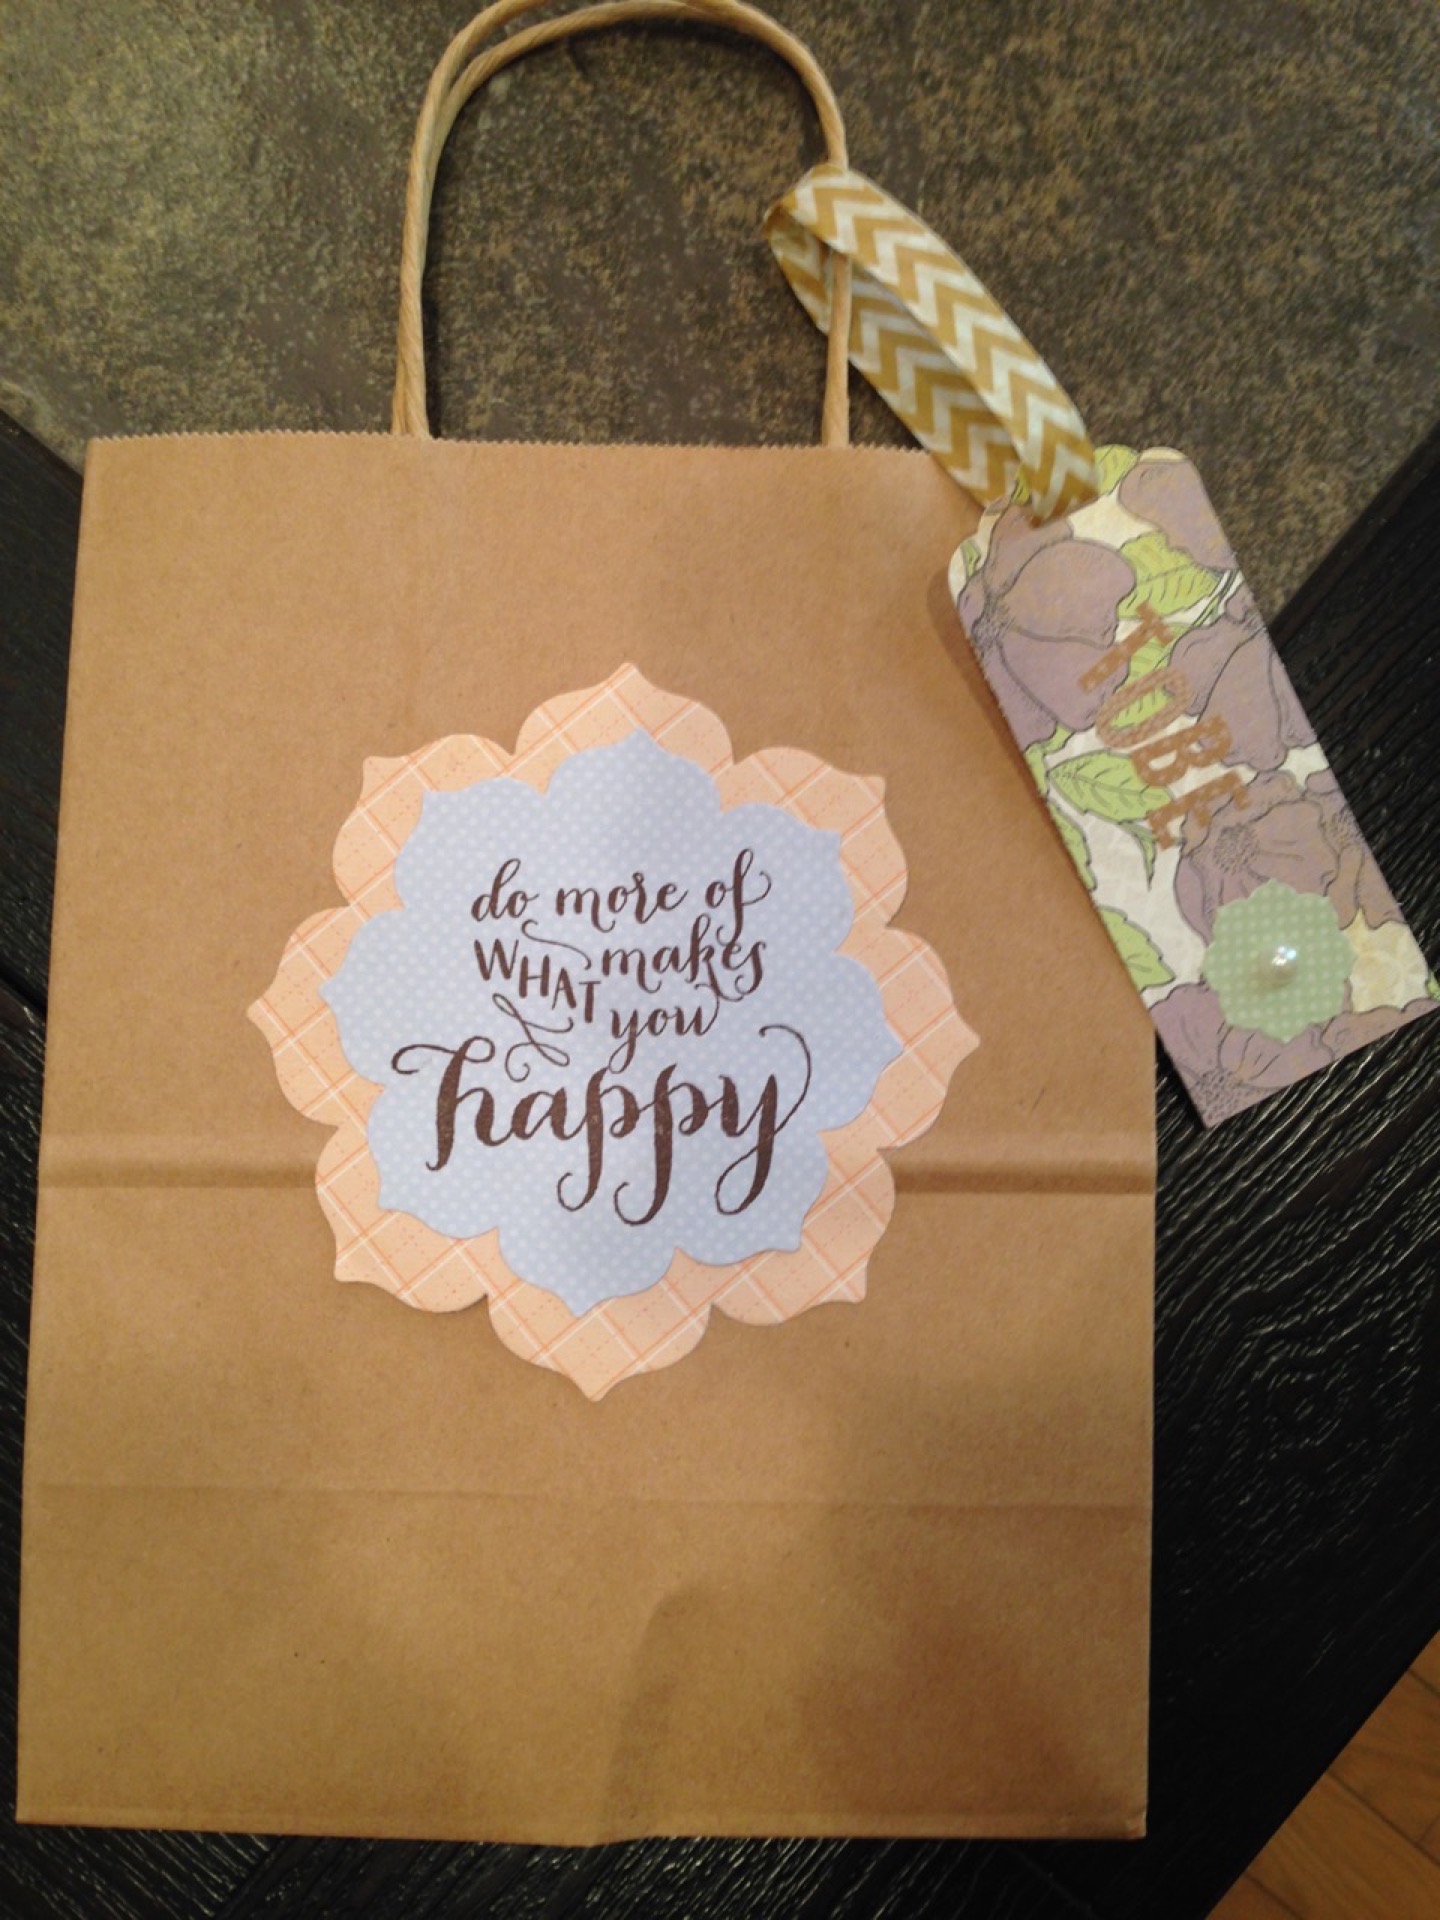
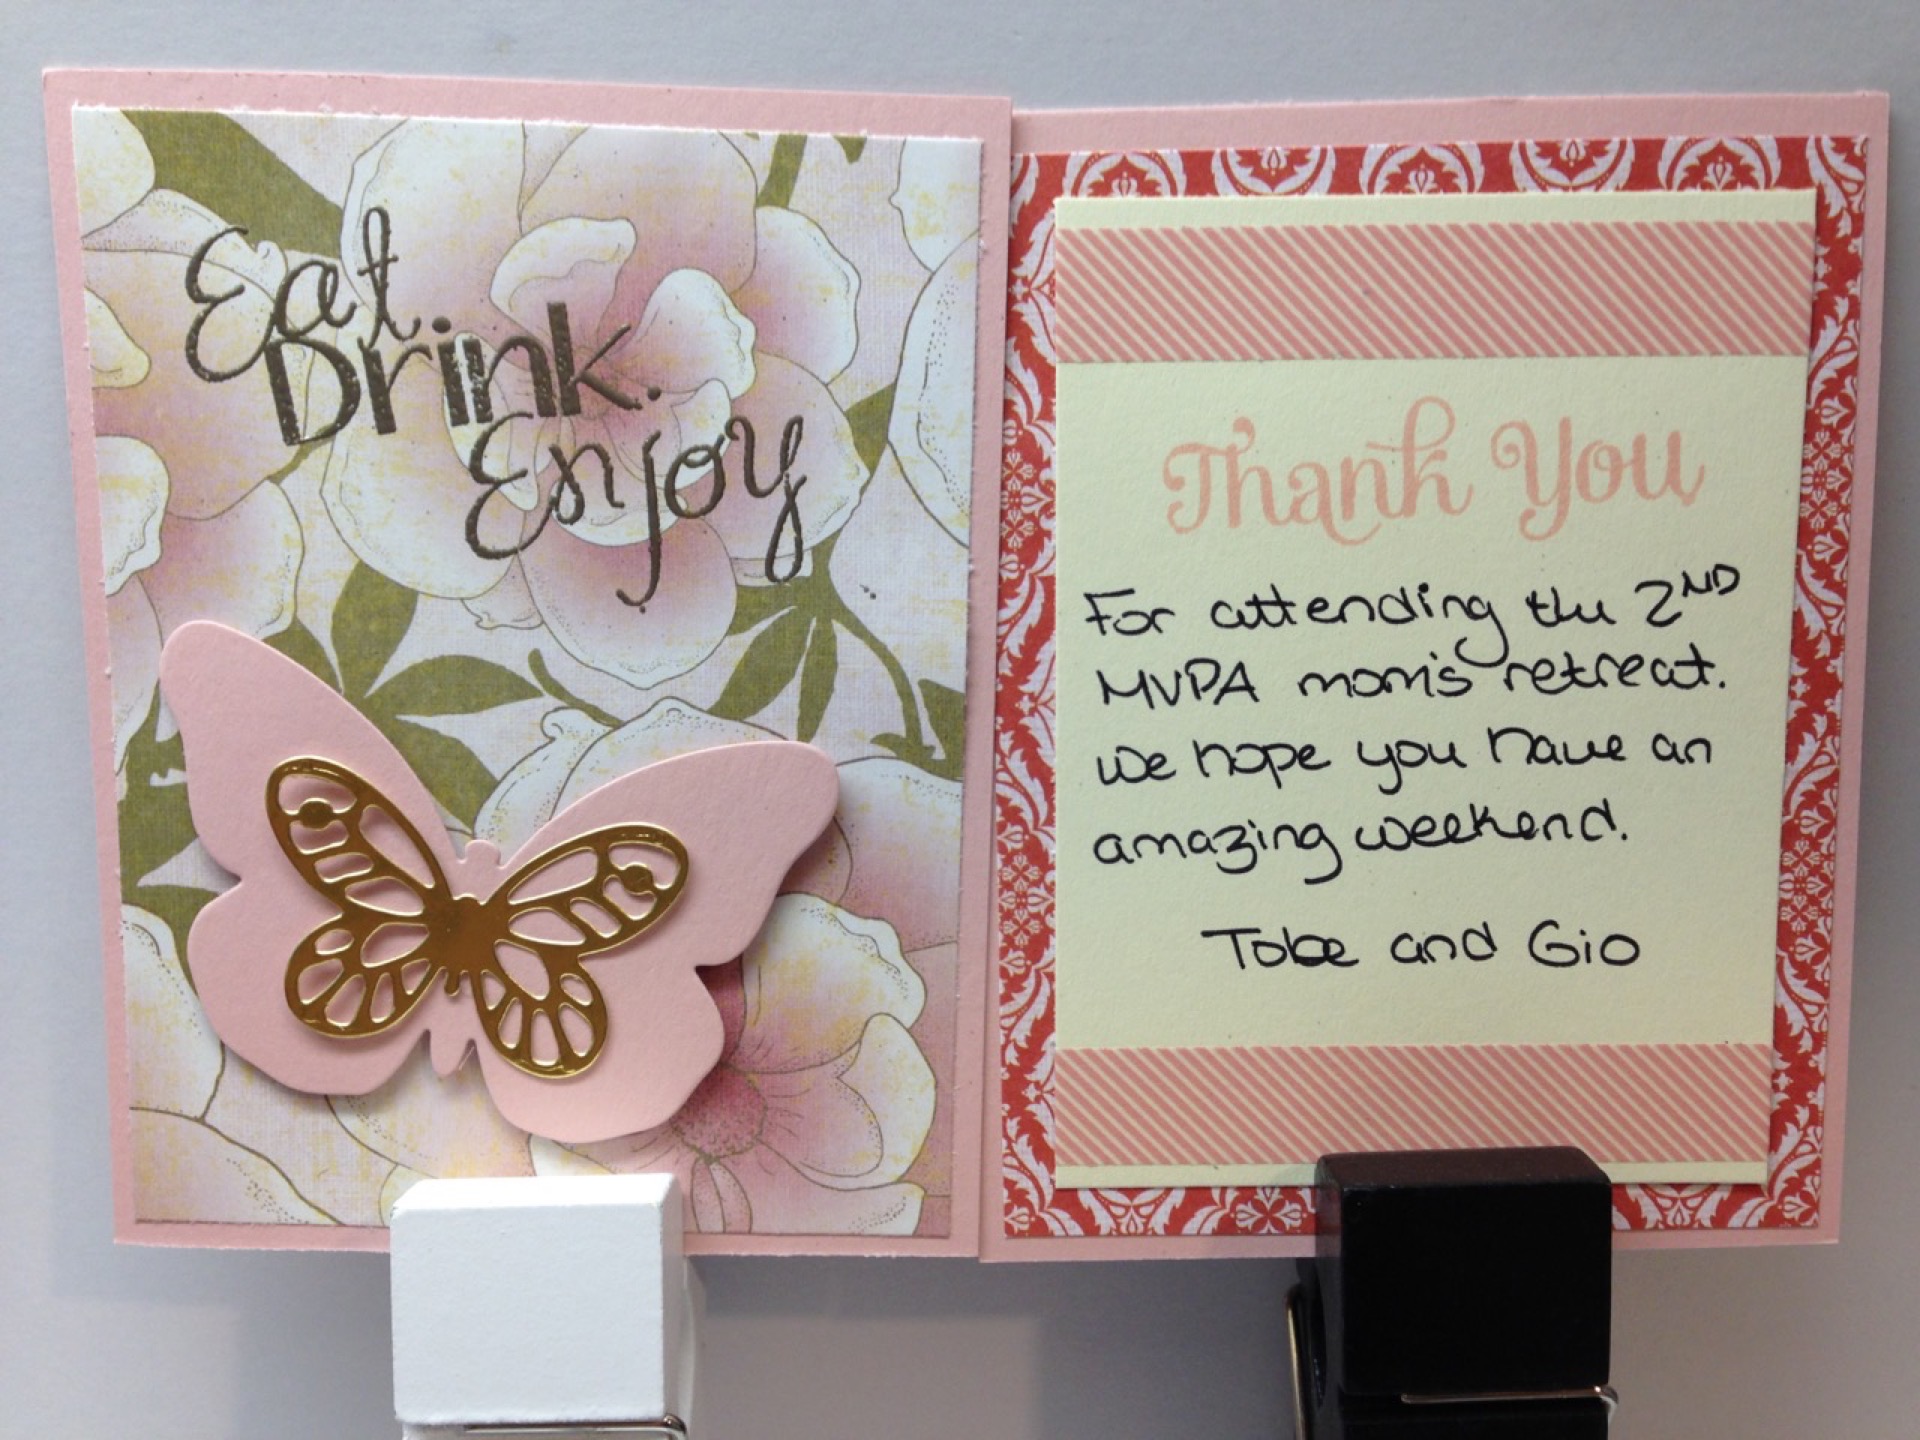
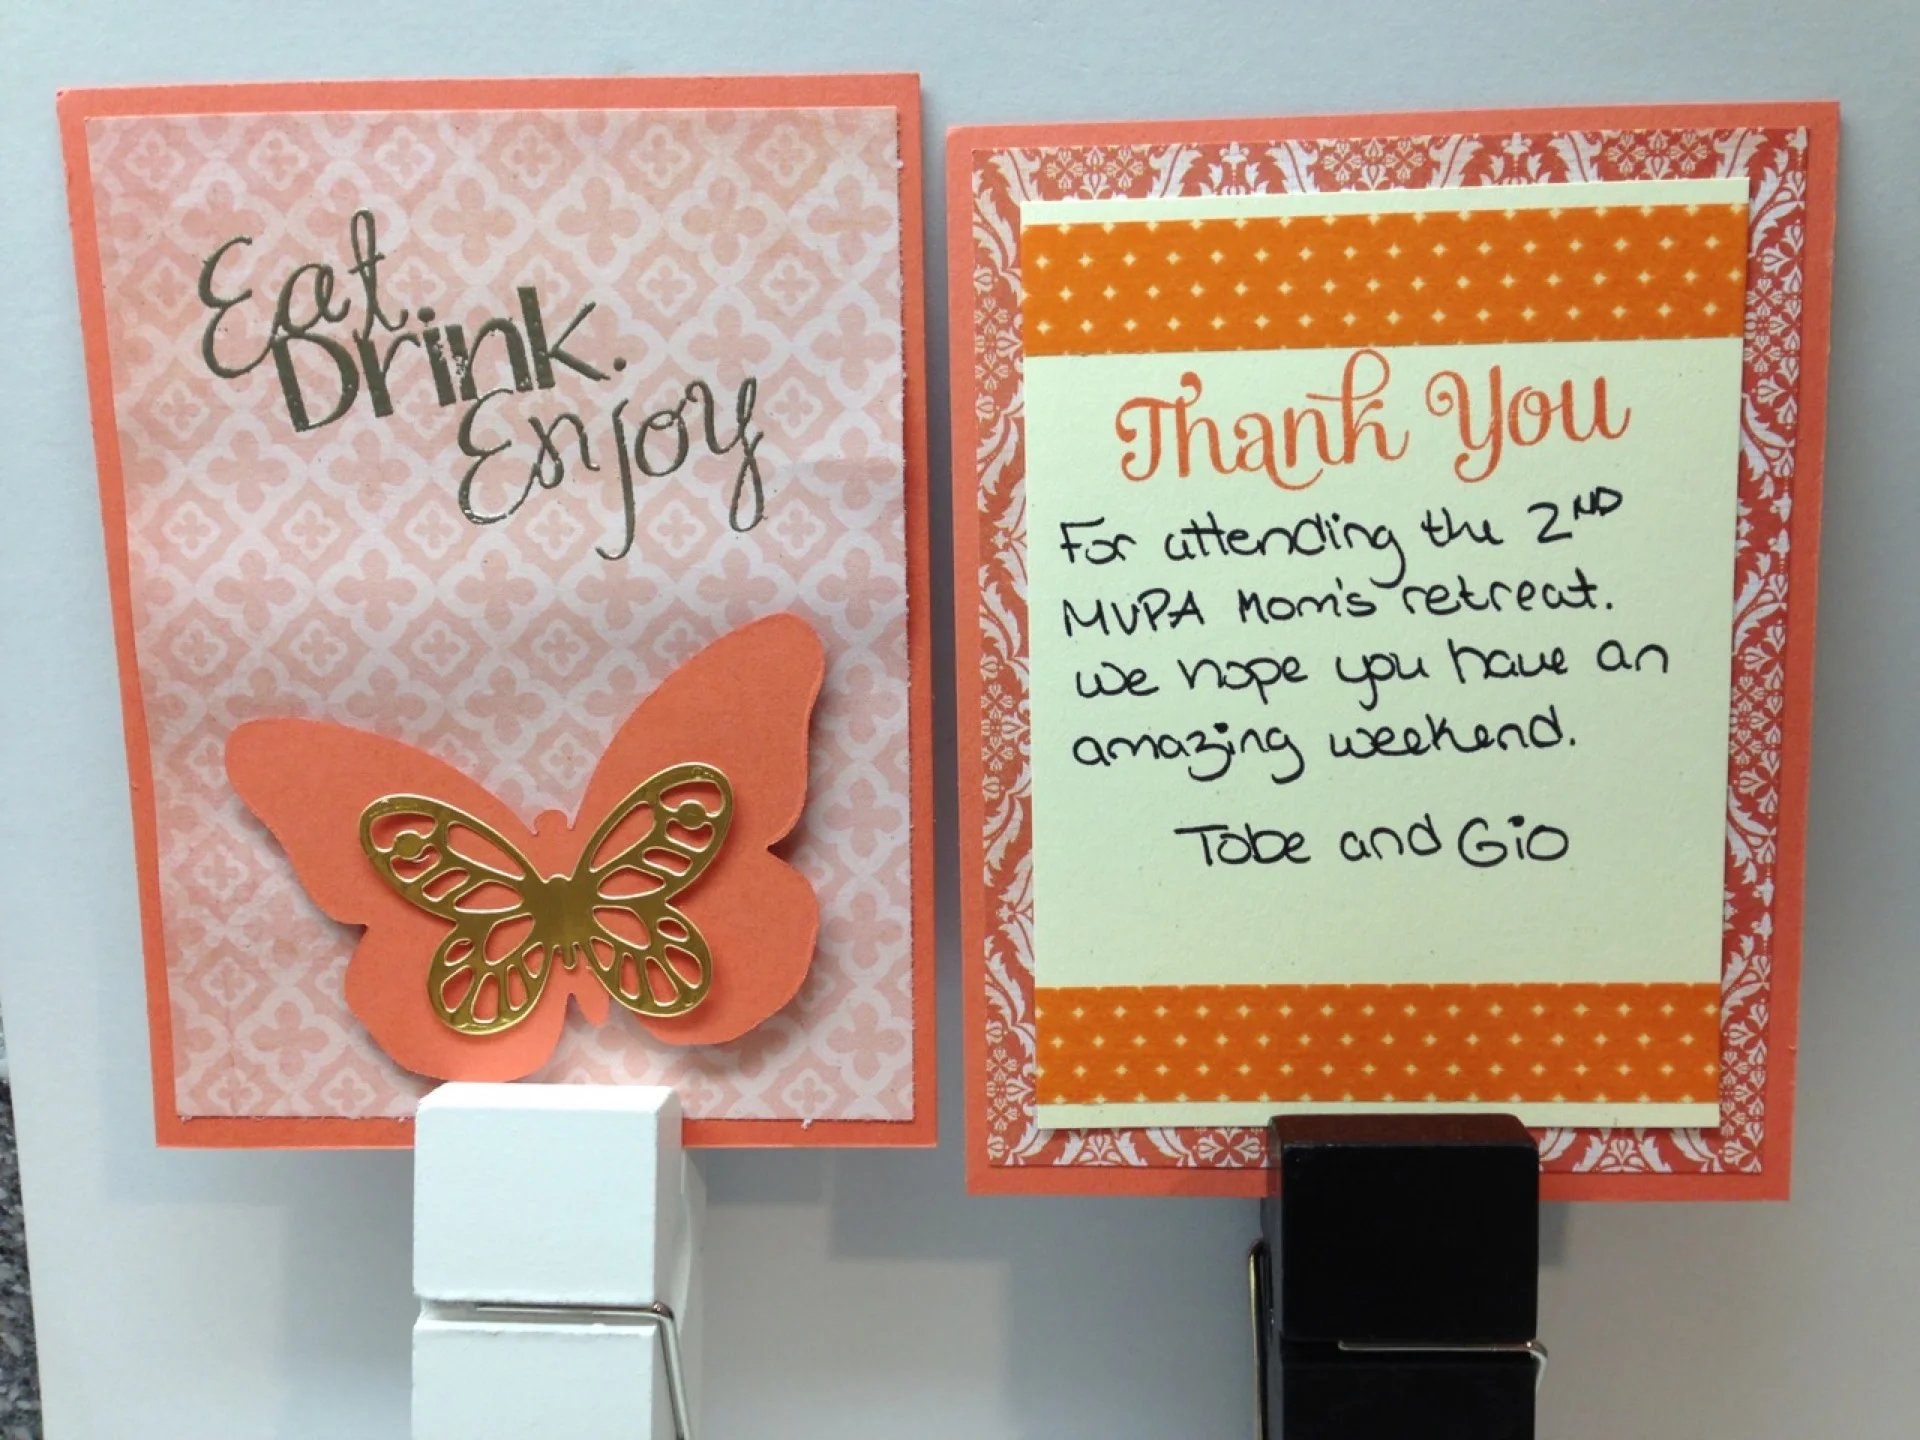
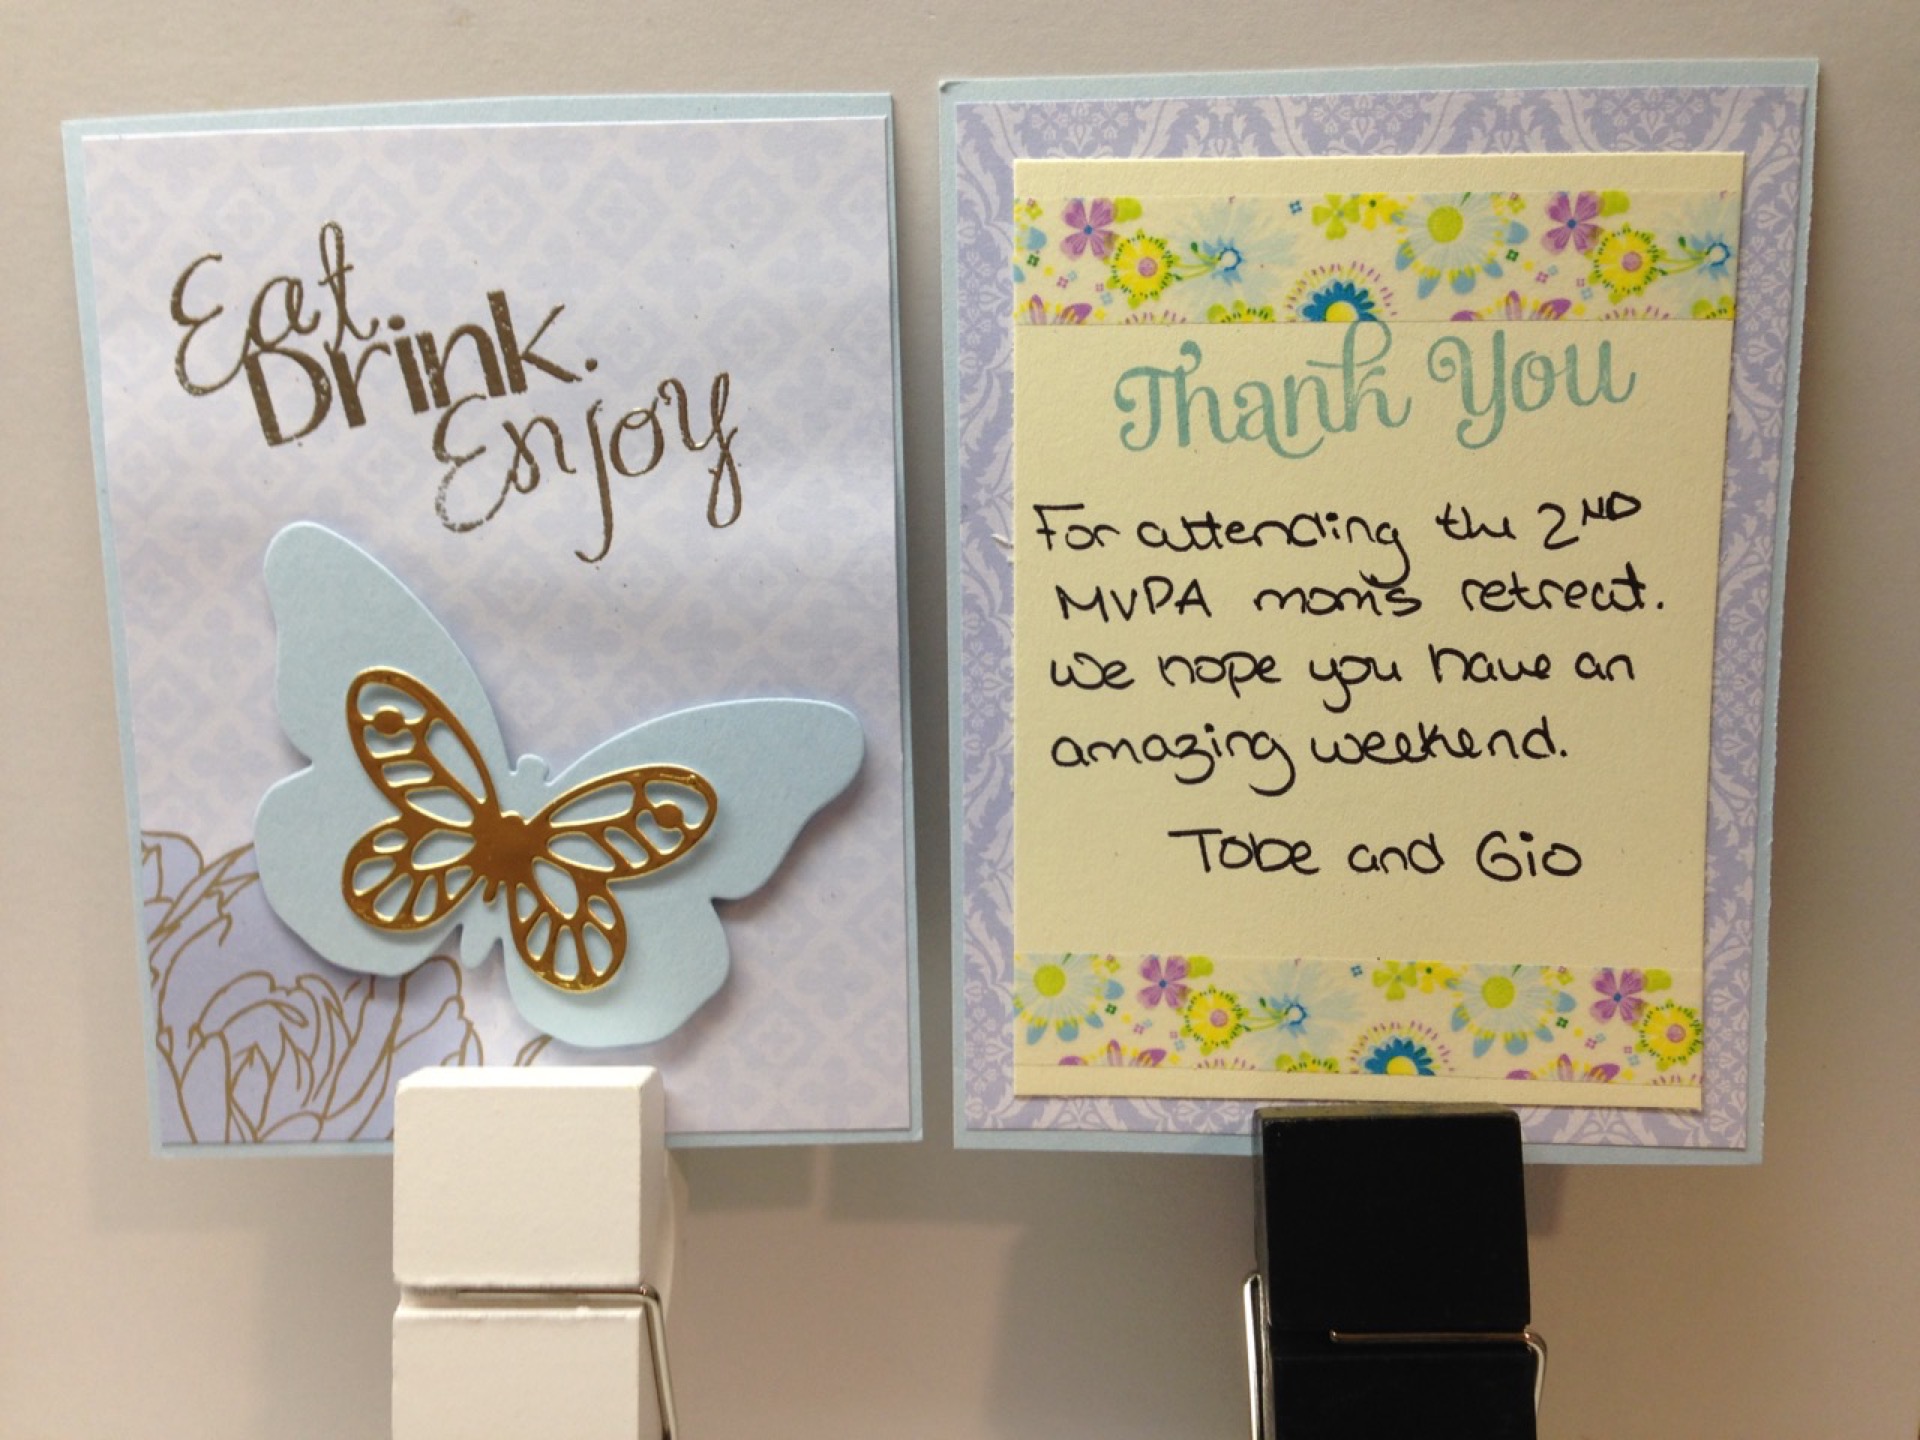
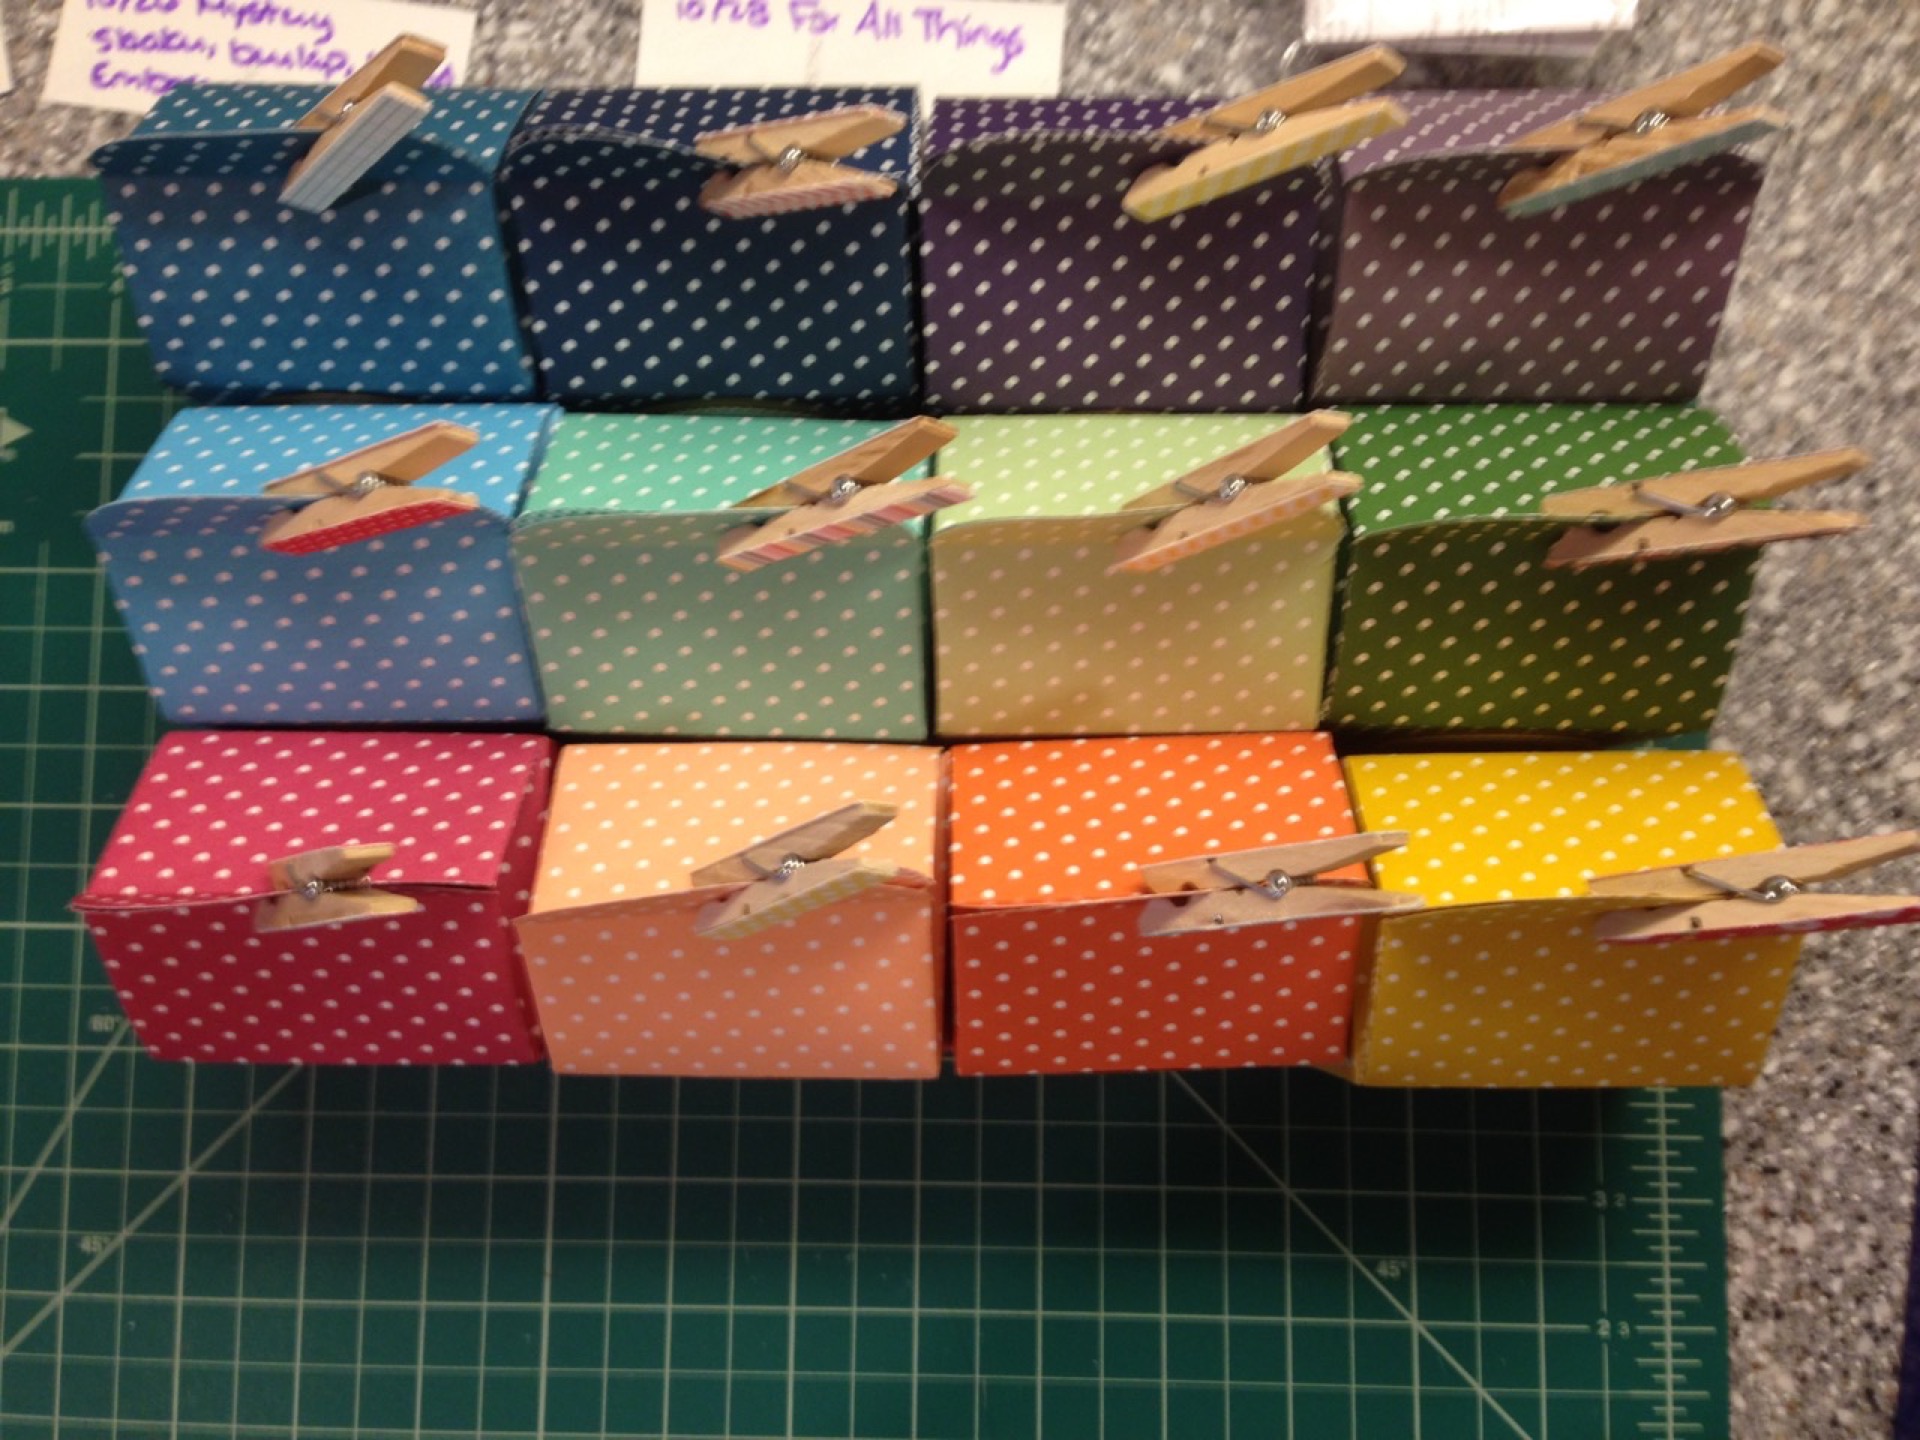
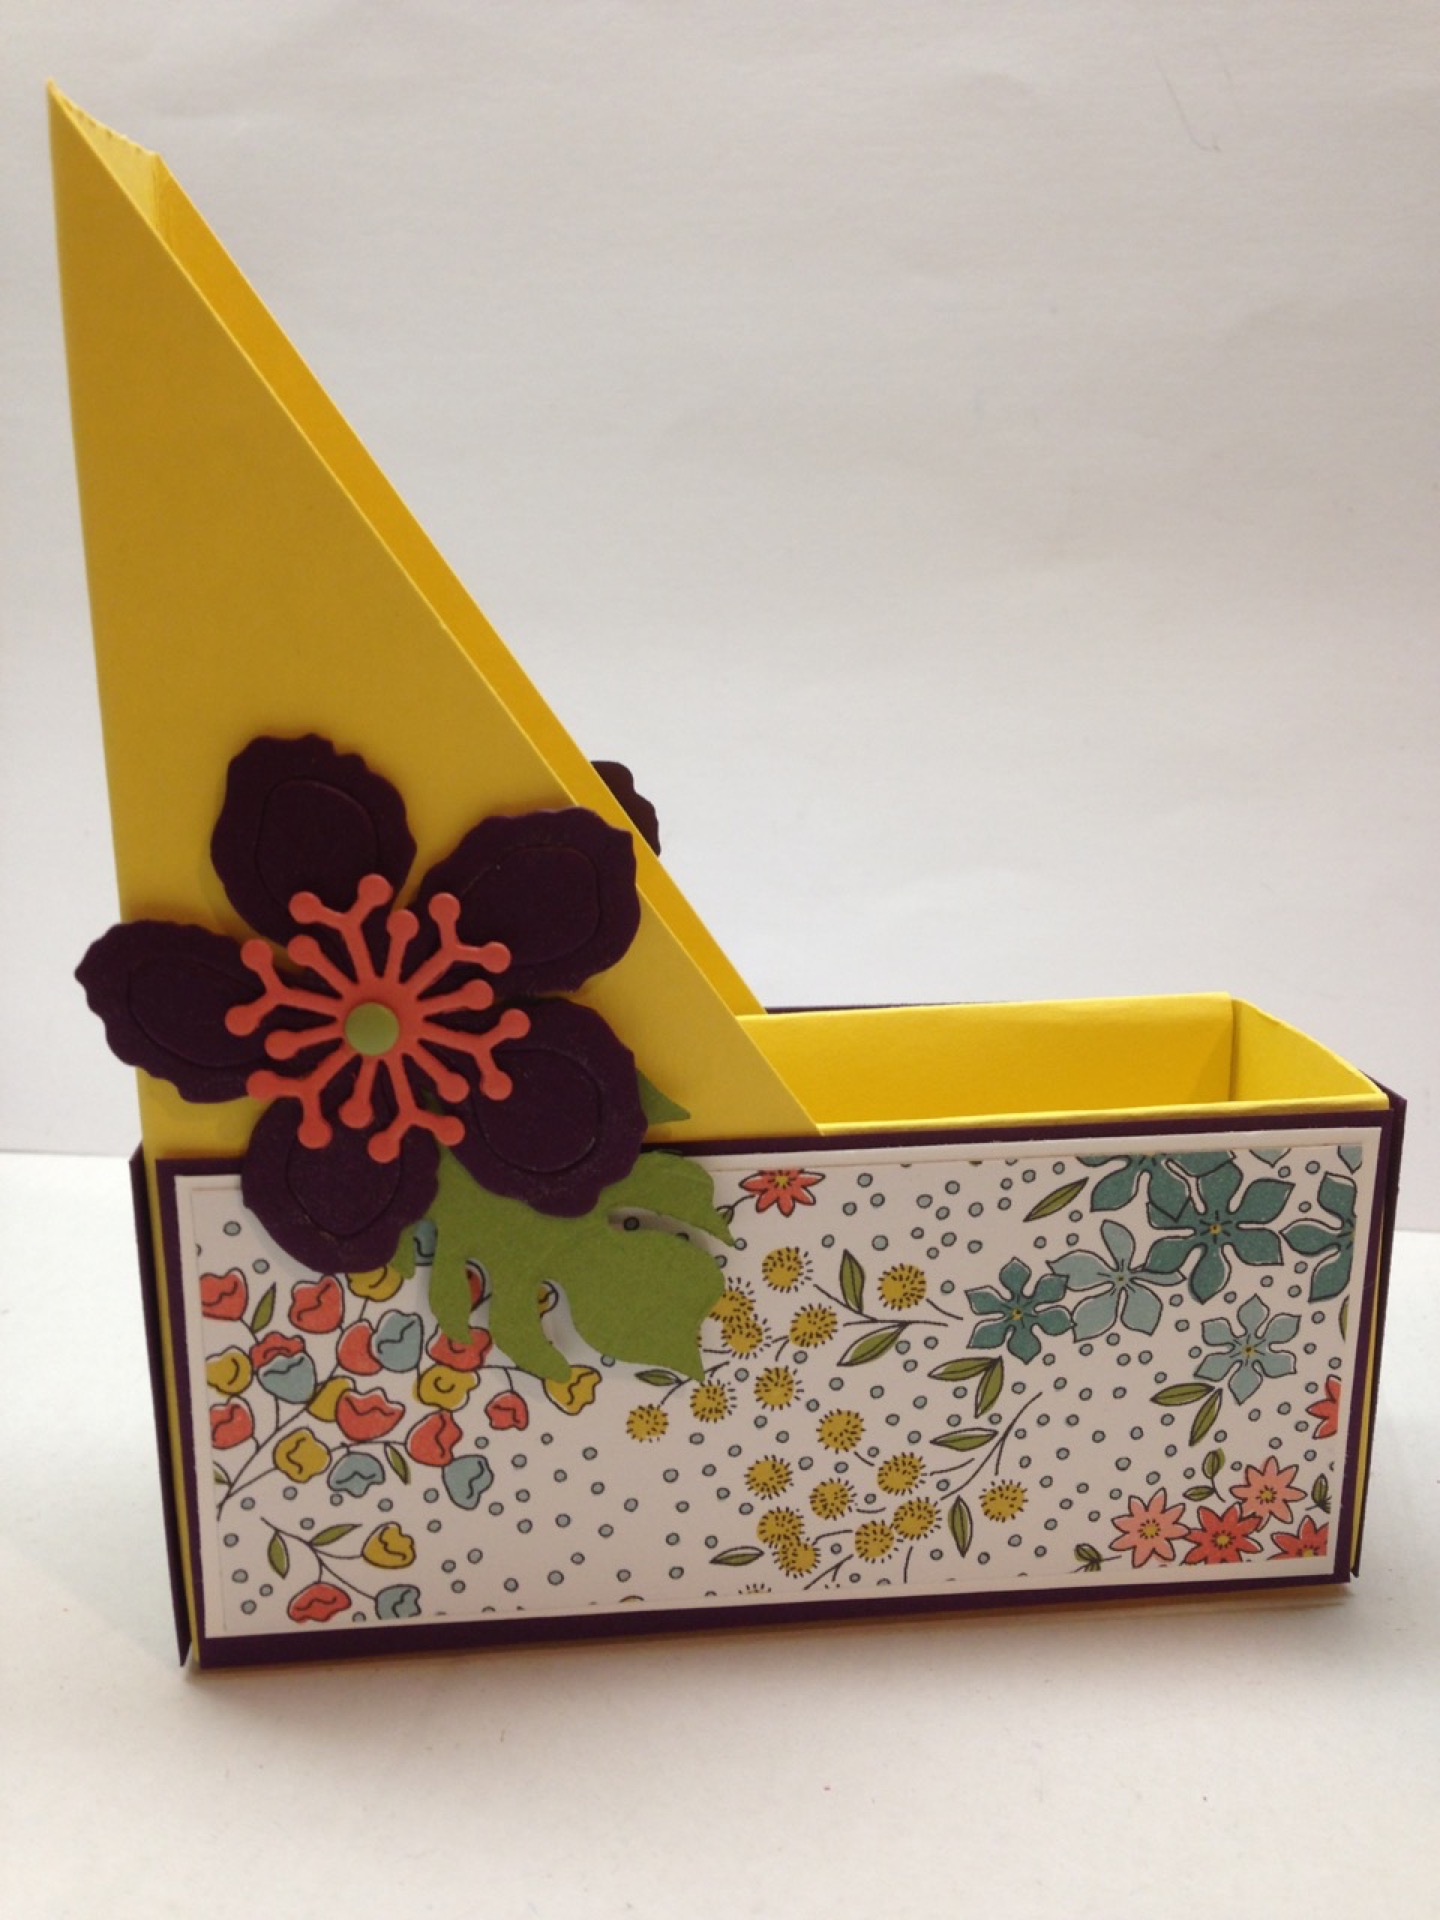
June's stamp club 3D project was this cute mini magazine-style card holder. It was super simple to make and a total crowd pleaser. And it holds approximately five cards with envelopes. Fill this holder with coordinating notecards for a perfect gift!


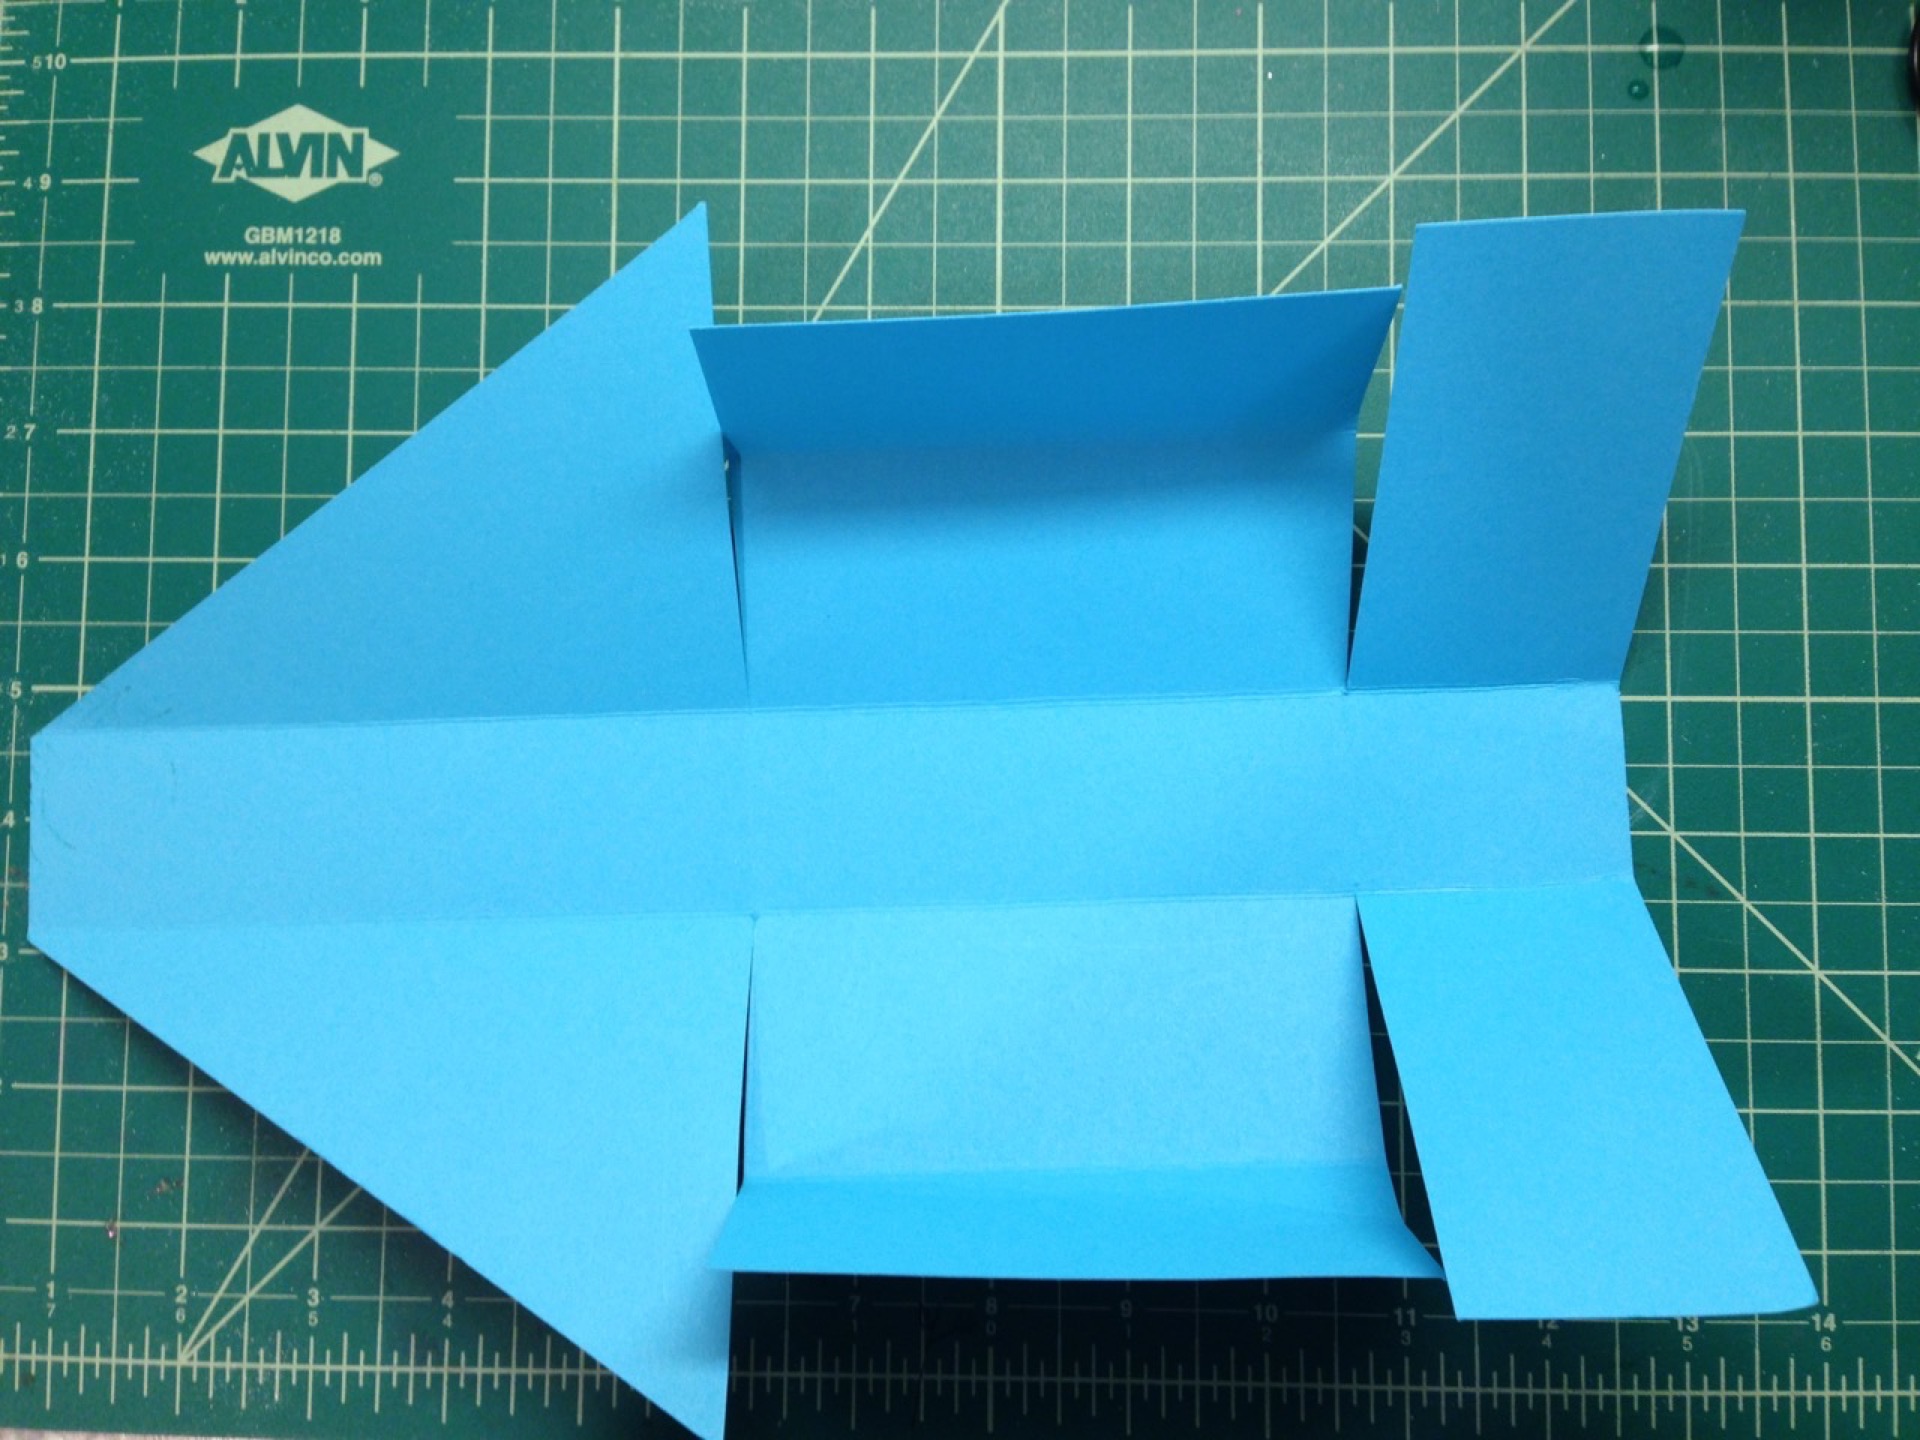
Start with a  9" x 12" piece of cardstock. Score the 12" side at 2" and 6 1/2". Score the 9" side at 3 3/4" and 5 1/4".

Holding the paper with the 9" side on the top, score between the two middle horizontal score lines at 1 3/4" from each side.

Trim the diagonals. Your paper should look like this:

Cut some decorative DSP and cardstock to embellish your holder.

Cardstock: Cut 2 pieces at 2" x 4 1/2" and 2 pieces at 1 1/2" x 2"

DSP: Cut 2 pieces at 1 3/4" x 4 1/4" and 2 pieces at 1 1/4" x 1 3/4"

Add sticky strip to the inside to assemble.


As a finishing touch, add a pretty embellishment. I choose to due cut a flower from the Botanical Builders Framelits.

 
  • Stamps:
  • Inks:
  • Cardstock: Wildflower Fields DSP (retired), Daffodil Delight, Old Olive, Blackberry Bliss (retired), Calypso Coral
  • Accessories: Candy Dots (retired), Wink of Stella
  • Tools: Botanical Builder Framelits

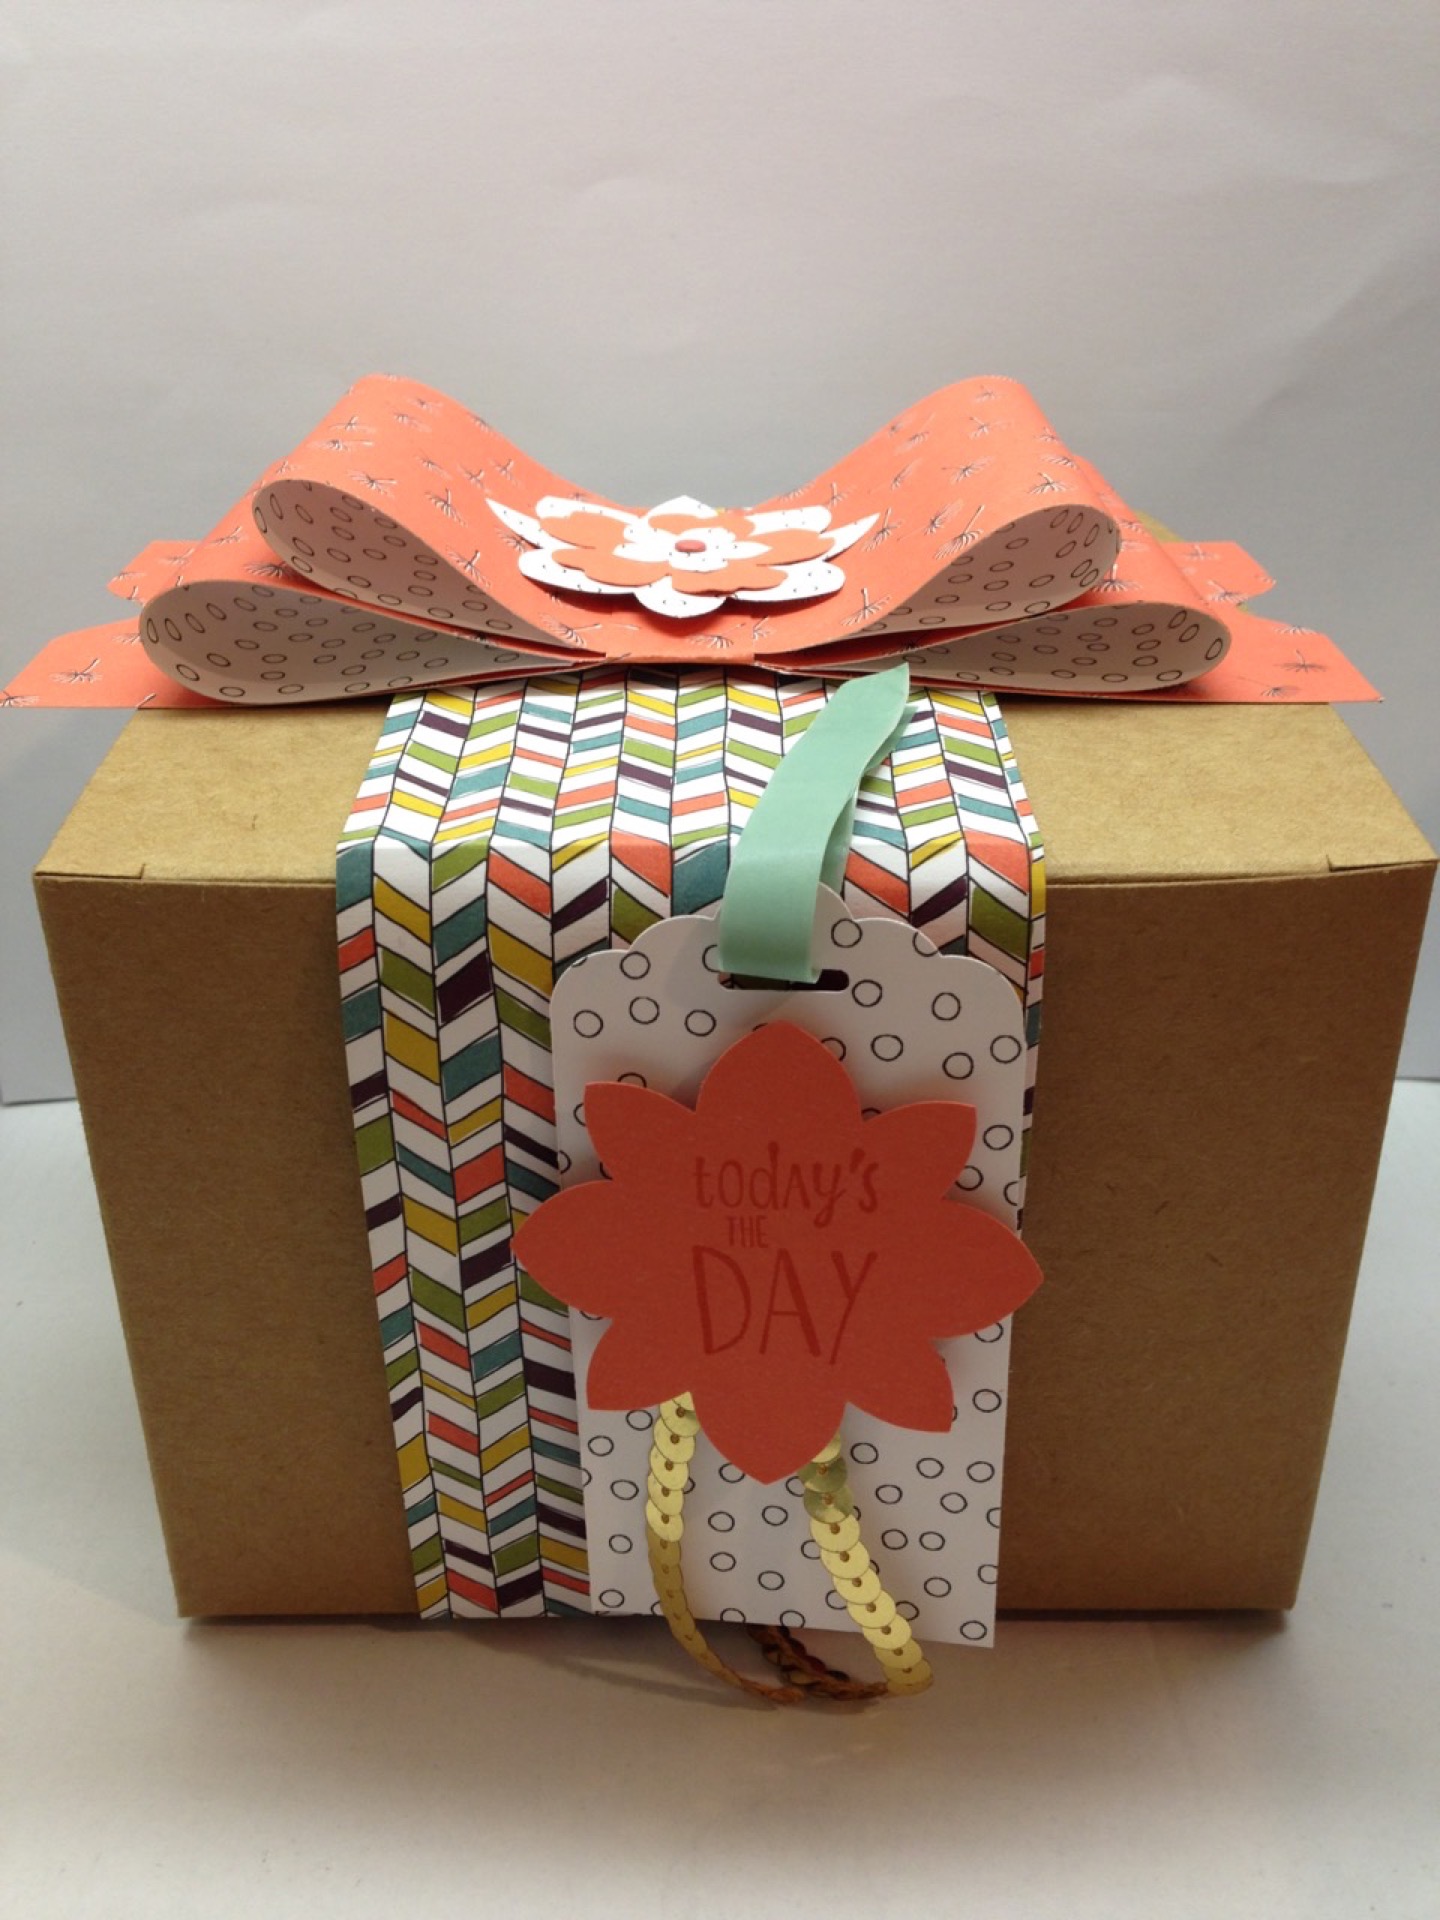
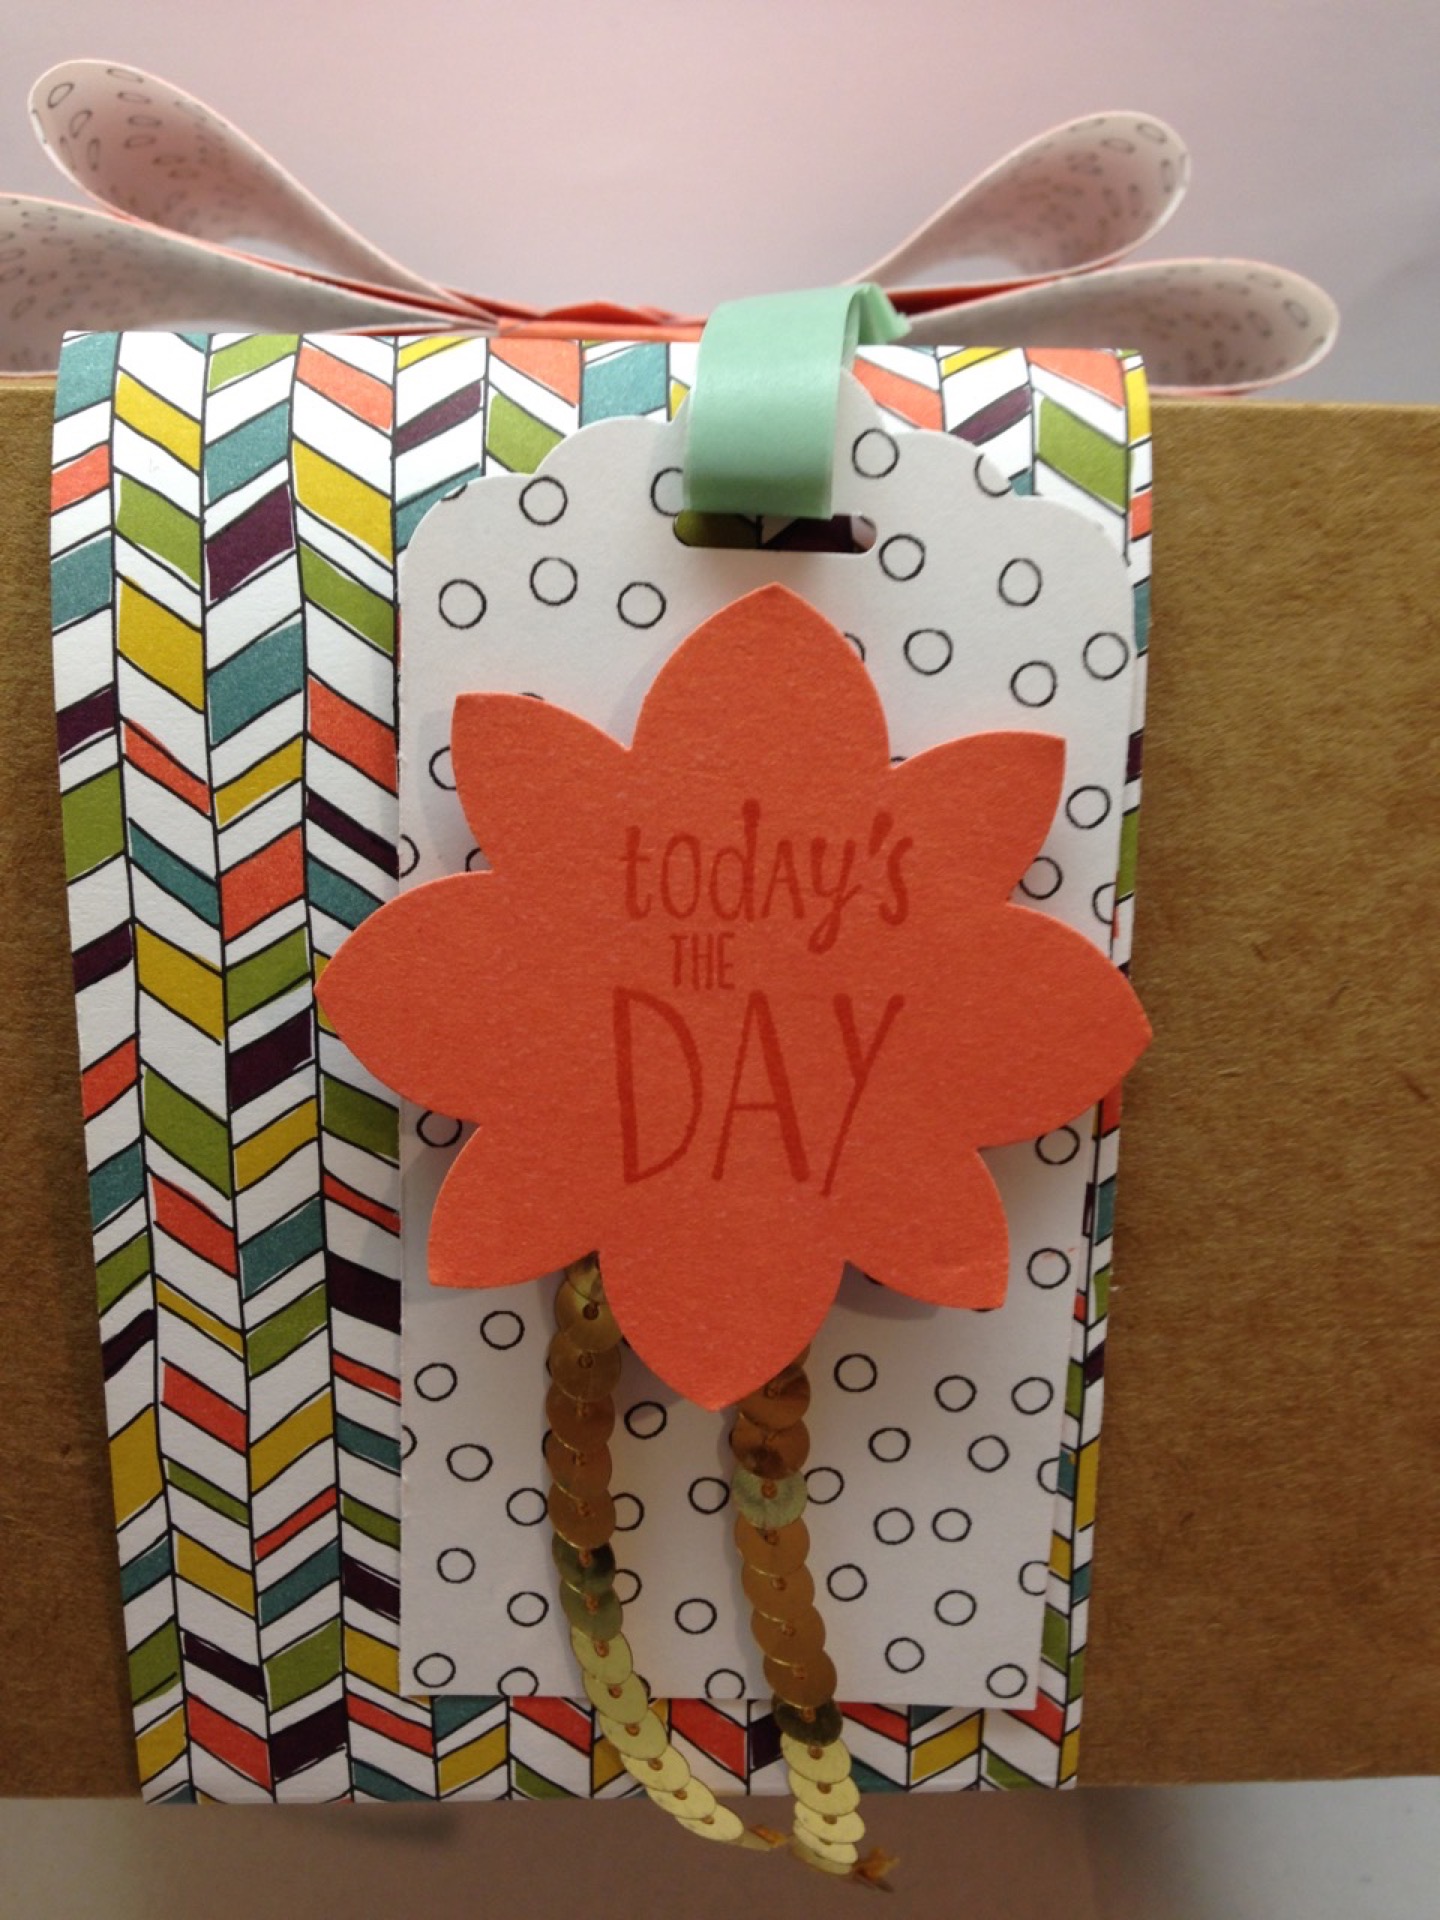
Two variations I made this week.

tags: Wildflower Fields DSP
categories: 3D Projects
Wednesday 06.22.16
Posted by Tobe Buffenbarger
 

Gift Card Holder

Today’s card is being featured on Stylin’ Stampin’ Inkspiration. The challenge was to create a gift card holder. I found this design on Pinterest and ran with it. I really love the Sweet Li'l Things DSP and had to highlight it in some way. The turtle design was perfect as a border for my gift card holder. This design has a space for a gift card (under the flap), while still having space inside to right a note.

  • Stamps: Petite Pairs (retiring)
  • Inks: Tangelo Twist (retiring)
  • Cardstock: Sweet Li'l Things DSP (retiring); Hello Honey (retiring); Pool Party
  • Accessories: 2014-2016 In Color Washi Tape (retiring)
  • Tools: Hexagon Embossing Folder (retiring)
tags: 2014-2016 In Color Washi Tape, Petite Pairs, Sweet Li'l Things DSP
categories: 3D Projects, Baby/Wedding/Anniversa...
Tuesday 05.03.16
Posted by Tobe Buffenbarger
 

Washi Tape Holder

The perfect 3D project for this month's stamp club. I loved making this simple yet usable washi tape holder. Now I want to make a ton to hold all my washi, but I might just settle for a few to hold the current SU washi sets. The project may look complicated, but it's really very simple. The cuts and scores are as follows:

5 Tape Holder

Cardstock – 11 x 6-5/8″

Score on the LONG side at 1, 3, 5-1/2, 8, 10″

Score on the SHORT side at 2, 4-5/8″

3 Tape Holder

Cardstock – 11 x 5-5/8″

Score on the LONG side at 1, 3, 5-1/2, 8, 10″

Score on the SHORT side at 2, 3-5/8″

From there, you fold from the outside in to make the basic box. Cut diagonally to create the opening on either side of the box. To finish, add washi tape around the edge to hold the two flaps together.

  • Stamps: Timeless Textures
  • Inks: Melon Mambo
  • Cardstock: Whisper White
  • Accessories: It's My Party Washi Tape
  • Tools:
tags: It's My Party Washi Tape, Timeless Textures, Washi Tape
categories: 3D Projects, Other Crafts
Thursday 04.14.16
Posted by Tobe Buffenbarger
 

SSINKMC30: Easter Baskets

Today’s card is being featured on Stylin’ Stampin’ Inkspiration. The challenge was to create a project using at least three of the items below. For this month's mystery challenge, I chose four of the items: non-card project, all the colors, 2 or more punches/dies, and Easter theme.


I made a simple Easter basket to use this coming March. I finally bought the Berry Basket die and just had to make an Easter/spring basket. After assembling the basket, I went about decorating it. I didn't want to go too crazy, so I just added some stamped and punched flowers finished with candy dots. Very simple, but such a great little 3D project. The February stamp club ladies made their own versions last week.

 
  • Stamps: Flower Shop
  • Inks: Wisteria Wonder, Bermuda Bay, Blushing Bride, Daffodil Delight
  • Cardstock: Cucumber Crush, Wisteria Wonder, Bermuda Bay, Blushing Bride, So Saffron
  • Accessories: Candy Dots
  • Tools: Pansy Punch
tags: Berry Basket, Easter, Flower Shop, Mystery Challenge
categories: 3D Projects, Other Crafts
Monday 02.22.16
Posted by Tobe Buffenbarger
 

A Wildflower Box

Today’s card is being featured on Stylin’ Stampin’ Inkspiration. The challenge was to create a project featuring a Sale-A-Bration item. I decided to focus on my favorite SAB item: Wildflower Fields DSP. I love the patterns and color combinations in this stack. To help highlight the paper, I decorated a gift box. This was the January Stamp Club 3D project in fact! I modified some instructions i had and created an extra large bow to go on top of the box. I also added a belly band for more visual interest, a flower in the center of the bow and a gift tag. Overall a super cute box! My stamp club ladies made variations using different paper and pattern combos.


To make the bow, you need four pieces of DSP:

  • 3" x 11" -- top loop
  • 3" x 9" -- middle loop
  • 3" x 7" -- base

Punch the three large strips in the middle. Fold over the ends of the top and middle piece and secure with glue dots to create the loops. Layer and glue together. Finish the card off with a strip around the middle section and punch the tails.

To make the belly band, you need two pieces of DSP each 3" x 12". Glue together and lay flat. At one end, score at 4 1/2" and 6 1/4". Start at the 6 1/4" score mark and score from there at 6 1/4". Finally score at 4 1/2" from the last score mark. This should wrap around the box and be able to be attached at the top under the bow.

Detail of the bow:

Detail of the gift tag:

 
  • Stamps: Happy Happenings
  • Inks: Calypso Coral
  • Cardstock: Wildflower Fields DSP; Calypso Coral
  • Accessories: Botanical Gardens Washi Tape; Gold Sequins; Candy Dots
  • Tools: Envelope Punch Board; Scallop Tag Topper Punch; Flower Medallion Punch; Pansy Punch; Petite Petals Punch
tags: Botanical Gardens Washi Tape, candy dots, Envelope Punch Board, Happy Happenings, sequins, Wildflower Fields DSP
categories: 3D Projects, Other Crafts
Thursday 01.28.16
Posted by Tobe Buffenbarger
 

A Blue Christmas

Today’s card is being featured on Stylin’ Stampin’ Inkspiration. The challenge was to create a Christmas tag. As I have already made a red and green tag earlier this month, I wanted to go in a different direction. As I was flipping through my supplies, I stumbled upon these blue Project Life cards. I probably won't use them in PL albums, so I decided to use them to make a fun tag. A few simple snips and punches and I had the perfect tag!

 
  • Stamps:
  • Inks:
  • Cardstock: Seasonal Snapshot 2015; Dazzling Diamonds Glitter Paper
  • Accessories: Seasonal Snapshot 2015 Accessories
  • Tools:
tags: Seasonal Snapshot 2015
categories: 3D Projects
Friday 12.18.15
Posted by Tobe Buffenbarger
 

Nutcracker GC Holders


Today’s card is featured over at Stylin’ Stampin’ Inkspiration and features a Christmas card challenge. This month I also joined Punk Projects for their 30 Days of Christmas Cards challenge.

For today's project, I decided to move beyond a greeting a card and made a few gift card holders. These are incredibly easy to make. Cut a piece of cardstock 3 1/2" x 8 1/2". Score at 2" and 6". Fold. Glue down the bottom flap. Add some patterned paper and a belly band and voila! Instant gift card holder! For these ones, I added a cute little nutcracker embellishment to help finish off the look!

I did a few more GC holders of different looks, colors, and papers.


  • Stamps: Sparkly Seasons
  • Inks: Real Red; Mossy Meadow; Old Olive; Cherry Cobbler; Craft White; Cucumber Crush
  • Cardstock: Merry Moments DSP; Mossy Meadow; Old Olive; Crumb Cake; Cherry Cobbler; Real Red
  • Accessories:
  • Tools: Seasonal Frames Framelits
tags: #30daysofchristmascards, Christmas, Merry Moments DSP, Sparkly Seasons
categories: 3D Projects, Other Crafts
Tuesday 11.24.15
Posted by Tobe Buffenbarger
 

Holiday Bazaar Crafts (non-cards)

Along with a large pile of Christmas cards, I always like to have a few non-greeting card products available for sale at the craft fairs. This year, I went with a few cards sets made from old cards laying around the cart area. Those were already made and just needed to be packaged. But my big project was a large set of Modified Notebooks and some Baker's Boxes filled with candy. I managed to create all of these in about three days!


categories: 3D Projects, Other Crafts
Saturday 11.07.15
Posted by Tobe Buffenbarger
 

SSINKMC26: Thanksgiving Treat Box

Today’s card is being featured on Stylin’ Stampin’ Inkspiration. The challenge was to create a card using our Mystery Challenge Rules. What to do? This month I went with Burlap, Island Indigo, and Thanks.


Instead of a card, I decided to make a little Thanksgiving treat box. Wouldn't these look adorable as place settings for Thanksgiving dinner? I sponged on some ink to the bottom of the box to give the paper a little something extra. I then added the sentiment tag for a fun pop of color. I think the little wooden leaf really makes the box! And the burlap is a great texture instead of using regular ribbon.

 
  • Stamps: Petite Pairs
  • Inks: Tangelo Twist; Island Indigo
  • Cardstock: Into the Woods DSP; Island Indigo; Whisper White
  • Accessories: Into the Woods Elements
  • Tools: Baker's Box Thinlits
tags: Into the Woods DSP, Mystery Challenge, Petite Pairs, Thank You, Thanksgiving
categories: 3D Projects
Monday 10.26.15
Posted by Tobe Buffenbarger
 

Retreat Crafts

Twice a year, I host a weekend retreat for some of the ladies from my parent group. And of course, I can't resist making some little crafty items.  This year I made bags to hold all our goodies and little thank you cards. The bags are simple plain kraft bags. I added a stamped layered flower. The paper is from a random paper stack from Recollections while the stamp and die cut are from SU. I also added name tags to each bag. The paper is from the same paper stack. I added a little flower and pearl and alphas. The "ribbon" is actually washi tape that I folded in half to attach to the bag.


The thank you cards were made form the same paper stack. I created seven different cards in a rainbow of colors. The stamp was a random stamp I found at Michael's that I heat embossed. The washi is a mix of random and SU washi. 

As a last minute craft idea, I made these cute candy holders from my Baker's Box thinlits. Each one is filled with Hershey's Kisses, Reese's Peanut Butter Cups, and Dove Chocolates. Just a little extra something. And the boxes looked gorgeous arranged in a nice rainbow of colors.

 
  • Stamps: Hello Life; Four You (retired); Homemade for You; random non-SU stamp
  • Inks: Calypso Coral; Crisp Cantaloupe; Blushing Bride; So Saffron; Pistachio Pudding; Bashful Blue (retired); Perfect Plum; Night of Navy; Elegant Eggplant; Island Indigo; Tempting Turquoise; Coastal Cabana; Garden Green; Hello Honey; Primrose Petals (retired); Versamark
  • Cardstock: Gold Foil; Recollections stack; Calypso Coral; Crisp Cantaloupe; Blushing Bride; So Saffron; Pistachio Pudding; Bashful Blue (retired); Perfect Plum; Very Vanilla; Night of Navy; Elegant Eggplant; Island Indigo; Tempting Turquoise; Coastal Cabana; Garden Green; Hello Honey; Primrose Petals (retired)
  • Accessories: Sweet Dreams Washi Tape; Beach House Washi Tape; random washi tape; random clothespins (Michael's)
  • Tools: Bold Butterflies Framelits; Pewter Embossing Powder; Baker's Box Thinlits
tags: Beach House washi tape, Four You, Sweet Dreams Washi Tape
categories: 3D Projects
Saturday 09.26.15
Posted by Tobe Buffenbarger
 
Newer / Older

Powered by Squarespace.