• Home
  • About
  • Archives - Wading Through
  • Archives - The Craft Sea

Wading Through...

  • Home
  • About
  • Archives - Wading Through
  • Archives - The Craft Sea

Crafty Book Reviews

Title: Handmade to Sell: Hello Craft's Guide to Owning, Running, and Growing Your Crafty Biz

Author: Kelly Rand, Christine Ernest, Sara Dick, Kimberly Dorn

Publisher: Potter Craft 2012

Genre: Business; Crafts

Pages: 176

Rating:  5/5 stars

Reading Challenges: Nonfiction Adventure; Mount TBR; Well Rounded - Self Help

No one knows more about helping handmade businesses than Hello Craft, the nonprofit trade association for crafty entrepreneurs. Written by the directors of Hello Craft, Handmade to Sell is the most complete, up-to-date, and authoritative guide for DIYers seeking to learn every aspect of selling, marketing, and branding. 

A very thorough guide for those serious about making crafting a full time business.  I'm not there yet, but I did pick up a few pointers and concerns throughout.

Title: How to Sell Your Crafts Online: A Step-by-Step Guide to Successful Sales on Etsy and Beyond

Author: Derrick Sutton

Publisher: St. Martin's Griffin 2011

Genre: Business; Crafts

Pages: 224

Rating: 4/5 stars

Reading Challenges: Nonfiction Adventure; Mount TBR

With over 400,000 sellers on Etsy, how can you make YOUR shop stand out and increase your sales? This is a key question for many crafters and artists who are selling online these days. Now here are all the answers and much more from author and Etsy seller Derrick Sutton. Based on his self-published guide, and drawn from his practical experience, you will learn how to boost your Etsy sales, attract more customers, and expand your online presence. Derrick shares his proven online sales and marketing knowledge in an easily accessible format, complete with simple actions steps at the end of each chapter. Learn how to completely optimize your Etsy shop, website, or blog, and much more.

I'll admit that I skimmed the second half of this book.  I don't need to learn how to set up a blog or even a Facebook account.  Those sections didn't really apply to me.  But I did get some great advice in the first half: all about the Etsy shop.  I've been kicking around the idea of opening my own storefront, so this gave me some good points to think about.

Title: Journal Bliss: Creative Prompts to Unleash Your Inner Eccentric

Author: Violette

Publisher: North Light Books 2009

Genre: Crafts

Pages: 128

Rating: 3/5 stars

Reading Challenges: Nonfiction Adventure; Mount TBR

Whether you're looking to express yourself creatively for the first time or have found yourself in a creative rut, you'll soon be following your inspired voice with the help of Journal Bliss. With the guidance of author, Violette, you'll learn to express your thoughts and feelings like never before in your own art journal. Not only will Violette inspire you with her own journal pages, she'll teach you techniques for creating your own unique pages.

This book just wasn't for me.  I'm not that into sketching or doodling and that's what the book focused on.  I was rather hoping that it would be more about writing style journaling.  Oh well.  Not bad, just not for me.

Title: Pinterest Perfect: Creative Prompts & Pin-Worthy Projects

Author: Walter Foster Creative Team, Jamielyn Nye, Flora Chia Jung Chang

Publisher: Walter Foster 2014

Genre: Crafts

Pages: 128

Rating:  3/5 stars

Reading Challenges: Nonfiction Adventure; Mount TBR; Well Rounded - Home

Filled with step-by-step projects, tutorials, art tips, and crafting techniques on everything from drawing, painting, and illustration to mixed media, typography, and papercrafts, each featured artist shares her unique art style with readers in an interactive and engaging format. Each section features a brief introduction to the artist, followed by four to six easy-to-follow, step-by-step projects and/or art techniques. Open practice pages at the end of each section invite readers to brainstorm, sketch, and collect inspiration for their own artistic projects. In addition, useful sidebars throughout the book share tips for using Pinterest efficiently and effectively, as a hobbyist and professional artist. One part inspiration, one part how-to, and filled to the brim with color, inspiration, and beautiful artwork, Pinterest Perfect! is the picture-perfect visual resource for any artist, crafter, or creative Pinterest enthusiast.

Not that excited once I actually dove in.  The creators said that they wanted to emulate the look of Pinterest and they definitely do.  Unfortunately that look doesn't really translate to a paper book.  Ultimately I was confused by the tactic.  With regards to the projects, they were decent.  But I found that almost all of the projects have a counterpart on my own Pinterest boards already.  Why do I need it in paper form?  I kept asking myself that questions, hence the 3 stars.

tags: 3 stars, 4 stars, 5 stars, crafts, Etsy, mount tbr, nonfiction adventure, Well Rounded Reader
categories: Book Reviews, Crafting
Sunday 07.27.14
Posted by Tobe Buffenbarger
 

Crafts of the Week

This past week I've been working on two crafting projects.  Here's a look at them.

Stamp Club homework from the sketch:


 I ended up making two birthday cards, one for my mom and one for my grandpa.  They share a birthday!  I dug through my ribbon and washi box and pulled out the scrap of blue ribbon and my new gold glitter tape.  Then I riffled through my scrap box to find papers that would coordinate.  I love how they came out!  I'm especially excited about creating a masculine card that doesn't have a sports, fishing, hunting, or outdoors theme to it.

Utter fail!  I sent these cards before I actually took pictures of them!  Oh well.  Here are my supply lists, just in case you wanted to know...

Supplies:

  • Stamps: Up, Up Up in the Air (sentiment)
  • Inks: Cherry Cobbler
  • Cardstock:  Retired SU DSP, paper scraps
  • Accessories: Gold glitter tape
  • Tools: Scallop circle punch, 1 1/4" circle punch

Supplies:

  • Stamps: Up, Up Up in the Air (sentiment)
  • Inks: Cherry Cobbler
  • Cardstock: Retired SU DSP, paper scraps
  • Accessories: Retired SU ribbon
  • Tools: Scallop circle punch, 1 1/4" circle punch

Valentine's Day/Love and Mother's Day OSW sets: 

I grabbed this sketch from InkyPinkies and went to town cutting two 12x12 DSP sheets.  Once I got them cut, I started pairing pieces to card bases.  Unfortunately, I realized that the pieces cut would not make 12 complete cards.  I would have to add other DSP pieces or something else.  Obviously if you look at her examples, she used other paper pieces to complete the cards.  Oh well.  I just combined the paper to make 8 cards for each set.  Then, I cut some more DSP from full sheets to add layers and embellishments to make 12 cards for each set.  After making one complete set, I talked to my mom who requested I send a batch of Mother's Day cards for the shop.  So I actually made two Love sets and two Mother's Day sets.  Crazy crazy...  but they do look great.


Valentine's Day/Love Set:


  • Stamps: Retired SU stamp (sentiment), Perfect Pennants (heart)
  • Inks: Primrose Petals, Riding Hood Red
  • Cardstock: Pink Pirouette, Smoky Slate, Twitterpated DSP
  • Accessories: Heart washi tape
  • Tools: Swiss Dot Embossing Folder, 1 1/4" circle punch, Petite Petals punch

Mother's Day Set:


  • Stamps: Random Mother's Day stamp
  • Inks: Riding Hood Red, Island Indigo, Basic Gray
  • Cardstock: Baja Breeze, Smoky Slate, Twitterpated DSP
  • Tools: Embossing Folder
tags: One Sheet Wonder, Stamp Club
categories: Crafting
Saturday 04.19.14
Posted by Tobe Buffenbarger
 

Project Life 2014 -- Weeks 13 and 14

Week 13

Family Album: Weeks 13 and 14 were all about documenting our trip back to Indiana.  I loved adding the little embellishment tags and sparkly stars here and there throughout the spread.  I didn't want to clutter the photos too much, but felt they needed a little something.

As to the pictures themselves, I love adding in more pictures of Arthur with other people.  I got some great shots of him with my sister, father, mom, grandpa, and grandma.  So cute!


Supplies:

  • SU Sent with Love DSP and embellishments
  • Studio Calico alphabet stickers
  • Random travel themed stamps

Week 14

Family Album: The second week of our trip back to Indiana.  This time I used some of my new Heidi Swapp stamps ("hello" and "together") and some great alphabets to label some pictures.  I also caught some great pictures of Arthur with his Grandma and Papa, Uncle, brothers, and new baby friends.


Supplies:

  • WRMK Albums Made Easy Dreamy cards
  • Enamel dots
  • Heidi Swapp stamps
  • Studio Calico alphabets
  • Heidi Swapp stickers
tags: Project Life
categories: Crafting
Saturday 04.12.14
Posted by Tobe Buffenbarger
 

Project Life 2014 -- Weeks 11 and 12

Week 11

Family Album: This week I chose to go back to using one of my "older" kits -- WRMK Tangerine.  My idea is to rotate my various kits to get a different color/design scheme each week.  I like the little pops of design with the Tangerine kit.  I added some cute labeling tags to help highlight a few of the pictures.

As to the pictures and events, this week is very Arthur heavy.  Oh wait... It's always Arthur heavy.  Anyway, I chose to include some adorable candid shots and eating shots.  I love the face he makes while eating.  It always looks like he hates it, but he eats everything.  The right hand page has a few random shots and his 5 month pictures.  I always have to include the stats insert.  My favorite shot of the week is the one where he's crawling towards me (left side, bottom left picture).


Supplies:

  • WRMK Tangerine
  • Labels from Studio Calico kit
  • Random stamps
  • PL Neutral Baby (monthly stat insert)

Arthur's Album:  This week I added in some of the new cards from the Baby for Him kit.  I love the cool blues and greens of this spread. The left side is a wrap-up of our week.  The right side is all about his 5 month pictures and milestones.


Supplies:

  • PL Neutral Baby Kit
  • PL Baby Boy Kit
  • Random stamps
  • Labels from Studio Calico Kit
  • Recollections stickers

Week 12

Family Album: I changed up my kits yet again and went with some of the random cards from my Studio Calico kits (Sept. and Oct. 2013).  I kept the cards a cool blue and gray with pops of pink.  I especially love my pink enamel dots and my new camera stamp (thank you Michael's $2 bin).

The pictures from this week came from two big events.  The left side highlights our morning at Washington Park.  Arthur had a great time crawling around.  And I had a great time taking some pics and reading in the sunshine.  The right side highlights Arthur's first official playdate.  I grabbed a few cute pics and stole a few from the other moms.  My favorite is the pic of Arthur and his friend Luke and their dueling grump faces (right side, top left).


Supplies:

  • Studio Calico Kits -- Sept and Oct 2013
  • Michael's stamps
  • Basic Grey enamel dots
  • Random stamps and alphabet stickers

Arthur's Album: Arthur's spread focused on lots of pictures.  I decided to use the back side of the inserts from the previous week.  Those were reddish so I picked two more reddish inserts for the right side.  I've realized that most of Arthur's spreads are light on embellishments and heavy on pictures.  And I'm okay with that!

IMG_7575


Supplies:

  • PL Baby Boy Kit
  • Random stamps
tags: Project Life
categories: Crafting
Saturday 03.29.14
Posted by Tobe Buffenbarger
 

One Sheet Wonder

While on Pinterest, I kept running across these "One Sheet Wonders."  I was very lost...  And so I went hunting and found a ton of tutorials of how to make the most cards out of a sheet of DSP (12x12, 8 1.2x11, 6x6).  I found this particular template from Crafty Steals:


I love that the template uses 12x12 paper and makes at least 11 cards.  This got me to thinking about what I wanted to do with the OSW.  I didn't want to make 11 cards using the same DSP just for me.  But this would be a great way to make card sets for gifts.  And so a master plan was born.  My plan is to use the OSW method (using various various templates) to make sets of a dozen cards.  Each OSW would be for a different occasion or holiday (e.g. Christmas, birthday, thank you, etc).  Once I finish all 12 sheets, I will have 12 sets of cards to give as gifts for next Christmas.  So simple!

I started my first sheet and ended up making four sheets worth of cards this first week.  My first set is an Easter card.  I ended up using Stampin' Up's Birds of a Feather DSP, Summer Starfruit, Primrose Petals, and Raspberry Ripple cardstock, random Easter stamp, polka dot embossing folder, and patterned scissors.  I love the variety of designs.  I didn't follow the example cards exactly, but used them as guidelines for my own designs.  My favorite of the bunch is actually the very first card (first picture, top left).  I love the focus on the cute DSP.


My second set is a Birthday set.  I used another sheet from the Birds of a Feather DSP pack.  The colors and paper are the same as the Easter cards.  I just threw in a birthday stamp I just bought from Michaels.  I really love the squares card (first picture, top right).


The third set is for Father's Day cards.  I love the masculine color and prints of the SU Parker's Patterns DSP.  Perfect for Father's Day cards.  I used a chevron embossing folder, random Father's Day stamp, Marina Mist cardstock and ink, Not Quite Navy cardstock and ink, and some kraft paper.  My favorite card is the simple two pieces of DSP with a sentiment in between (third picture, bottom right).


The fourth set is for Anniversary cards.  I wasn't going to make another set, but I had so many left over pieces from cutting two Parker's Patterns sheets that I could make another.  The opposite side from the very masculine print was a cute little floralesque print in Marina Mist and Cherry Cobbler.  I thought the print was perfect for Anniversary cards.  Not too masculine, not too feminine, just right.  I added in some Not Quite Navy and Cherry Cobbler ink as well as brown and kraft cardstock and a baroque embossing folder to complete the cards.  My favorite is the simply embossed card with the strip of DSP (first picture, bottom left).


Four sheets of DSP, some cardstock for bases, and a few scrap pieces for sentiments and I have 48 cards done!  I plan on using a different OSW template for my next set of cards.

tags: One Sheet Wonder
categories: Crafting
Saturday 03.22.14
Posted by Tobe Buffenbarger
 

Project Life 2014 -- Weeks 9 and 10

Week 9

Family Album:

This week I decided to change up my color scheme.  I put away the Seafoam and Sunshine kits in favor of the Seasons Mini Kit.  I took a look at all the cards for spring and choose the pink and yellow ones.  I then added some great stickers from the My Mind's Eye giant embellishment pack for some flair.  Lastly I rediscovered these cute gold rimmed tags.  Love the inclusion!

As for the weekly events, Arthur started solids so I had to include a ton of pics and some journaling.  I love the middle eating picture.  He looks so proud of himself after eating the entire bowl of rice cereal.  The right hand page is all about the Arthur's first official playdate.  Lots of pictures from that event plus some nice journaling to remember the day.  Lastly, I added "the weather today" insert to highlight our unusual (rainy and chilly) weather on playdate day.


Supplies:

  • PL Seasons Mini Kit
  • My Mind's Eye die cut and sticker pack
  • Random embellishments from Studio Calico kit

Arthur's Album:


Supplies:

  • PL Baby Neutral Kit

Week 10

Family Album:

I again turned to the Seasons Mini Kit for inserts.  This time I used a variety of colors, designs, and sizes.  I love the way the layout turned out!  I added more of those gold tags, some alphabet stickers, a birthday sticker (for my birthday!), enamel dots, and a cute word bubble.  This week's layout is busier than usual, but I'm loving it!  I imagine that I will end up using the rest of the spring cards within the month.

This week was about a ton of candid shots of our family.  I love the little moments I caught of Arthur being extra cute.  I can't believe that this is my first naked baby butt shot!  It was too cute to not include.  I had to add a card for my 32nd birthday...  Per usual, there was no party, but I did got out to eat twice this week (once with Pam and once with J).


Supplies:

  • PL Seasons Mini Kit
  • Enamel dots
  • Birthday stickers
  • Random Embellishments from Studio Calico Kit
  • Random Alphabet stickers

Arthur's Album:

I used one card from the Baby Boy mini kit I found on clearance at Michaels.  Hoping to add more color in the coming weeks.


Supplies:

  • PL Baby Neutral Kit
  • PL Baby Boy Mini Kit
tags: Project Life
categories: Crafting
Saturday 03.15.14
Posted by Tobe Buffenbarger
 

Project Life 2014 -- Weeks 7 and 8

Week 7

Family Album: This week was a combination of regular activities, Valentine's Day, and Arthur turning 4 months.  I decided to split the spread.  The left side focuses on our regular activities.  I used a nice orange and turquoise palette to add visual interest.  Instead of adding another picture, I chose to use a 4x6 pocket as my weekly highlights insert.  I didn't add much embellishment: space man stamp and piece of washi tape was all.  The right side was heavy on Arthur's milestones.  The red is a bit overwhelming, but I still think it looks nice.


Supplies:

  • WRMK Tangerine Journalling Kit
  • PL Holidays Mini Kit
  • PL Neutral Baby Kit
  • SU Stamp (space man)
  • Random embellishments

Arthur's Album: Arthur's album is split between Valentine's Day (left side) and 4 months (right side).  I wanted to create some type of balance in the spread.  Other than the hearts, I didn't add any embellishments.


Supplies:

  • PL Neutral Baby Kit
  • PL Holiday Mini Kit
  • Random embellishments

Week 8

Family Album: Somehow I completely lost the right side picture of this week's spread.  Oh well.  I'll get it finished soon.  I kept the embellishing at a minimum.  I relied on some alphabet stickers to add some interest to the track pictures.  I love the visual interest of this week's page.


Supplies:

  • WRMK Tangerine Journaling Kit
  • Random stamp and alphabet stamps
  • Camera charm

Arthur's Album: Arthur's album is missing one picture that will have to go onto the next picture order.  No embellishments this week, but I did a huge amount of journaling.  I am getting better at storytelling; capturing those little moments.


Supplies:

  • PL Neutral Baby Kit
tags: Project Life
categories: Crafting
Saturday 03.01.14
Posted by Tobe Buffenbarger
 

Playing with My New Supplies

This past week, I received a huge Stampin' Up order.  My demonstrator, Pam, told me that she wanted to see me make cards with my new stuff.  Of course, I had to dive right in.  I had so much to play with and try out: tons of DSP, some punches, some stamp stamps, new ink colors, and some new embellishments.  Here's pics of my new stash:

Card #1


Pam gave us the sketch above for our stamp club homework.  I won't be attending March club (Arthur and I are flying that day to Indiana), but I did want to do the homework and get creative.  I started with the idea of using my new Sweet Sorbet DSP.  After finding a few different layering patterns, I paired them with my new Petite Petals stamps and punch.  I love the play of florals with a touch of neutral (Sahara Sand based pattern paper).  I left the card without sentiment because I didn't want it to get too busy.  As an added bonus, everything on this card is Stampin' Up.

 
  • Stamps: Petite Petals
  • Inks: Crisp Cantaloupe, Pistachio Pudding, Summer Starfruit
  • Cardstock: Summer Starfruit, Sweet Sorbet DSP
  • Tools: Petite Petals Punch, SNAIL, Dimensionals

Card #2

The second card is again using the sketch from OWH.  I wanted to play with my new Banner Blast stamps and punch, and this is what came out.  I decided to skip the horizontal piece of DSP as I think it would have been much too busy.  While card #1 used a lot of the floral patterns from the Sweet Sorbet DSP pack, this card uses the geometric designs.  I love the polka dots!  I think that design is my favorite in the entire pack.  I had to use it a background!  Plus, this is another all Stampin' Up card.

 
  • Stamps: Banner Blast
  • Inks: Pool Party, Pistachio Pudding, Crisp Cantaloupe, Basic Black
  • Cardstock: Sweet Sorbet DSP; Summer Starfruit
  • Tools: Banner Punch, SNAIL, Dimensionals

Card #3

I initially tried to complete the sketch with patterns from the Birds of a Feather DSP, but found myself making some big changes.  Ultimately, this is what came out after a lot of playing and changing pieces up.  I loved the birds on a wire look and wanted to incorporate that piece somehow.  Because of the big pattern with both bird designs, I designed to go subtle for the background patterns.  They are all from the same design pack so of course they all work together.  Another all SU card.

 
  • Stamps: Express Yourself
  • Inks: Raspberry Ripple
  • Cardstock: Primrose Petals; Birds of a Feather DSP
  • Accessories: 2012-2014 In Color Dahlias
  • Tools: Artisan Label Punch, SNAIL, glue dots, dimensionals

Card #4

This is my other attempt to use the sketch and the Birds of a Feather DSP.  I decided that the two pieces overlapping (blue design and brown stripe) really threw off the balance of the card.  So, I put the sentiment on top of the cross and added the dahlias in the opposite corner to help balance the card.

 
  • Stamps: Express Yourself
  • Inks: Primrose Petals
  • Cardstock: Primrose Petals, Birds of a Feather DSP
  • Accessories: 2012-2014 In Color Dahlias
  • Tools: Artisan Label Punch, SNAIL, Dimensionals, Glue dots

Card #5


I wanted to play some more with the Sweet Sorbet DSP pack, so I went onto my Pinterest boards for inspiration.  The above card caught my eye and I knew I had to use it as inspiration.  Just like Angie, I initially didn't know what to do with that black based pattern.  It's incredibly loud in a 12 x 12 sheet, but if you cut it down and only use a piece, I really really love it.  I kept her basic layout, but changed up some of the supplies for ones from my own stash.

 
  • Stamps: Perfect Pennants; Banner Blast
  • Inks: Crisp Cantaloupe, Summer Starfruit, Pool Party, Basic Black
  • Cardstock: Crisp Cantaloupe, Pistachio Pudding, Sweet Sorbet DSP
  • Accessories: WRMK Sew Easy Floss
  • Tools: Chevron scissors, Chevron Embossing Folder, Banner Punch, SNAIL, Dimensionals, Glue Dots

Card #6

 
IMG_7020

Another card inspired by a Pinterest pin.  For my last card, I realized that I don't have any Pool Card cardstock, so I can't recreate the exact coloring on the above card.  Instead, I used a piece of black scrap to give the card a bolder look.  I love the look of the banners in a row.  Plus, the colors really pop against the black (they look much brighter in person).

 
  • Stamps: Banner Blast
  • Inks: Pistachio Pudding, Crisp Cantaloupe, Basic Black, Pool Party, Summer Starfruit
  • Cardstock: Whisper White, Black scrap, Pistachio Pudding, Sweet Sorbet DSP
  • Accessories: WRMK Easy Sew Floss
  • Tools: Banner Punch, SNAIL

Overall, I'm really loving my new supplies.  Next week I want to branch out to some of the other pattern papers.  I have a plan to use some for One Sheet Wonders...

categories: Crafting
Tuesday 02.25.14
Posted by Tobe Buffenbarger
 

Project Life 2014 -- Weeks 5 and 6

Week 5

Family Album: This week wanted to really bring out the fun bright colors from the photographs.  Thankfully I had purchased a third of a Honey kit from an Etsy seller.  They were the perfect colors to play with.  After I looked at the pictures to choose from, I decided to do an entire page (well almost an entire page) dedicated to telling a story about Arthur and his new favorite toy.  I love the idea of doing this type of theme pages more often.


Supplies:

  • PL Honey Kit
  • PL Sunshine Kit
  • Studio Calico Alphabet stickers

Arthur's Album: For his album, I stuck with the yellows and grays with some fun inserts.  I love the right side with the corresponding pictures splitting the page.  It gives a nice mirror effect.


Supplies:

  • PL Baby Neutral Kit

Week 6

Family Album: Week six was all about pink and turquoise.  I had the repeating camera insert already in place from last week (other side of the flowered journaling card).  it was so cute, I had to use it and ended up designing the entire spread to correspond.  The left side was highlighting some pictures from our usual routine (baby playing with Sophie, Shoreline walk, crafting time).  I even used a journal card to highlight my week in crafting.  Nice to see a spread not completely focused on Arthur even though he is just so adorable.  The right side is dedicated to pictures and journaling of the mom's group Valentine's Party.  I even remembered to snap a few photos of the event.  (It was gray and gloomy out, so the pics are pretty dark.  And this is after lightening them up on the computer.)  I forgot to add in the February calendar card at the beginning of the month.  The party turned out to be the perfect occasion to use it as a Who, What, Where, When, and Why type journaling card.  I then used a red design card from the Holiday mini kit to list all the attendees for the party.  It's a nice way to remember who was there since I didn't get pictures of everyone.  Overall, I absolutely love this layout!


Supplies:

  • PL Honey Kit
  • PL Seasons Mini Kit
  • Random embellishments from Studio Calico

Arthur's Album:  Arthur's weekly spread included more pictures of him and some highlighting of our party.  I stuck with the usual color scheme, but changed up the design with the 4x6 journaling card and alternating 3x4 inserts and photos.


Supplies:

  • PL Baby Neutral Kit
tags: Project Life
categories: Crafting
Saturday 02.15.14
Posted by Tobe Buffenbarger
 

Another Card Making Session

Reorganizing my Pinterest boards to include one for "This Week's Project" ideas has really motivated my crafting.  Now I pull some random ideas over on Sunday night (recipes, cards, sketches, crafts, books, projects) and use that board for inspiration when I want to craft.  I spend less time thinking of what I want to do and more time just doing.  Love it!  If you want to check it out, click here.  It turns out I was crafting fool this week.  Let's see what I made: Card #1

colors (1920).png
 
sketch (1920).jpg
 

My first card combines a color challenge and a sketch to create my homework for February Stamp Club.  Again this week, I tried to use as many scraps as I could and not cut up whole sheets.  It was a success.  The only full sheets I cut were those used to make the card bases.  I love the play of patterns with this card.  I also added my own sentiment design.  I didn't want to stamp over the floral patterned paper so I used some layering framelits to highlight the sentiment.  The dimensions of the paper scraps are 4" x 3", 1.75" x 1.75", 0.25" x 1.75", 0.5" x 4"

IMG_6498 (1920).jpg
 
  • Stamps: Stampin’ Up Best of Greetings
  • Inks: SU Primrose Petals
  • Cardstock: SU Primrose Petals, SU Gumball Green; various scraps
  • Tools: Spellbinders Nestabilities Labels Eight; Dimensionals; SNAIL; Big Shot

Card #2

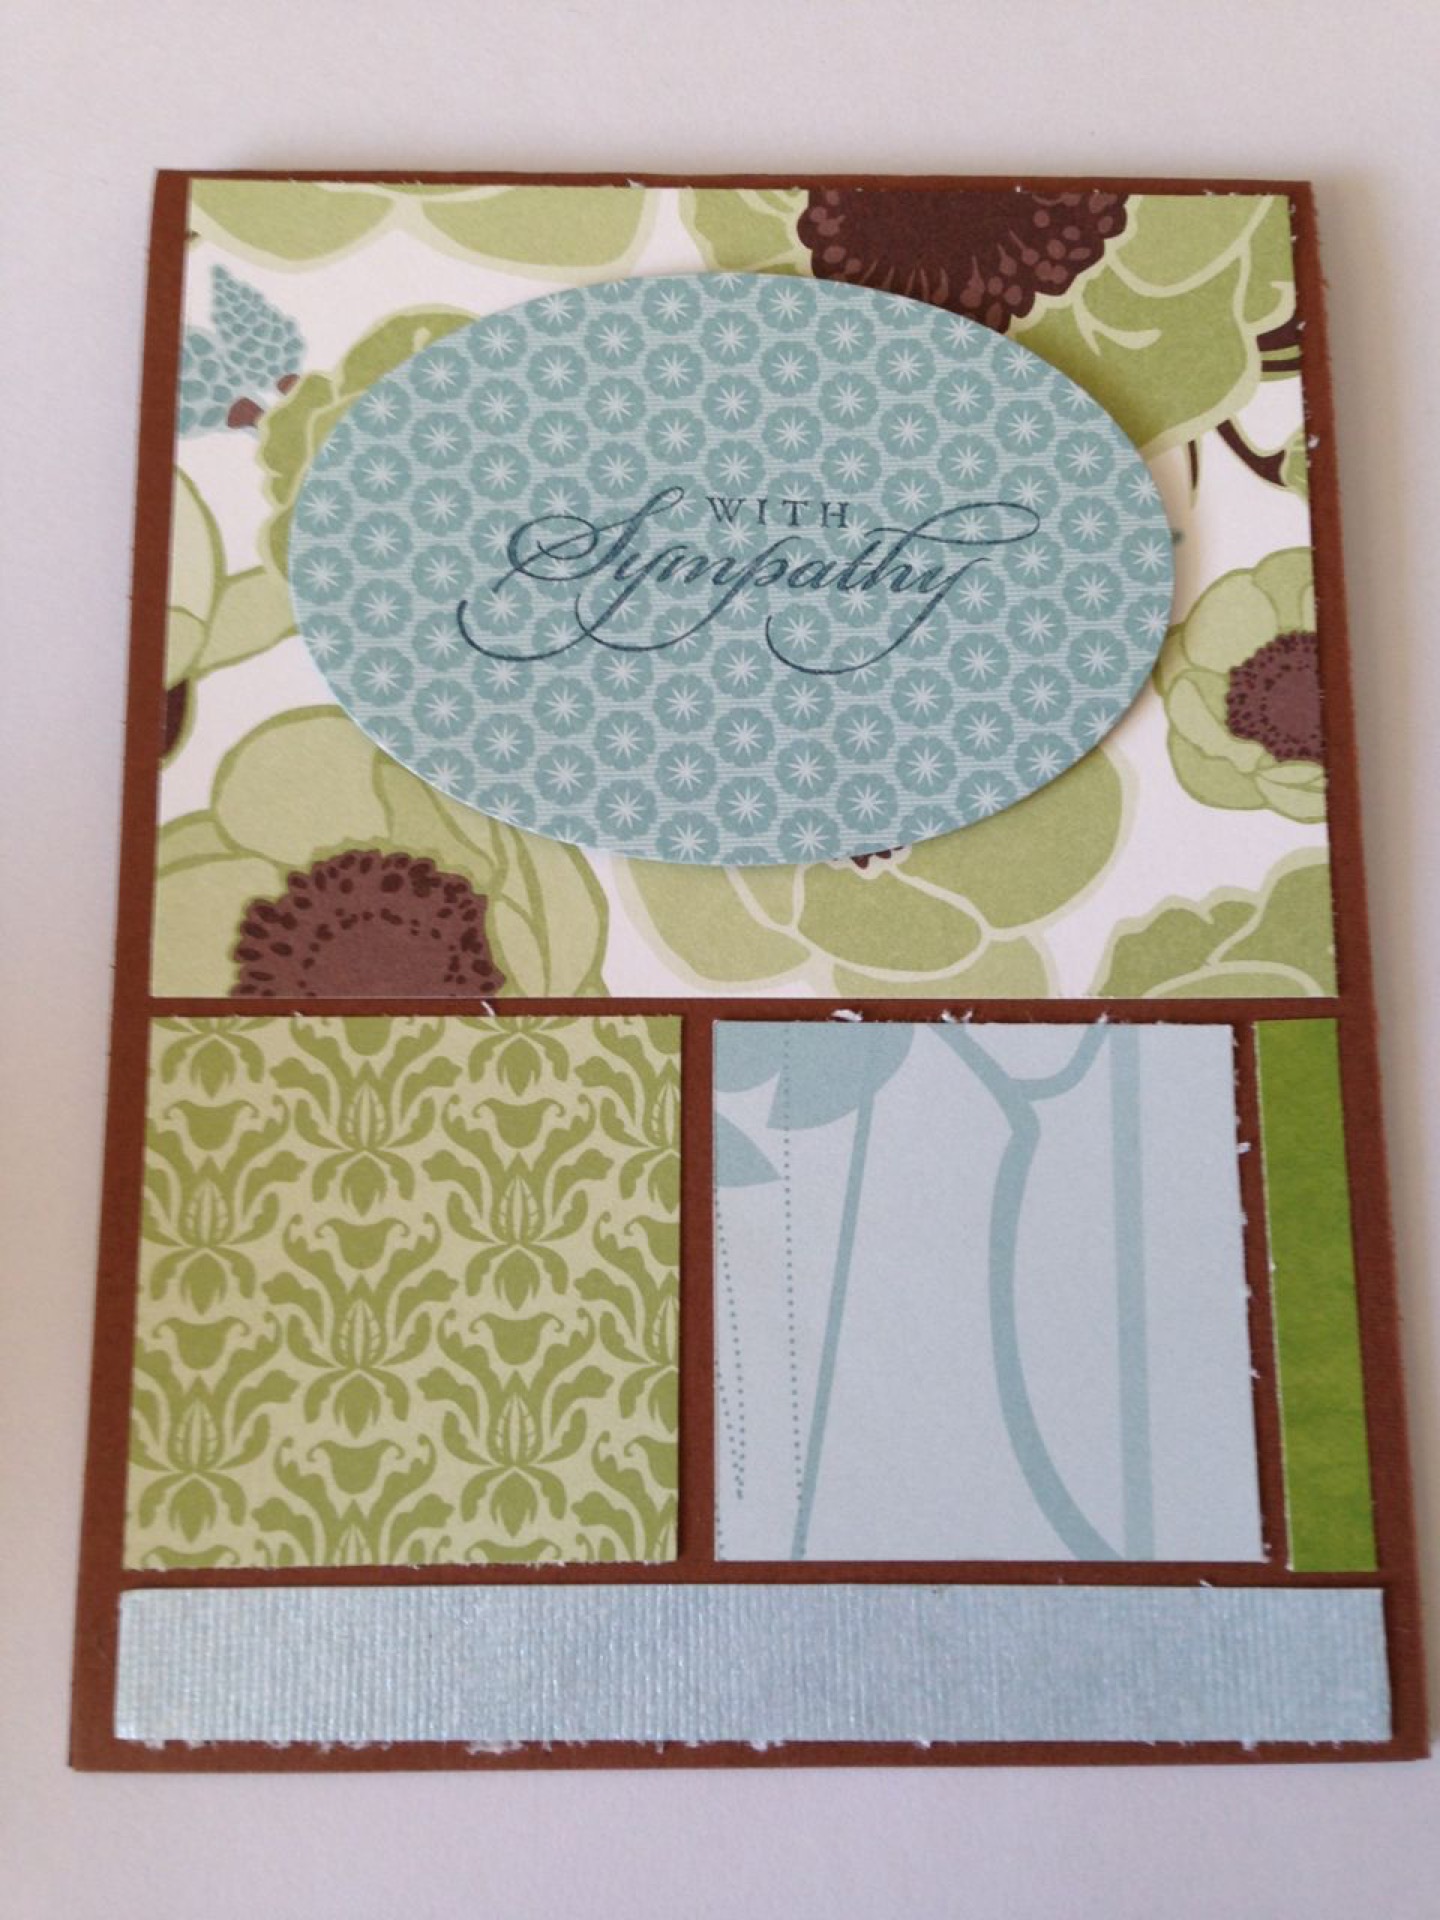
My second card used the same sketch as the first but I used different scrap papers.  I also changed up the sentiment design in favor of an oval scrap I had laying around.  While it's not a traditional sympathy card, I think the cool blues and greens are soothing and the patterns are completely distracting.

IMG_6499 (1920).jpg
 
  • Stamps: Stampin’ Up Best of Greetings
  • Inks: SU Midnight Muse
  • Cardstock: SU DSP (don't know the name), various scraps
  • Tools: SNAIL

Card #3

sqaures (1920).jpg
 

My third card is straight from a card on my Pinterest boards.  I love the simplicity of the squares but with the fun coordinating patterns.  Robin used the SU Festival of Prints paper stack (which I have), but I decided to use more of small scraps.  If you look closely, many of the papers used in this card were also used in card #2. Way to make double use of scraps!

IMG_6501 (1920).jpg
 
  • Stamps: Stampin’ Up Best of Greetings
  • Inks: SU Marina Mist
  • Cardstock: SU DSP (can't remember name);  various scraps
  • Tools: 1″ Square Punch; SNAIL

Card #4

My fourth card used a sketch (that has since disappeared from Pinterest, odd...) and my new SU Smoky Slate cardstock.  I am in love with this shade of gray.  It's light and not overpowering but such a fun departure from white bases.  I also tried to again use a ton of scraps for this card and succeeded!

IMG_6500 (1920).jpg
  • Stamps: Stampin’ Up Stacks of Wishes
  • Inks: SU Basic Gray
  • Cardstock: SU Smoky Slate; various scraps
  • Tools:  Spellbinders Nestabilities Labels Eight; SNAIL; Big Shot

Card #5

sketch1 (1920).jpg
 

My fifth card came from the need to use these specific papers.  So I scoured my techniques and sketches board and pulled this sketch out.  The picture is horrid, but somehow I couldn't take a non-yellowed photo.  Something about these papers just threw off the picture.  Anyway, I am loving how geometric and layered this card is and yet it's still very nice and simple.

IMG_6509 (1920).jpg
 
  • Stamps: Random Stampin' Up retired stamp
  • Inks: SU Pumpkin Pie
  • Cardstock: SU Pumpkin Pie; various scraps
  • Tools: 1 1/4" Circle Punch; SNAIL

Card #6

butterflies1 (1920).jpg
 

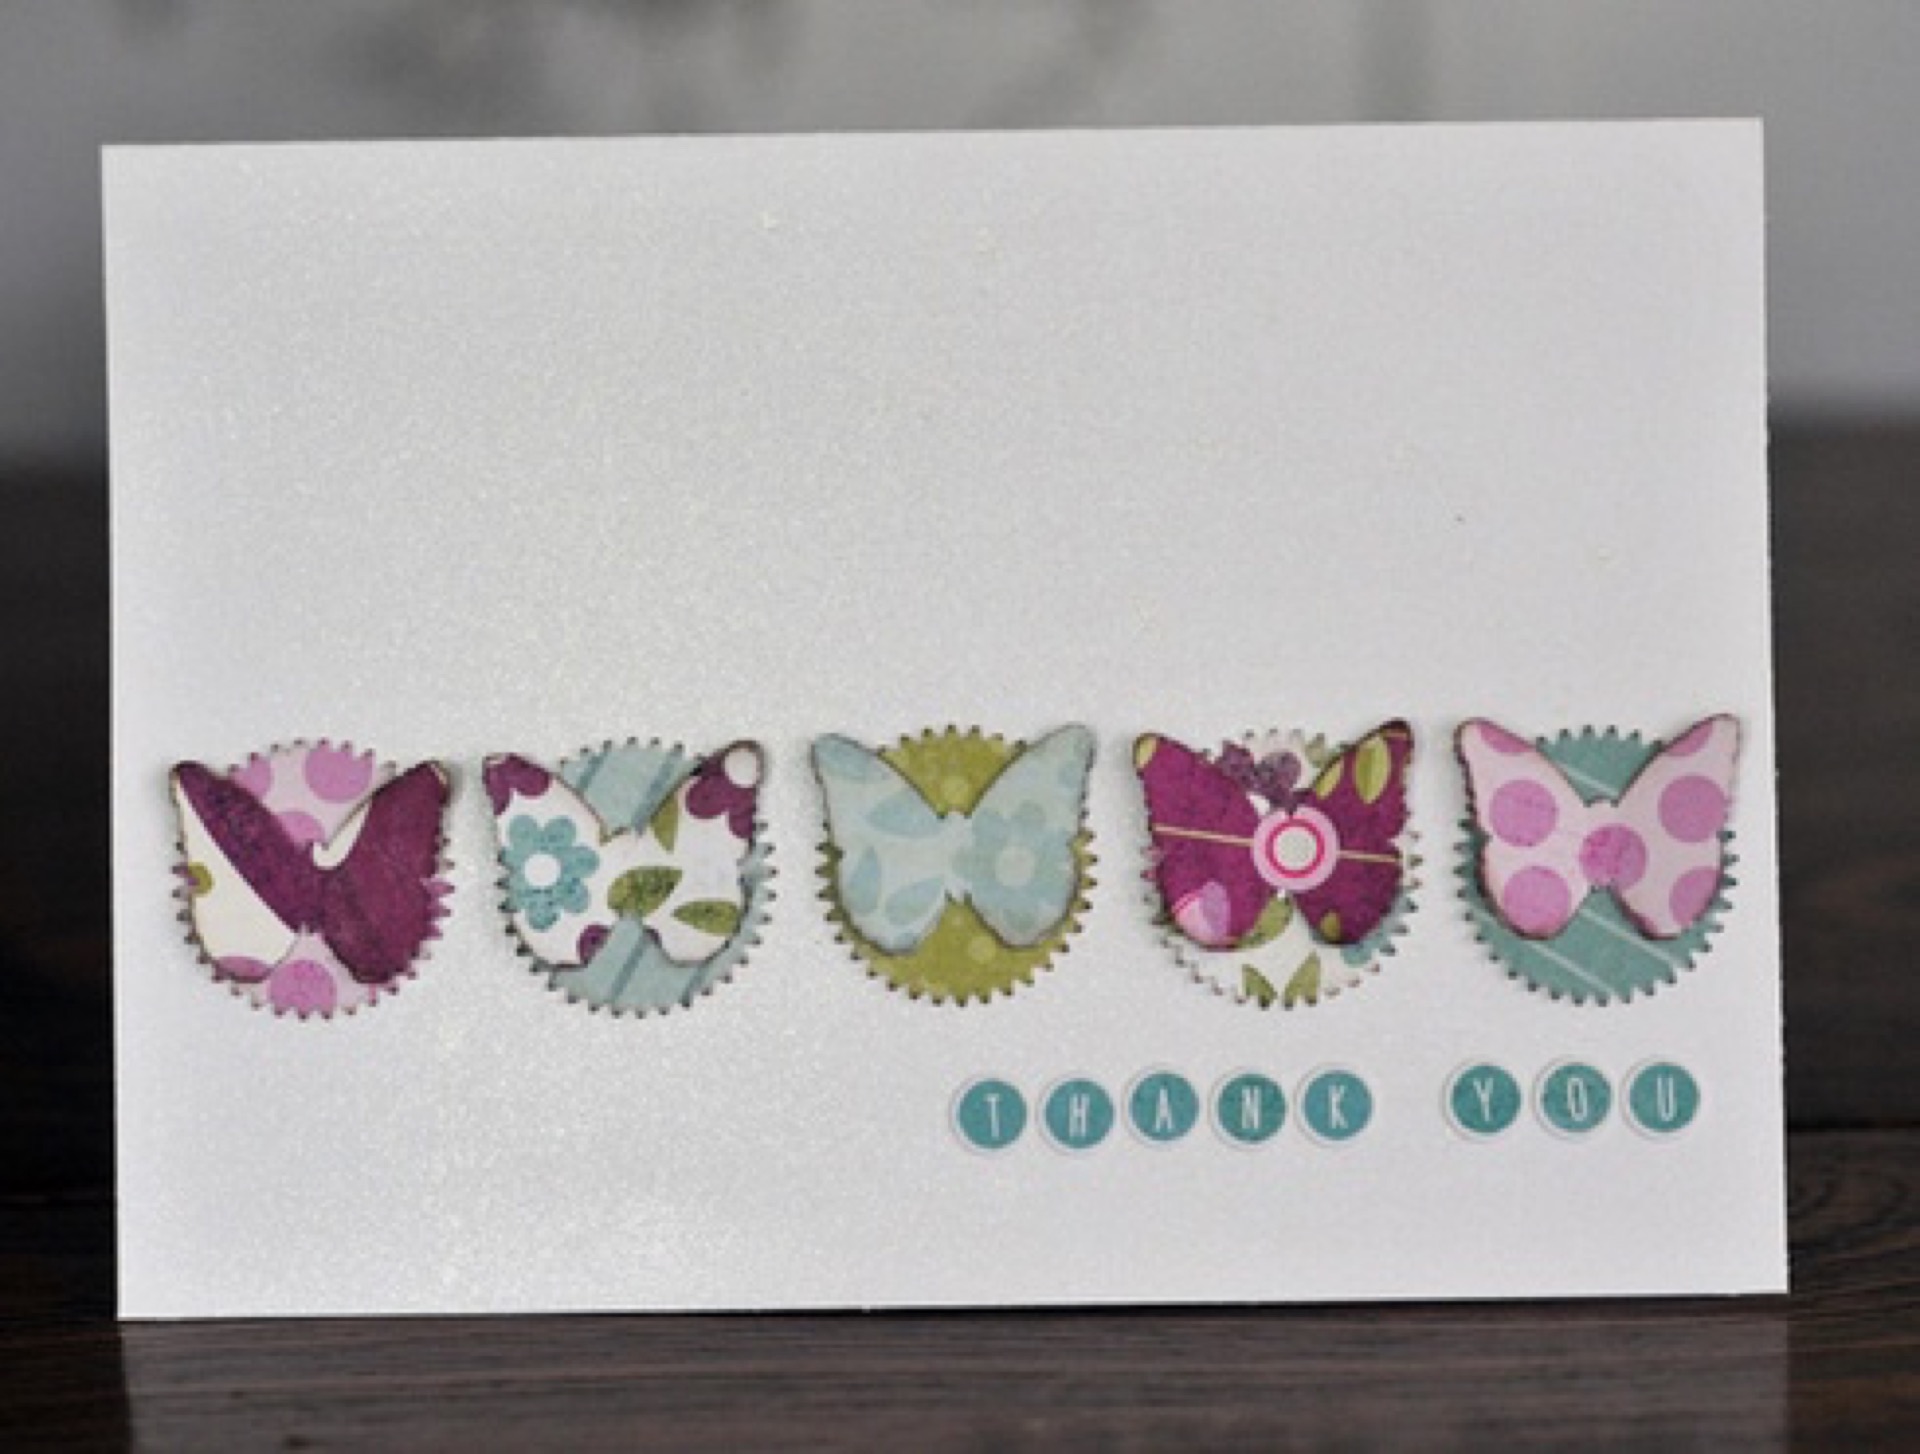
I adore the simplicity of the original butterfly card.  I had to try and make my own.  Looking at the finished project, I love the design and my pattern choices.  But, the butterflies are all crooked...  Next time, I need to use a ruler.

IMG_6510 (1920).jpg
  • Stamps: Random Stampin' Up retired stamp
  • Inks: SU Primrose Petals
  • Cardstock: SU Print Poetry DSP
  • Tools: 7/8" Scallop Circle Punch; SU Bitty Butterfly Punch; SNAIL

Card #7

I wanted to try out a different interpretation of the butterfly card.  For this one, I decided to make everything bigger and see what happened.  I love the asymmetrical design of this card.  I was going to just do a straight line of butterflies down the middle, but at the last minute I change up the placement.  I like this look much better.  Also, I repeated the use of the Print Poetry DSP but chose only papers featuring Midnight Muse, Raspberry Ripple, and Crumb Cake.  I love the color play!

IMG_6508 (1920).jpg
 
  • Stamps: Random Stampin' Up retired stamp
  • Inks: SU Raspberry Ripple
  • Cardstock: SU Primrose Petals
  • Tools: SU Elegant Butterfly Punch; 1 3/4" Scallop Circle Punch; SNAIL

Card #8

circles1 (1920).jpg
 

My last inspiration card was this gorgeous play of circles and patterns.  To help me narrow down the choices, I used only paper from SU's retired Festival of Prints DSP stack.  For the first card, I ended up using the Early Espresso, Crumb Cake, Gumball Green, and Cherry Cobbler pages.  I had to make it an actual Christmas card after seeing the results.  My only issue is the placement of the circles.  It was much harder than I thought it was going to be.  Now I know how to place the first (bottom) row to get a better placement overall.  Also, next time I will probably use a smaller size circle punch.

IMG_6511 (1920).jpg
  • Stamps: Random Stampin' Up retired stamp
  • Inks: SU Cherry Cobbler
  • Cardstock: SU Festival of Prints DSP; various scraps
  • Accessories: 3D flower sticker
  • Tools: 1 1/4" Circle Punch; SNAIL

Card #9

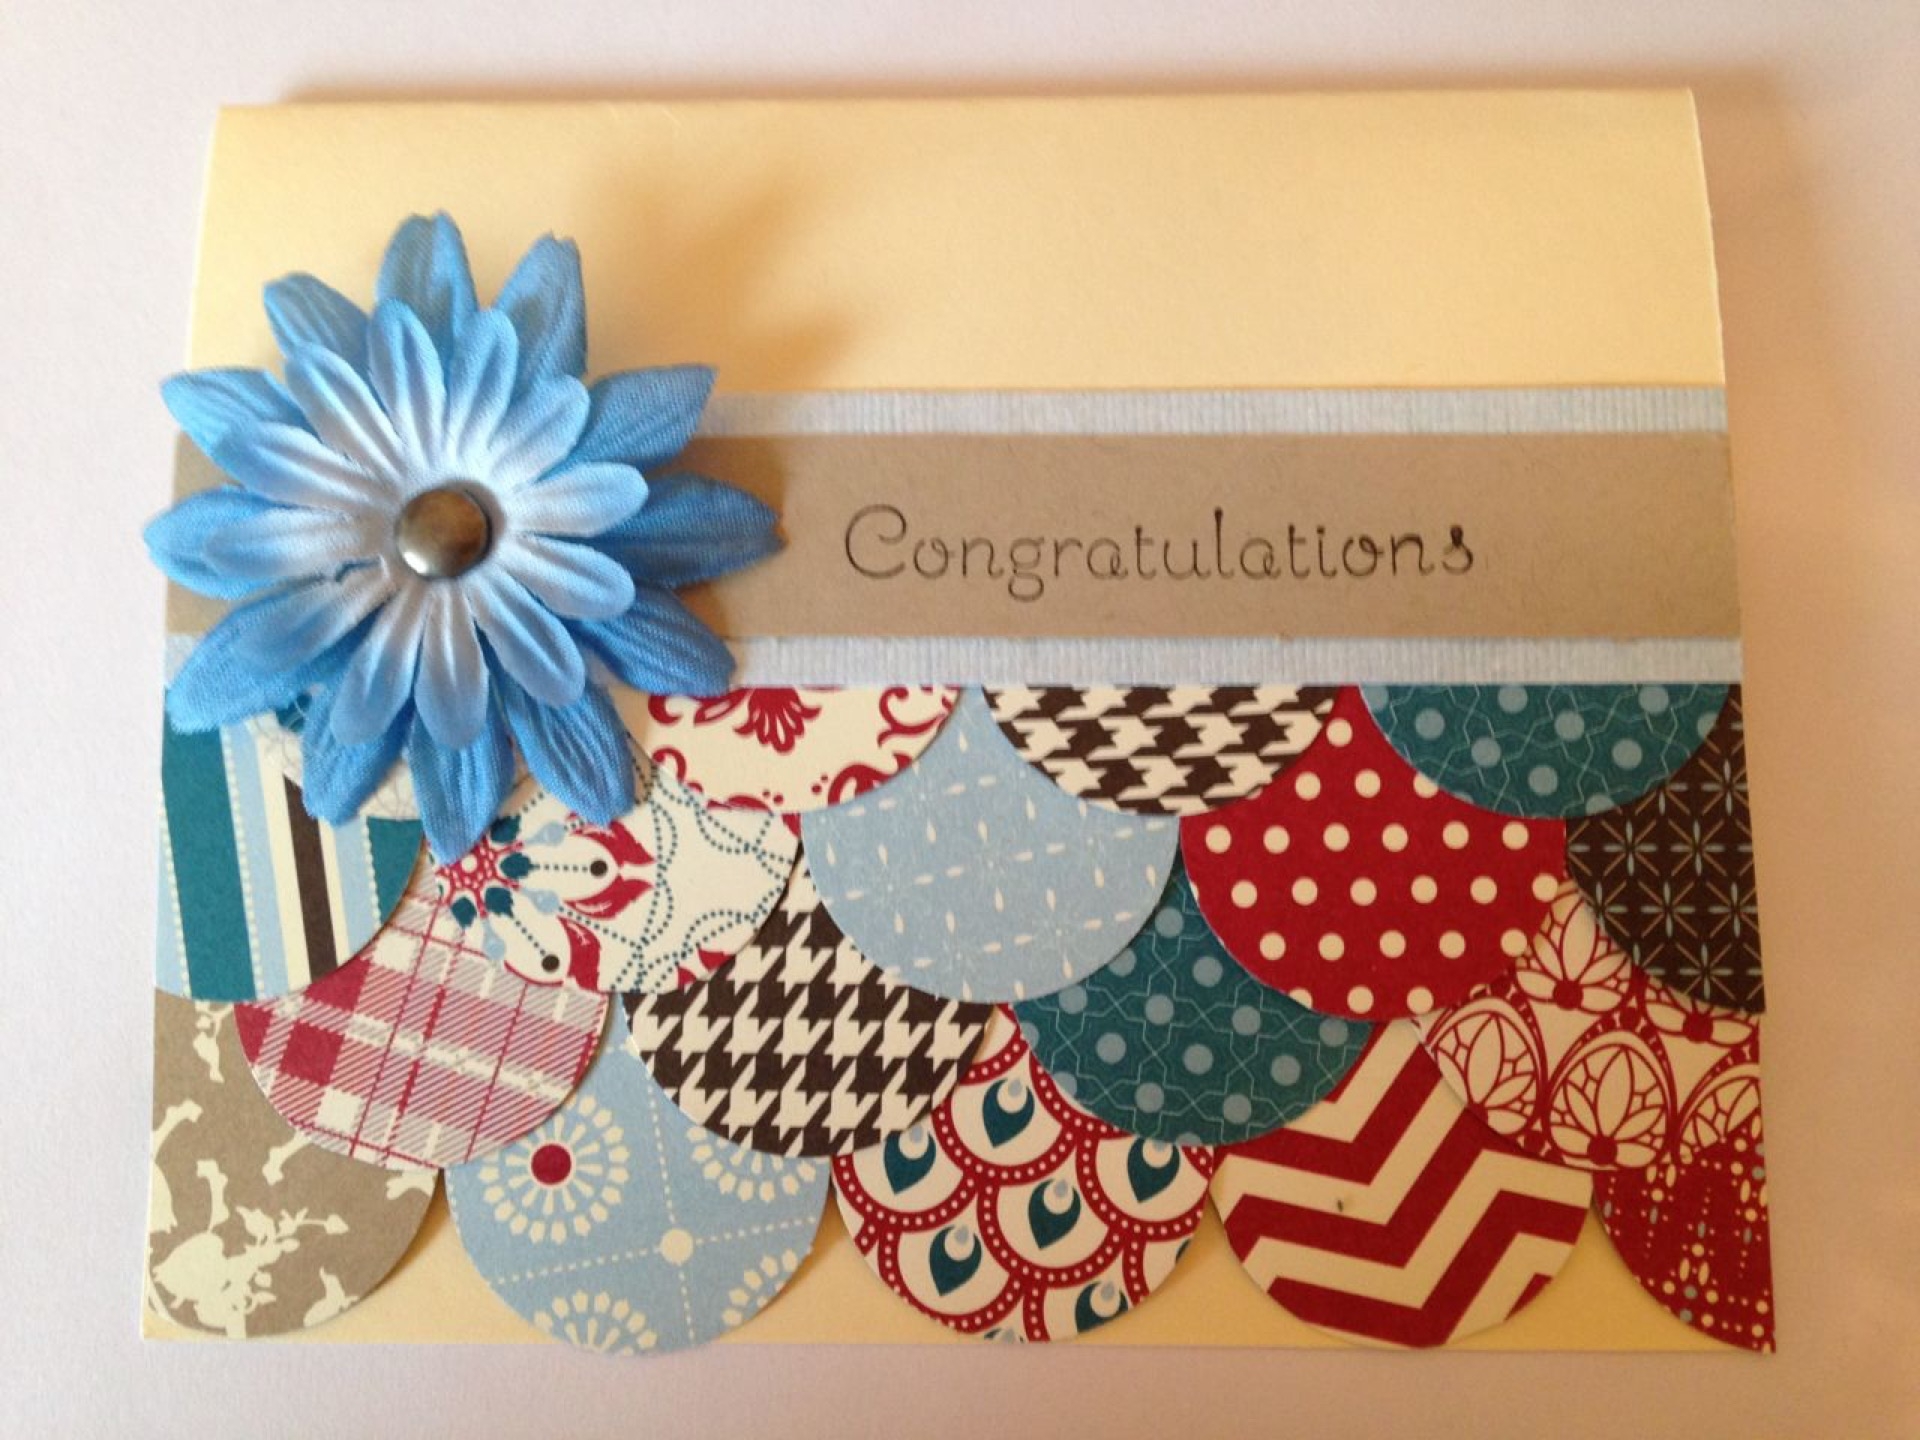
My last card of the week is another version of the circles card.  This time, I used the Island Indigo, Cherry Cobbler, Early Espresso, and Crumb Cake papers from the stack.  After putting it all together, it didn't look like a Christmas card so I made it a Congratulations card.  Also, I did a bit better with the circle placements. I'm sure that I will revisit this design in the future.

IMG_6512 (1920).jpg
  • Stamps: Random Stampin' Up retired stamp
  • Inks: SU Early Espresso
  • Cardstock: SU Festival of Prints DSP; various scraps
  • Accessories: Fabric flowers; brad
  • Tools: 1 1/4" Circe Punch; SNAIL

I'm loving my cards from this week.  Next week, I want to play around with one sheet wonders...

categories: Crafting
Saturday 02.08.14
Posted by Tobe Buffenbarger
 

Crafting Time

I spent some time Sunday afternoon making some cards.  I had a few leftover kits from crop night, so I thought I would focus on those.  I took a few ideas from Pinterest and put my own spin on them.

circles (1920).jpg
 

For my versions, i used a ton of random paper from my stacks and a few Stampin' Up products.  I left off the ribbon in favor of a more streamlined one-layer (but not really) look.  My only complaint is that I don't own a circle punch between 1 1/4" and 2".  I really need to add that to my Stamp Club order for February.

IMG_6441 (1920).jpg

Supplies:

  • Stamps: Stampin' Up Wacky Wishes
  • Inks: SU Primrose Petals, SU Garden Green
  • Cardstock: SU Primrose Petals, various scraps
  • Tools: Cuttlebug Swiss Dot Embossing Folder; 2" Circle Punch; 1 1/4" Circle Punch; 1" Circle Punch; SNAIL; Big Shot

I found an interestingly designed card on Pinterest, but couldn't find the original source.  Of course, this was after I had already made my own version of the card.  Oh well!  At least I can showcase my cards.  I played around with layering and shades of pink.

IMG_6438 (1920).jpg

Supplies:

  • Stamps: Stampin' Up Morning Meadow; Su Flower Shop
  • Inks: SU Primrose Petals; SU Regal Rose; SU Garden Green; SU Certainly Celery
  • Cardstock: SU Primrose Petals, various scraps
  • Accessories: Rhinestone jewels
  • Tools: SU Pansy Punch; SNAIL; Dimensionals
butterflies (1920).jpg
 

I love the graduated colors of the original design and wanted to make my own interpretation.  I made a near copy of the original and then decided to play up with the placement of the butterflies for the second card.  I also used a ton of scraps for these.  The dimensions of the strips are 3/4" by 3 3/4", 3 1/2", and 3 1/4".

IMG_6440 (1920).jpg

Supplies:

  • Stamps: Stampin' Up Banner Greetings
  • Inks: SU Primrose Petals
  • Cardstock: Scraps
  • Accessories: SU 2012-2014 In Color Dahlias
  • Tools: SU Elegant Butterfly Punch; SNAIL; Glue dots

Hope you enjoyed the cards.  I definitely enjoyed making them.

categories: Crafting
Sunday 02.02.14
Posted by Tobe Buffenbarger
 

Project Life 2014 -- Week 4

Family Album: I played around with some embellishments this week.  As per usual, I have the weekly highlights inserts and the weekly date insert. I added some alphabet stickers to two of the pictures for added descriptions.  I really love the font of "Sophie."  To help doctor up the printed inserts, I added some candy dots and stamps.  A few weeks ago, I bought some partial kits (Honey and Kraft) from an Etsy seller.  I can't justify buying an entire kit as I already have three separate kits.  But, I can get a few partials to add some extra fun to the spreads.  I really really love the bright colors from the Honey kit. As to this week's photos, it was another Arthur heavy week.  I managed to catch a few adorable smiles and some action shots.  My favorite picture is my artsy shadow picture.  Randomly the light from the windows created some beautiful shadows.

IMG_6403 (1920).jpg
 
IMG_6404 (1920).jpg
 

As it is the end of January, I filled out my monthly wrap-up insert.  I loved embellishing the monthly title card with fun stickers (glittery stars).  I picked my favorite 8 photo a day pictures to include.  I added the each day's theme written on washi tape.  Love the look!

IMG_6405 (1920).jpg
 

Supplies:

  • PL Sunshine kit
  • PL Honey kit (partial)
  • PL Day stickers
  • Embellishments from Studio Calico kits
  • Random stamps
  • Random stickers
  • Washi tape

Arthur's Album: This week's spread is very simple and photo heavy.  I made sure to include our weekly highlight inserts and a little journaling about some photos.  I really loved the photos from this week.

IMG_6401 (1920).jpg
 
IMG_6402 (1920).jpg
 

Supplies:

  • PL Baby kit
tags: Project Life
categories: Crafting
Saturday 02.01.14
Posted by Tobe Buffenbarger
 

Tour of My Crafting Station

IMG_6081 (1920).jpg
 

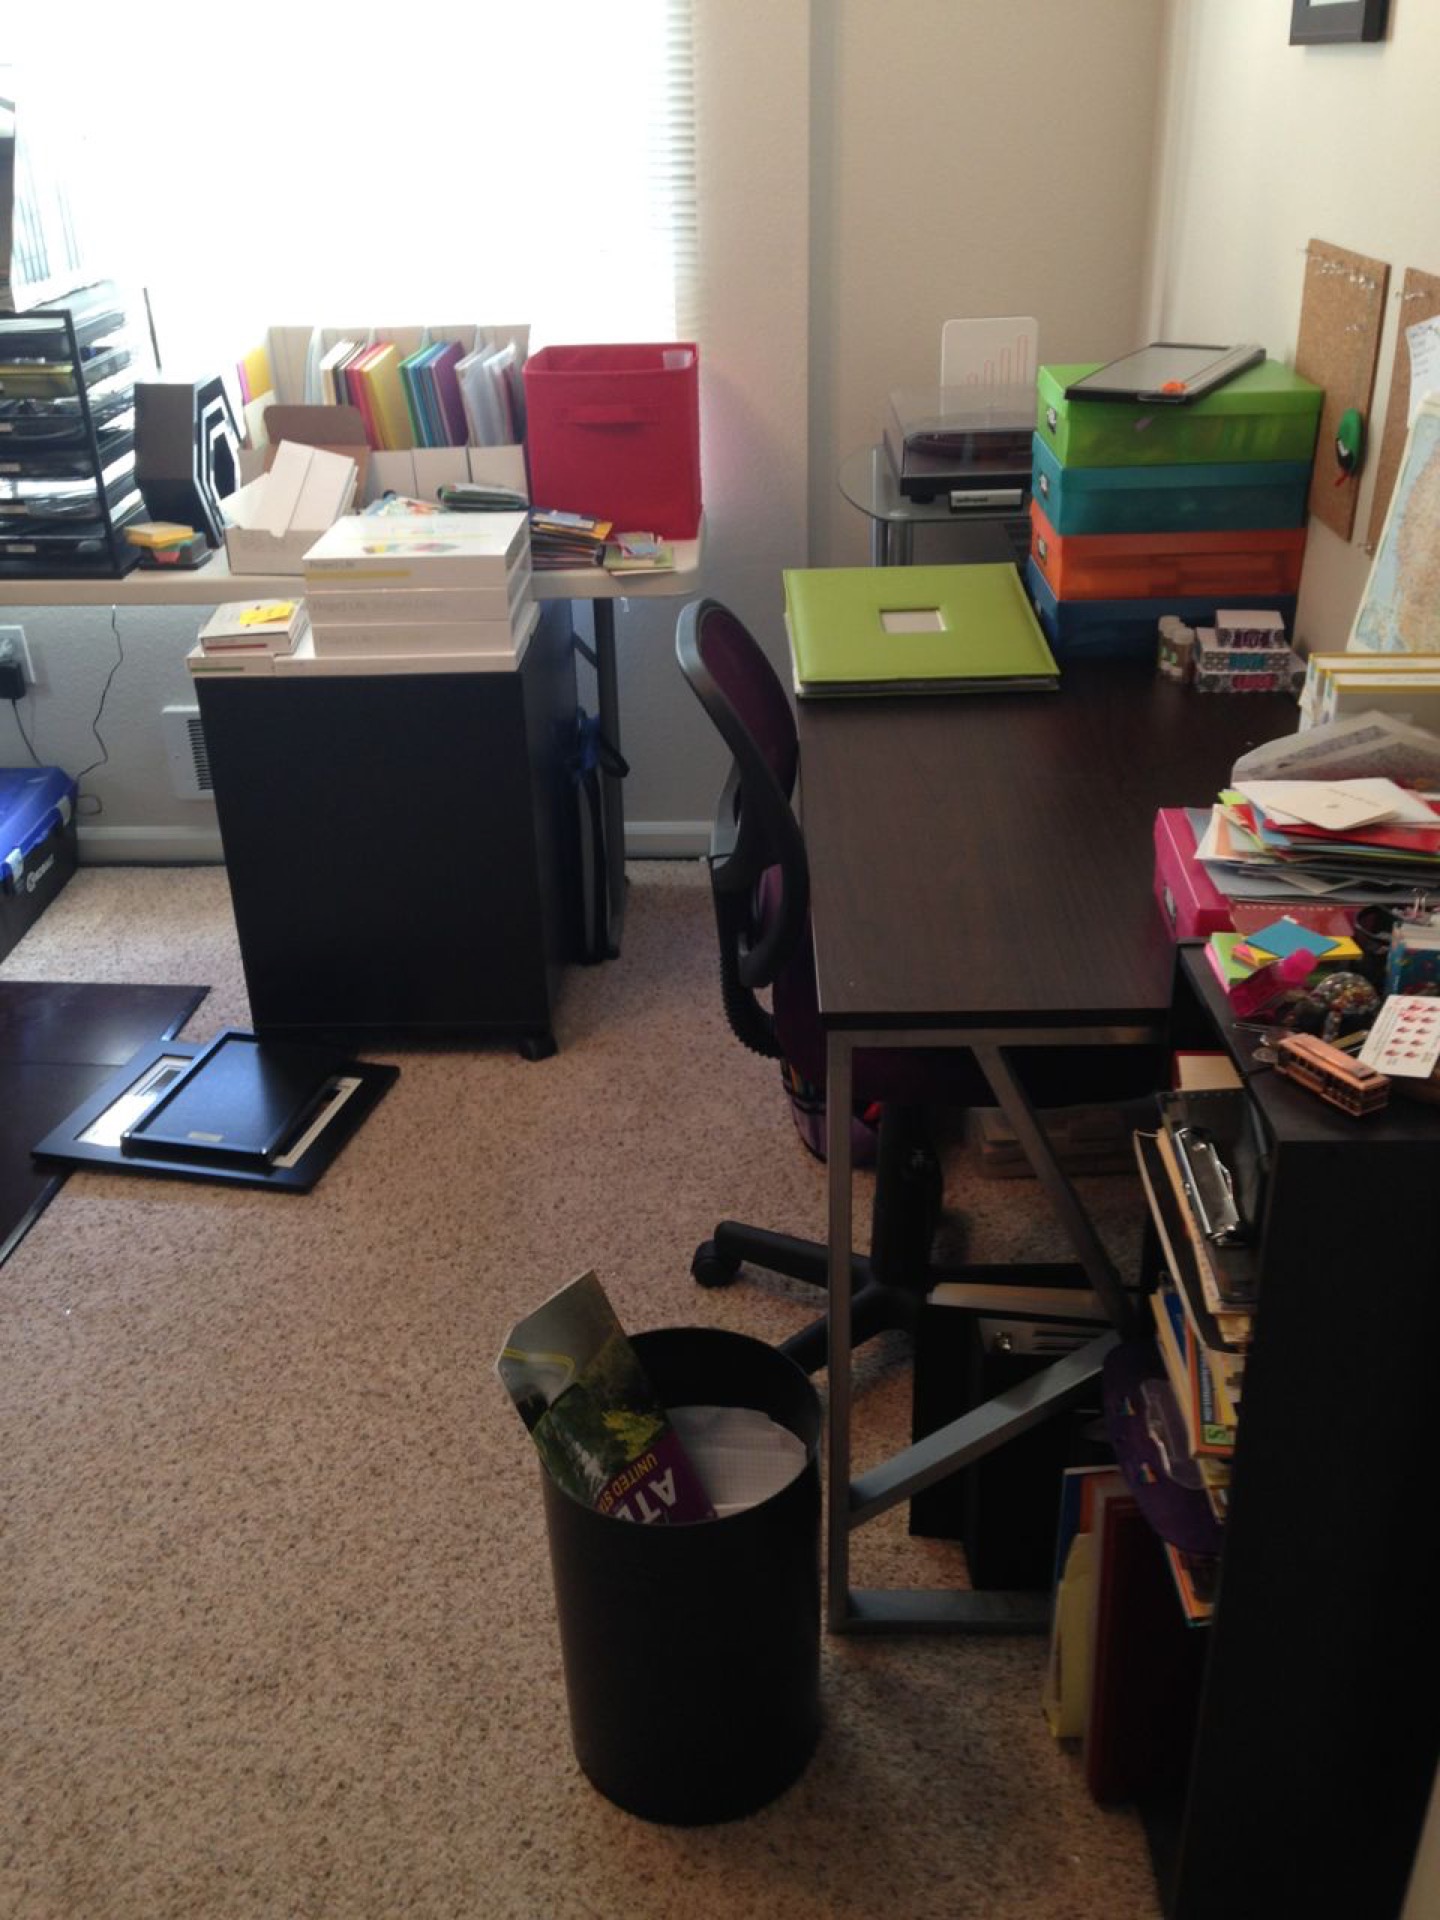
Since coming back from Christmas break, I attempted to organize my crafting space.  A few weeks later and I'm ready to reveal my area.  My space is one half of our third bedroom.  The other half of the room is filled with J's modeling supplies and workspace.  The closet is full of bookcases.  So, that leaves the half by the door (minus the corner dedicated to the servers and various computer stuff) and a small space of the long table.  From the above picture, you can see my limited space.

Let's start with the area by the window:

On top of the white table I keep a variety of things.  I have my red bin (we'll look inside in a few minutes), finished cards (currently just stacked up), envelopes, and all my 8.5" x 11" paper.  I decided to buy some Ikea cheapy magazine holders to sort my paper by color.  The last holder on the left holds cut card bases and my Stampin' Up catalogs.  I plan on adding fun scrap paper to the magazine holders to liven them up a bit.

IMG_6082 (1920).jpg
 

Tucker under the white table is my beloved Ikea Alex drawer set.  I bought this piece right after we moved in almost two years ago and am still in love with it.  It has a total of six drawers.  The top three are shorter and the bottom three are longer height-wise.  All the drawers are extremely deep.  They hold 12" x 12" paper with room to spare.  We couldn't put the drawers under the table with the opening facing out because of a vent (you can see the corner in the pic).  Instead we slide it in sideways.  I can still open the drawers without moving this extremely heavy piece.  The extra room sticking out was the perfect size to hold my boxed Project Life kits.  Currently I have a pocket pages box, a Baby Neutral kit, a Sunshine kit, a Seafoam kit, a Holiday kit, and a Seasons kit residing there.  It makes it really easy to grab a kit to work with and frees up a ton of space on my table.

IMG_6083 (1920).jpg

Inside the Alex drawers, I have a ton of supplies.  The first two drawers hold a lot of various office supplies not worth looking at.  The third drawer (short drawer) holds my Christmas supplies.  I finally decided to sort out my Christmas only supplies from the rest.  Best decision I've made in a long time.

IMG_6114 (1920).jpg

The fourth drawer (first tall drawer) used to hold all my stickers for scrapbooking.  Since I am moving towards Project Life, I've slowly used my stickers and haven't bought much more.  Because of that, this drawer is slowly becoming a paper drawer.  One of next projects is to sort through my 12" x 12" paper and organize them by colors / patterns.

IMG_6113 (1920).jpg

The fifth drawer is a split drawer.  Half is full of more 12" x 12" paper.  Half is full of my paper punches.  Fairly soon I'm going to have to make more room for paper punches.  I'm thinking about moving the punches up to the sticker drawer as I use those.

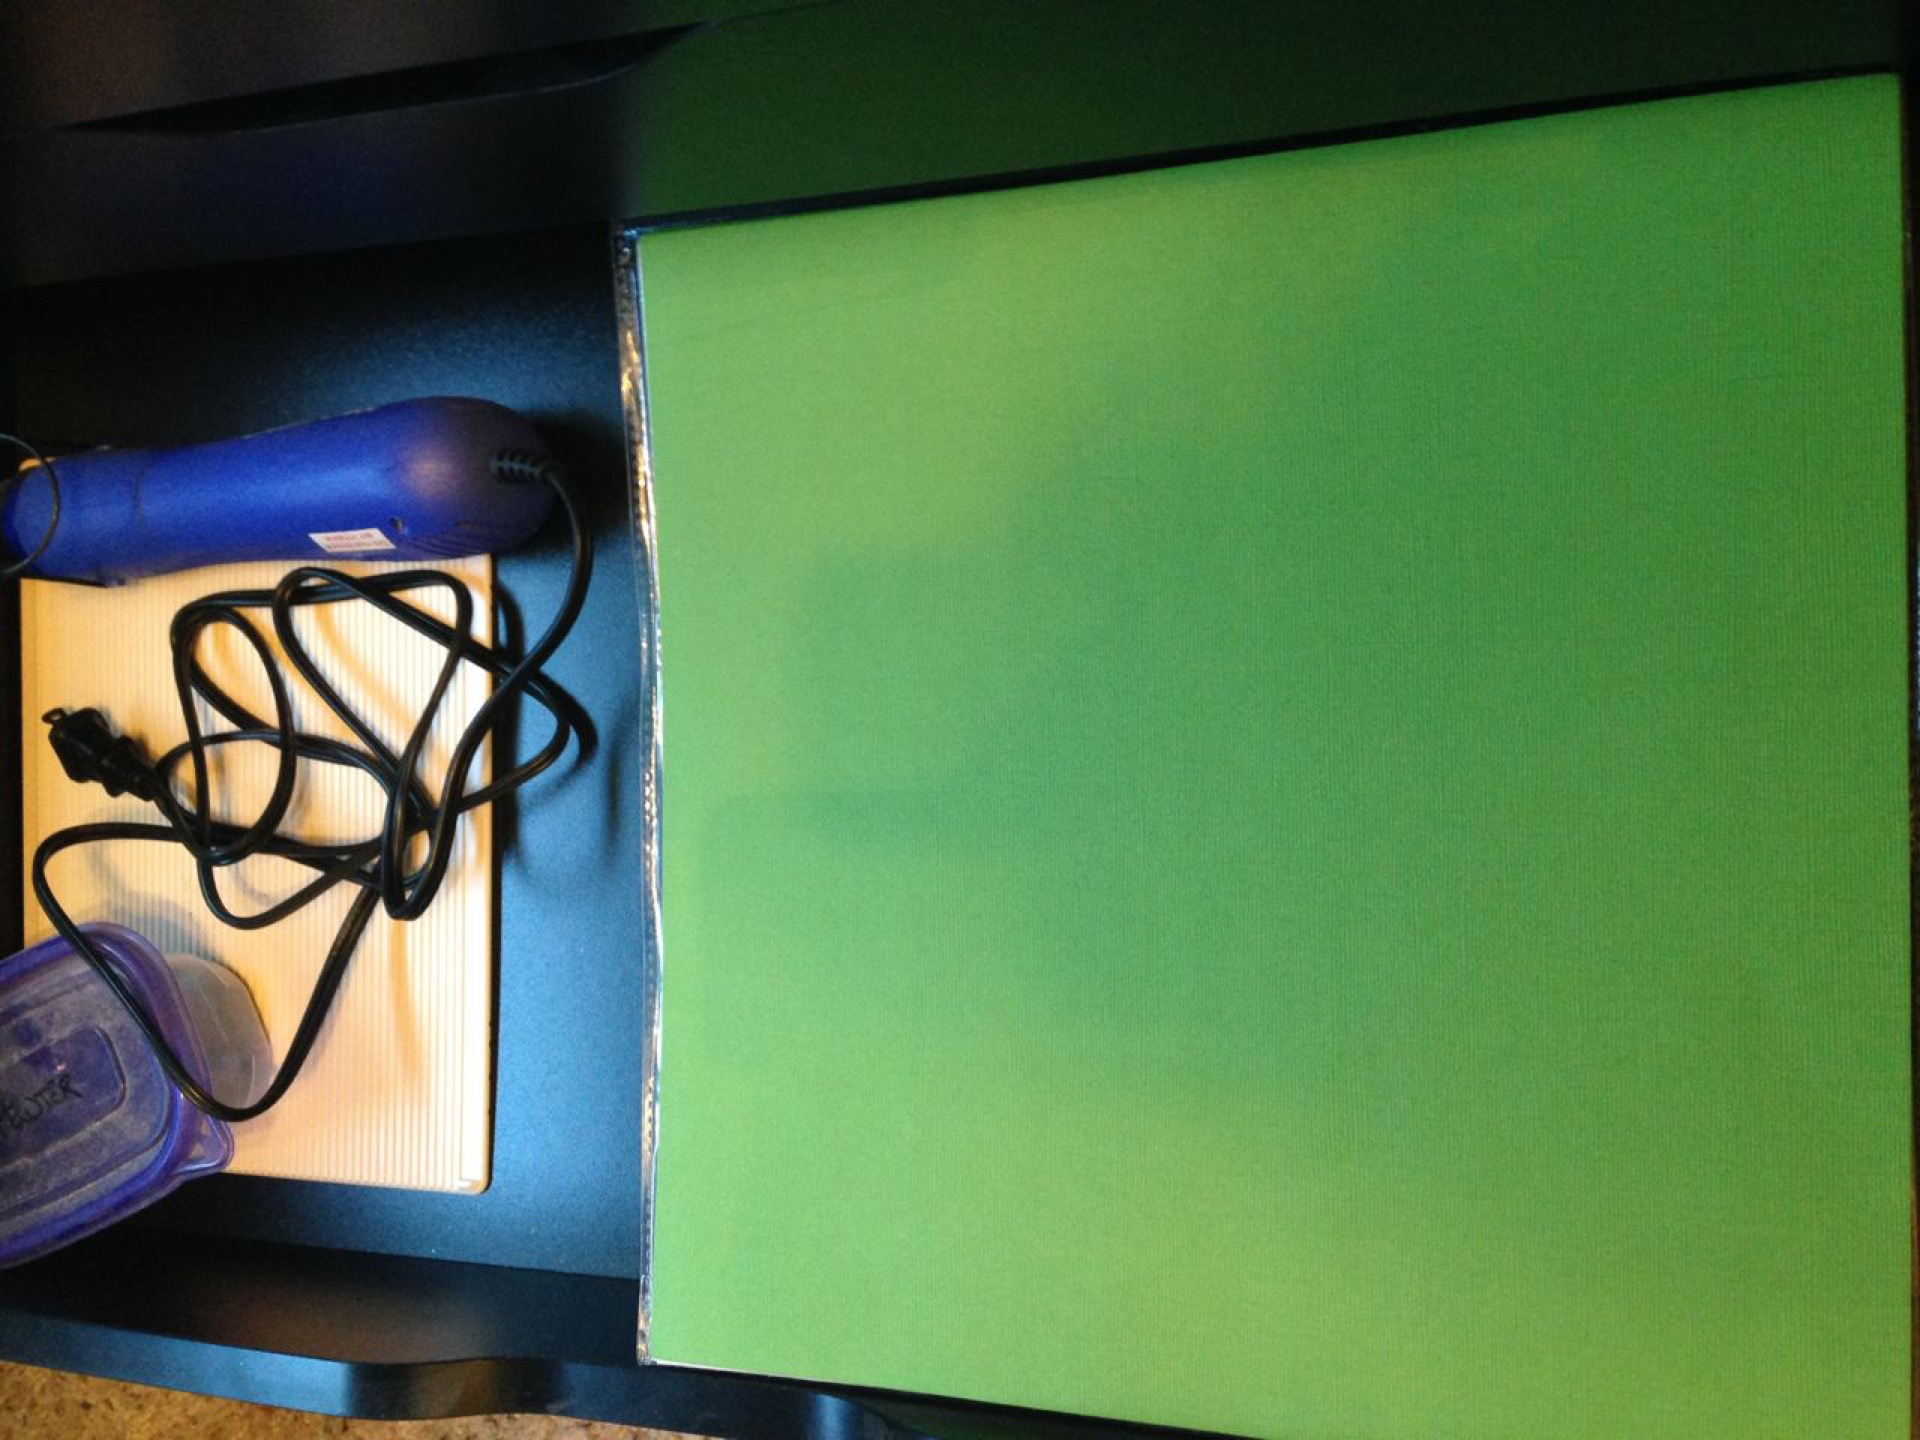
The last drawer is another half and half drawer.  Half is paper, half is my heat embossing supplies and my scoring board.  Kind of random, but I don't use my heat embossing tools all the time.

IMG_6111 (1920).jpg

Finally on top of the window table I have one of my red bins.  This one is filled with all my Stampin' Up stamp cases, SU framelits, and SU embossing folders.  I would like to have my stamp cases in a more visual spot, but I need to think more about how I want to do that.

IMG_6116 (1920).jpg

Here's the view of my main work space.  I bought this very basic table from Amazon.  I love that I have a large area to work with and nothing for me to get tangled onto.

IMG_6084 (1920).jpg

The right side is a big hodgepodge of stuff.  The little shelving unit contains random notebooks, the twins' scrapbooks I'm currently working on, and my yearbooks.  The top of it has some random office supplies and coasters.  Under the desk, I have my two Project Life albums.  On top, I have my Project Life supply box, two Studio Calico PL supply boxes, and a few PL specific embellishment envelopes.

IMG_6087 (1920).jpg
 

The pink box contains Project Life specific supplies.  I have a few rotary stamps, some photopolymer stamps, a corner rounder, day stickers, and some random things.  I tried to make it easier on myself when I got to do my weekly spreads.  I didn't want to spend a lot of time searching through supplies.  Having a dedicated box cuts my time in half. Love it!

IMG_6123 (1920).jpg

On the left side of the table, I have a PL album (not usually there), a couple of paper stacks for notes, and four boxes of supplies.  The bottom box (darker blue) is pictures and ephemera for the twins' scrapbooks.  I haven't switched them over to PL (probably won't until I fill the current album).  I tend to scrap there pages once every few months.  So, I throw everything in this bin to keep for later.

IMG_6086 (1920).jpg
 

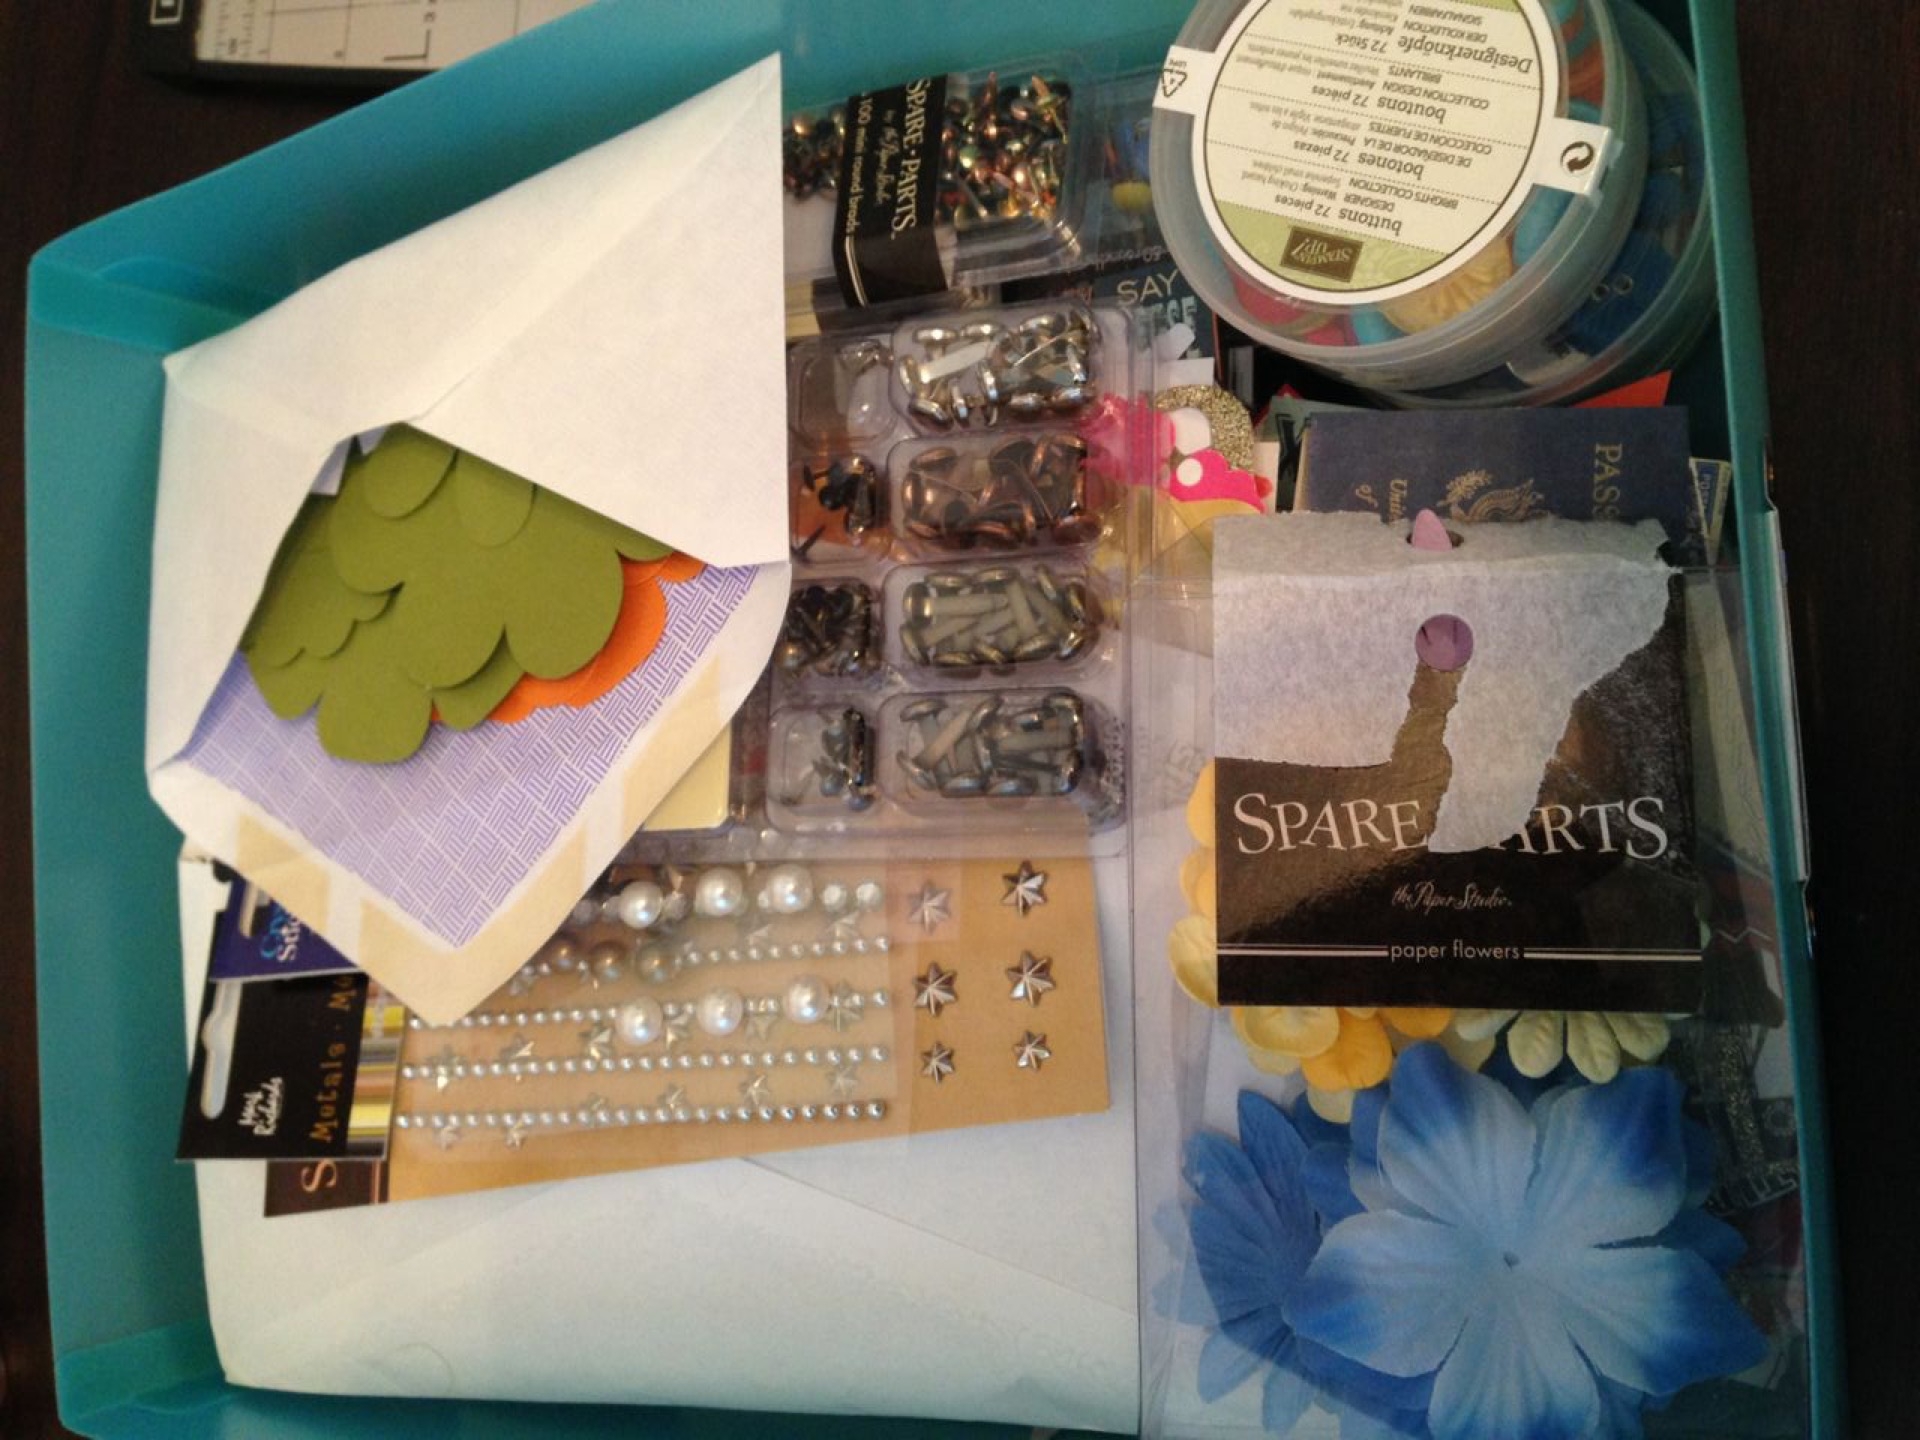
The turquoise box holds all my small embellishments. I have a ton of buttons, brads, flowers, jewels, and die cuts.

IMG_6121 (1920).jpg

The orange box holds paper scraps.

IMG_6120 (1920).jpg

The green box has all my ribbon and washi tape.  Given my current obsession with washi tape, I will probably have to rethink this box soon.

IMG_6122 (1920).jpg

Under the table holds the last of my supplies.  I have a few bins and my tool caddy.

IMG_6085 (1920).jpg
 

The red bin contains my Stampin' Up ink pads, my stamp scrubber, my snail refills, and a few random ribbon spools.  I usually keep my ink pads horizontally, but for the pictures I put them vertical to see the colors.  I don't want the ribbon in this bin, but I ran out of room in the ribbon box.

IMG_6115 (1920).jpg

The second scraps box.  I think I have a scraps problem.  I really need to do a scrap purge.

IMG_6119 (1920).jpg

This bin holds all my non-Stampin' Up stamps.  I think I need a better way of accessing my stamps.  I'll have to think about it.

IMG_6118 (1920).jpg

Lastly, I have my tool caddy.  I try to keep all my scissors, markers, and random tools in one easy access place.  Plus, this holder is mobile!

IMG_6117 (1920).jpg
 

Overall, I am satisfied with my crafting area.  However, there are a few things that I want to improve in the near future.  I've filled my Pinterest board with crafting room inspiration.  I see a trip to Ikea in my future!

categories: Crafting
Thursday 01.30.14
Posted by Tobe Buffenbarger
 

Project Life 2014 - Weeks 1, 2, 3

I'm starting a new weekly feature highlighting my Project Life pages.  My goal is to stay on top of the weeks throughout 2014.  Making these posts a weekly feature should hold me accountable.  So here we go... Many project lifers create a new album for each year with a title page, etc.  I started PL in October with Arthur's birth, so mine is going to look a little different.  I am hoping to keep Oct. - Dec. 2013 and all of 2014 in one album.  We'll see how that goes.  I decided to start my 2014 weekly spreads with the week of Dec. 30 - Jan. 5.  Yes, I included Dec. 30th and 31st in Week 1's spread.  I think it will help me stay organized.

Week 1

Family Album: It's another case of the missing photographs.  Darn Walgreens!  I hope to get them printed sometime this week, so I can add them in.  For the left side, I went with a winter color scheme of gray, blue, and white.  We were still in Indiana and there was almost 2 feet of snow on the ground; the colors seemed appropriate.  I went back to the day by day journaling using the PL day stickers.  For the right side, I wanted to highlight the start of 2014.  I used three inserts from the Holiday mini kit and added some silver stars.  The number chipboard stickers were from a Studio Calico kit I bought on Black Friday.  I love their silhouettes.  The "Explore" insert was a Google image that I downloaded.  I chose "Explore" as my word for 2014, so I wanted to highlight it in this first week's spread.

IMG_6132 (1920).jpg
 
IMG_6138 (1920).jpg
 

I added two different inserts in this week.  The first insert is my "State of the Blog" wrap up.  I added journaling cards from the PL Sunshine kit and a screenshot of the home page of my blog.  I love the bright colors and simplicity of the inserts.


The second insert highlights the rest of my Fat Mum Slim's Photo a Day December pictures.  This was the first time I tried one of these challenges.  I finished it, but learned a few lessons along the way.  I used two PL Seafoam inserts as a title page and a journaling card.  To designate each day's theme, I wrote on top of a washi tape swatch adhered to the photo.  They look much better in person.  Now I really need some more washi tape to use this technique more. (Side note: I'm missing the Dec. 31st picture.  I have to get that one printed and inserted.)

IMG_6135 (1920).jpg


Supplies:

  • PL Seafoam kit
  • PL Sunshine kit
  • PL Holiday mini kit
  • PL Day stickers
  • Random stickers from stash
  • Random paper from stash
  • Various washi tape

Arthur's Album

IMG_6149 (1920).jpg
 
IMG_6151 (1920).jpg
 

Week 2

Family Album: Another week of photos speaking for themselves.  I wanted to get the rest of our vacation pictures into the album.  To highlight the crazy Midwest weather, I cropped a picture from The Weather Channel.

IMG_6159 (1920).jpg


Supplies:

  • PL Seafoam kit
  • PL Baby kit

Arthur's Album

IMG_6156 (1920).jpg


Week 3

Family Album: This week I tried to incorporate some insert cards other than the Sunshine and Seafoam kits.  I bought some random sets and partial sets online over the holidays.  I love the lighter blue and orange color combinations.  I also tried to play with pattern cards instead of using just simple designs.  Finally I decided to add "Week __" to the date cards.  (Note: I only did this for the family album.)


Supplies:

  • PL Seafoam kit
  • WRMK Tangerine kit
  • PL Day stickers

Arthur's Album: On the left side, I did a few journaling cards and a random insert all in yellow.  I love the clean look.  The right side is all about Arthur's 3 month pictures and inserts.  The photo heavy right side balances the cleaner left side.

IMG_6316 (1920).jpg
 
IMG_6317 (1920).jpg
 

Supplies:

  • PL Baby kit
tags: Project Life
categories: Crafting
Saturday 01.25.14
Posted by Tobe Buffenbarger
 

Project Life December

Wrapping up my 2013 Project Life with the last two weeks of December.  Since I was in Indiana at the time, I had to wait until January to complete these spreads.  However, I did plan ahead and work on parts of them while on vacation.  I took a small box filled with journal inserts, bric a brac, journaling pens, glue, and grid paper.  I laid out each weekly spread on the grid paper and wrote in what photo went where.  Then, I did the journal on the insert cards and added some embellishments.  Once I got home, I just printed the pictures and slide them into the page protector pockets.  Easy peasy!  And I stayed on track!

Dec. 16 - 22

Highlights: Since this was the week we were traveling (Arthur for the first time!), I wanted to use some travel themed paper and embellishments.  Thankfully I bought travel themed paper from SU's clearance rack in December.  I cut up the little embellishments (like the "special delivery" tag) and used them as accents.  I also cut down the rest of the paper into 3x4 or 4x6 pieces to use as inserts.  The only insert that isn't that paper is the "True Story" date card.  That one is from PL's Seafoam kit.  The blue worked nicely with the pattern papers.  It's a bit hard to see in these photos, but I did stamp directly onto a few photos.  The pic of Arthur and I has a "postcard" stamp on the bottom.  I experimented with different inks before leaving and decided that Staz-on black worked the best.  I like the look of a simple stamp here and there.  I also stamped the small plane and the globe onto insert cards. Finally I cut up our boarding passes to use as interesting inserts and added a Komet hockey ticket to the family album.  Overall, I really love the colors and flow of these spreads.

IMG_6139 (1920).jpg
 
IMG_6142 (1920).jpg
 

Dec. 23 - 29

Highlights: Christmas week and I had to use Christmas theme paper and embellishments.  The inserts are a mix of some random cut up SU Christmas DSP and pieces from the PL Holiday mini kit.  I then added a few Christmas stickers to add to the fun.  I didn't add any stamping this week, but let the photos speak.  (Side note: The family album's right page is missing a few photos.  For the second time in a row, Walgreens has not printed all the prints I ordered.  Really getting frustrated with them...)

IMG_6144 (1920).jpg


Christmas insert

In the middle of Christmas week, I added a Design H insert to highlight our "professional" Christmas photos.  Alright, my mother and I took them...  I included a few inserts from the PL Holiday mini kit.  I love our little family photos, even if the twins were in a slightly foul mood that day.

 
IMG_6130 (1920).jpg
 

Next week, I'll be sharing Weeks 1, 2, and 3 of 2014.

tags: Project Life
categories: Crafting
Saturday 01.18.14
Posted by Tobe Buffenbarger
 

Project Life November and December

I've only been at this for a few weeks, but I've already learned so much about what to do and what not to do.  My main realization is that I need to make PL work for me and just me.  I've looked at so many different examples of styles and usage and they all look amazing.  But, I can't get too wrapped up in copying some other's design.  I need to make PL work just for me.  It comes down the fact that I like simplicity.  I don't like a lot of clutter, a lot of layering, a lot of embellishment.  While it can be very pretty, that's just not my style.  My simplistic uncluttered style is evident in my pages so far.  I like clean photos and relatively clean inserts.  Although I am experimenting with adding some washi tape accents in the coming weeks. Secondly, I really loving taking a bit of time each Sunday or Monday to do my layouts.  I figure out what pictures I want, where to put them, and which inserts to use.  Then, I journal and put the inserts in the pages.  The photos will be printed later, but I've already got each spread 90% done by Monday night.  As an extra bonus, working on my pages is a nice break from mommy duties.  I can focus just on me for 30-60 minutes.

Thirdly, while I would love to have my pictures printed instantly, I have accepted the plan of printing monthly instead.  I just don't know if home printing is worth the money and hassle at this point.  I save up my pictures until Walgreens or Snapfish or Shutterfly have a good deal and then print them.  So far, so good.

Fourth, I have added a ton of PL related products to my Amazon wishlist.  While I love everything I see, I have limited my list to my favorites.  I just need to remember to not get too stash buying happy that I over supply myself.

Fifth, taking pictures of my pages while in their plastic sleeves is tricky.  To get better pictures, I've resorted to taking the pieces out, laying them on the desk, and then photographing them...  Much better looking on the blog.

Finally, I joined a Studio Calico class starting in January for extra motivation and inspiration.  I've heard about so many people losing momentum at some point in the year.  I want to make it all the way.  And having a bit of extra help will certainly be a great idea.

Nov. 4 - 10

Highlights: This week was all about hanging out near the house...  As for the design, I stuck with my basic design of 4x6 prints and 3x4 inserts.  I added the day of the week stickers to my weekly highlights for the family album.  I'm trying to add more embellishments to my pages, but haven't quite figured that out yet.

IMG_4911 (1920).jpg
 
IMG_4913 (1920).jpg
 
IMG_4924 (1920).jpg
 
IMG_4925 (1920).jpg
 

Nov. 11 - 17

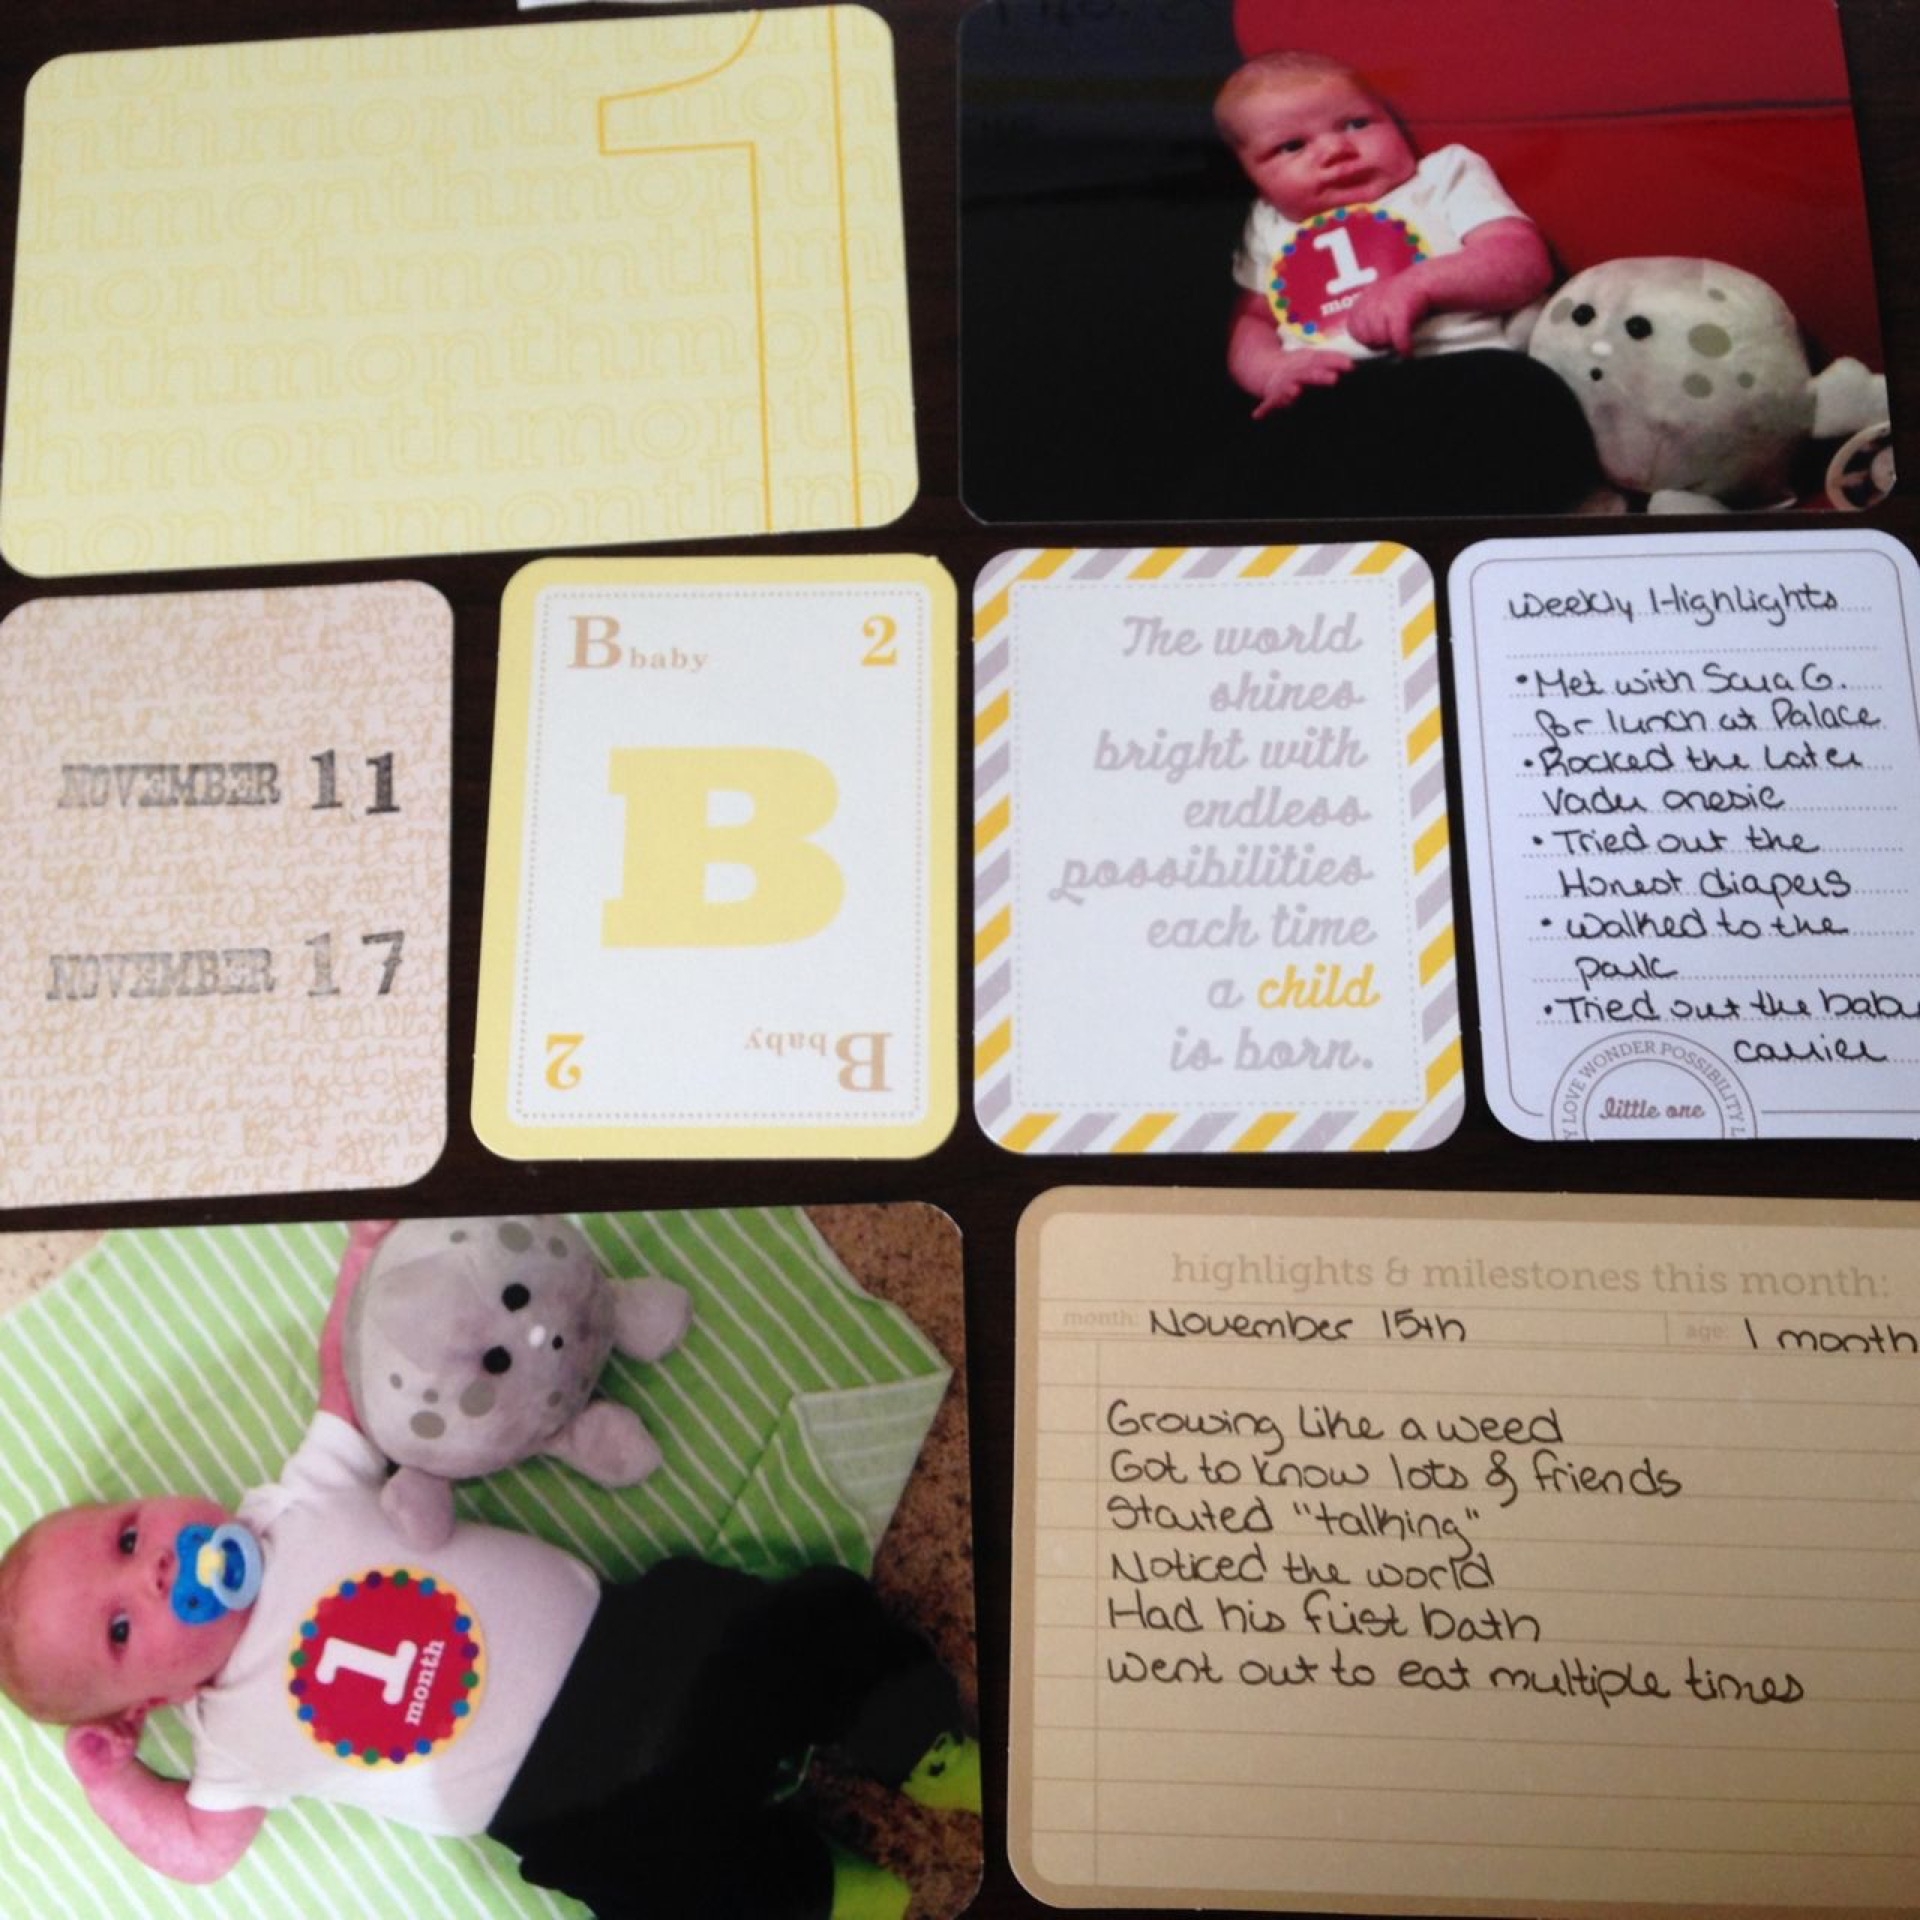
Highlights: Arthur turned one month old this week.  I made sure to add the special 1 month inserts to his pages to highlight the occasion.  For the family album, I stuck more toward the pictures speaking for themselves.  A little bit of embellishment on these pages.

IMG_4915 (1920).jpg
 
IMG_4917 (1920).jpg
 
IMG_4926 (1920).jpg
 
IMG_4927 (1920).jpg
 

Nov. 18 - 24

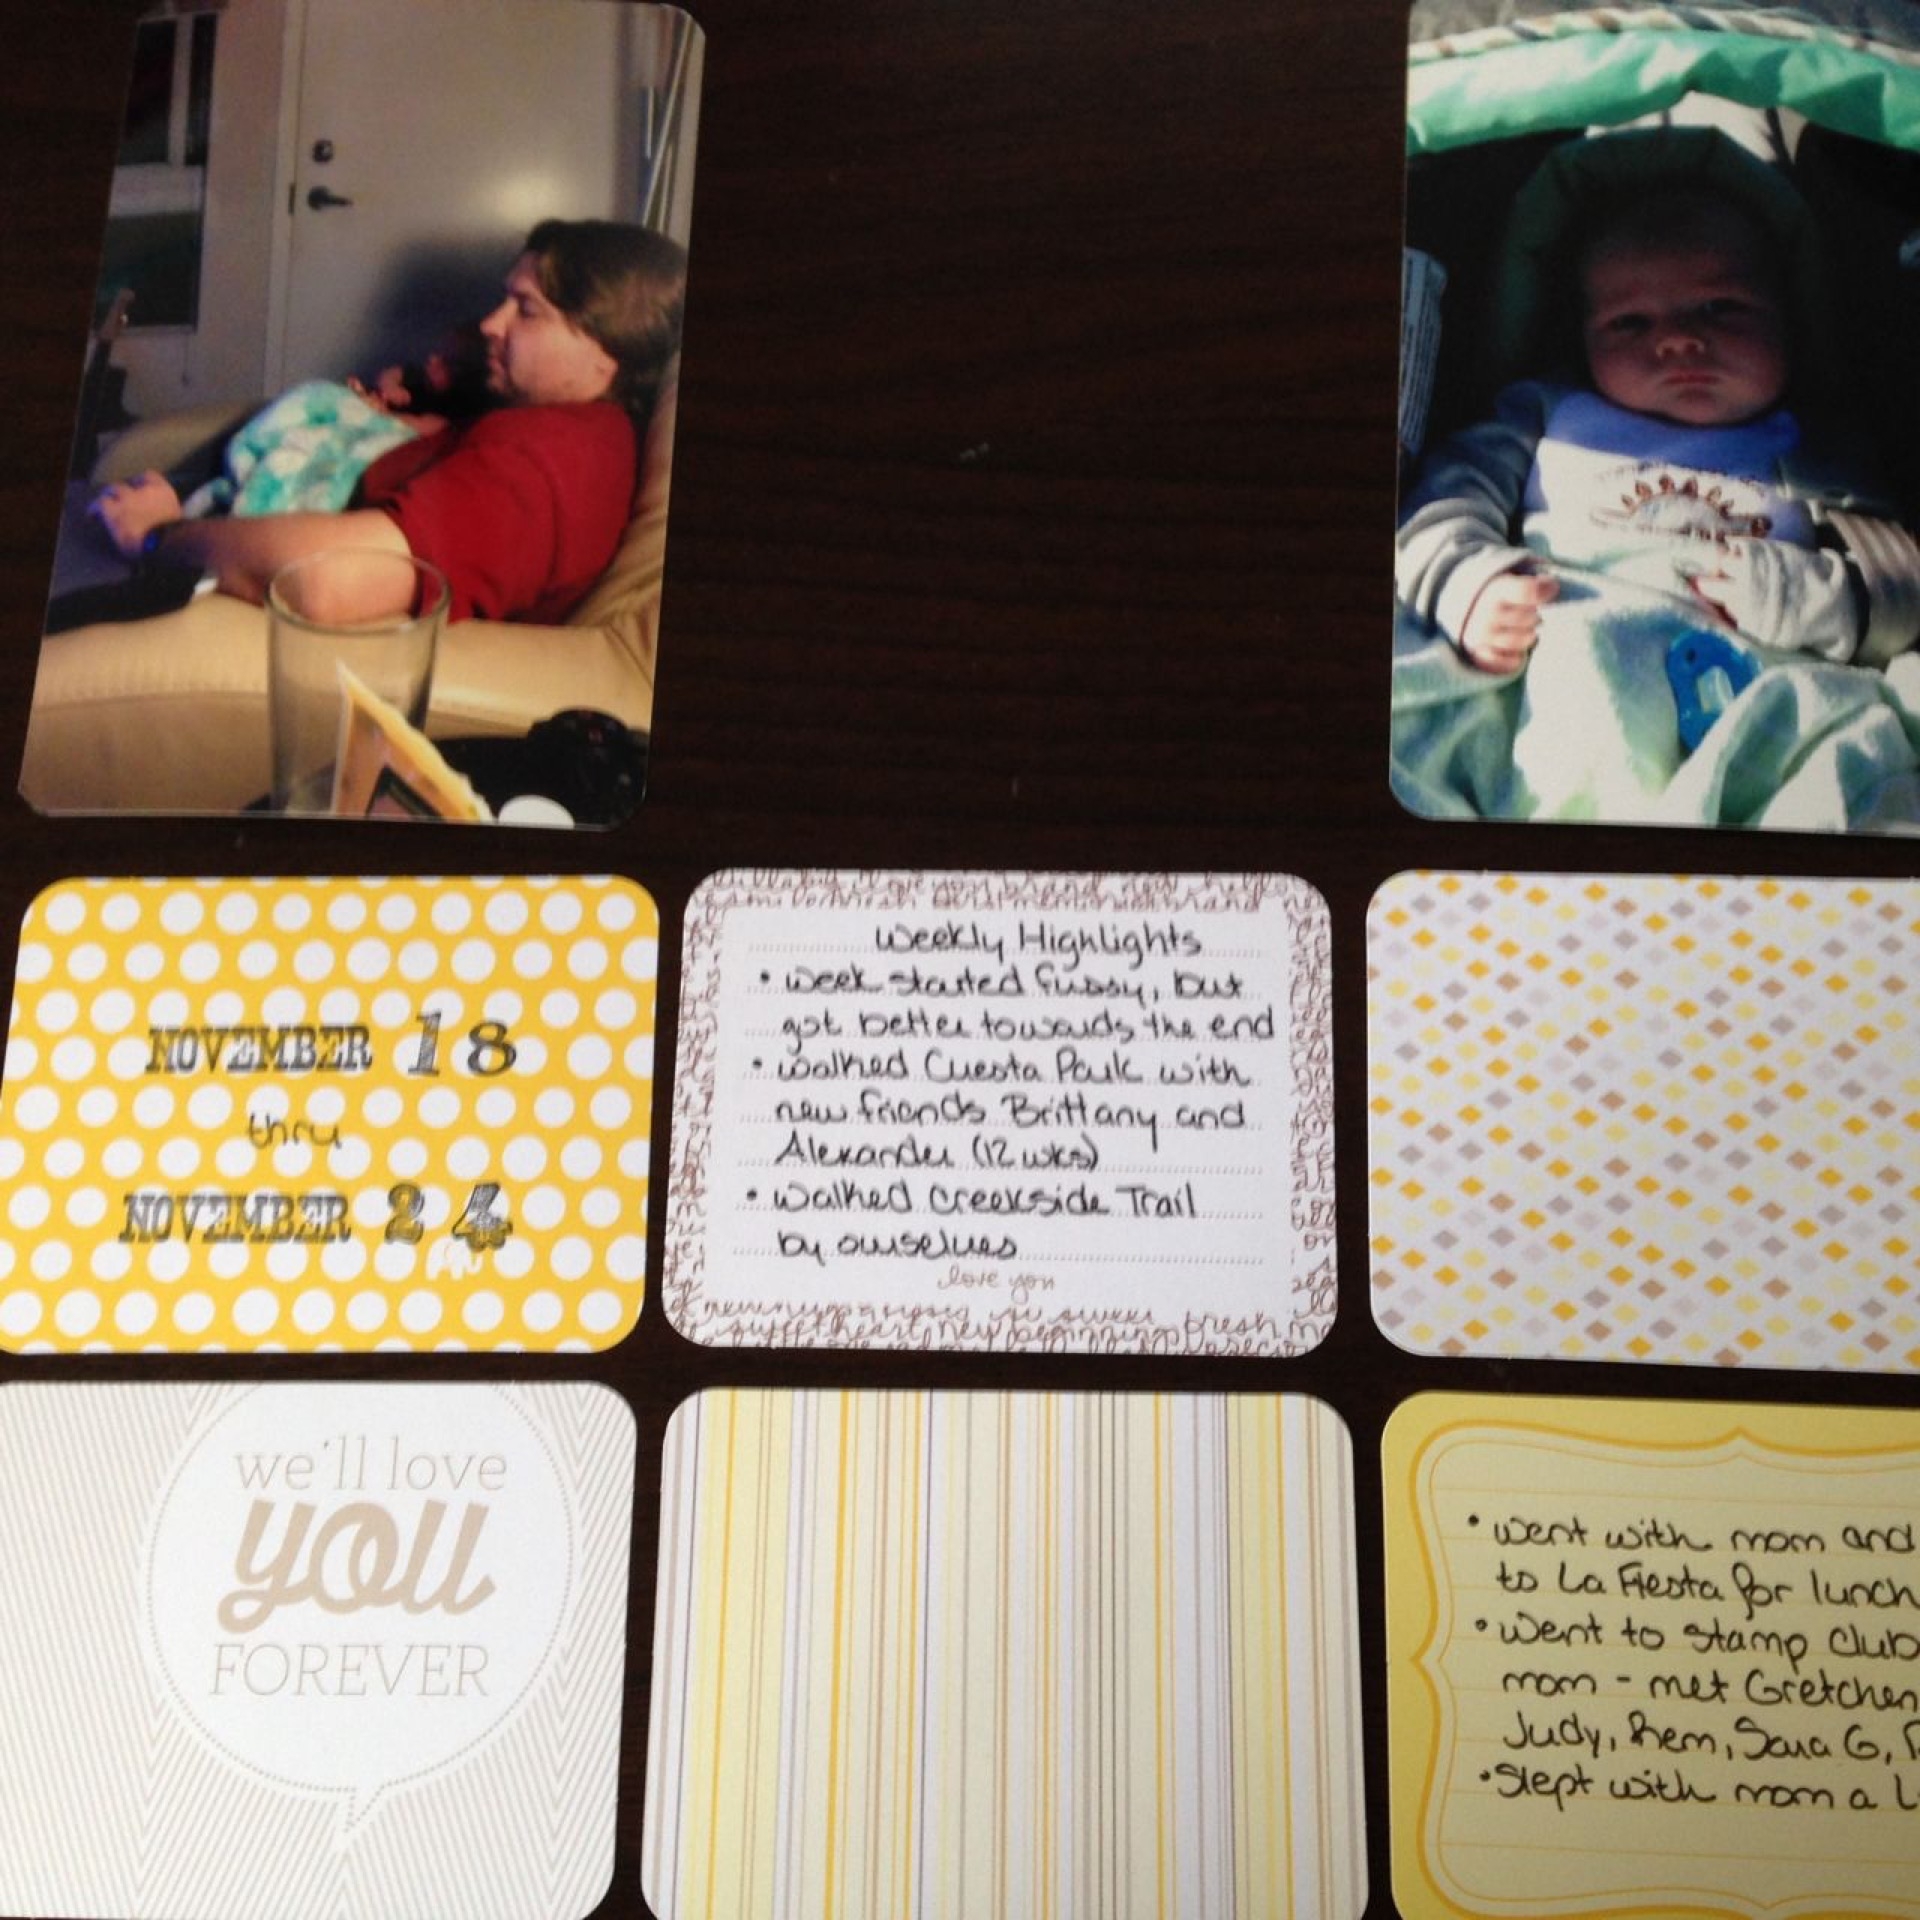
Highlights: A couple of trips outdoors this week.  Arthur and I went to two new parks.  I love discovering new places around here...  The holes you see were pictures that somehow didn't get printed by Walgreens.  I have about 10 different photos that didn't print, but were clearly on my order.  I had to call, complain, and get them to reprint my photos.  I just haven't stuck them back into the albums yet.  I added a few word stickers to the family album.  I don't want to over embellish my pages.  I like the cleaner look.

IMG_4919 (1920).jpg
 
IMG_4920 (1920).jpg
 
IMG_5335 (1920).jpg
 
IMG_5336 (1920).jpg
 

Nov. 25 - Dec. 1

Highlights: Arthur and I started our weekly walks at Shoreline with the mom's group.  Shoreline is a gorgeous park with gorgeous views.  We are really loving the walk, socializing with other moms and babies, and lunch at the cafe afterwards.  I caught some great Arthur expressions in this week's photos.  For the family album, I started including my photo-a-day challenge photos.  When they don't easily fit into the spreads, I have collecting them into their own inset page for the end of the month.

Extra bonus: I added in a Thanksgiving insert for Arthur's photo shoot with the turkey hat.  I didn't want to lose out on including other photos just to get these adorable ones in...  An insert seemed like the perfect way to go.  I plan on doing another insert for Christmas photos.

IMG_5337 (1920).jpg
 
IMG_5344 (1920).jpg
 
IMG_5338 (1920).jpg
 
IMG_5340 (1920).jpg
 

Dec. 2 - 8

Highlights: A pretty quiet week at home.  For my photo-a-day pics, I added each day's theme on washi tape.  I love the look and it utilizes more of my craft stash.  The cut out heart was a random chip board piece that was lying around.  I love how it stands out against the dark background in that picture.  Plus, lots of regular day-by-day style journaling.

 
IMG_5346 (1920).jpg
 

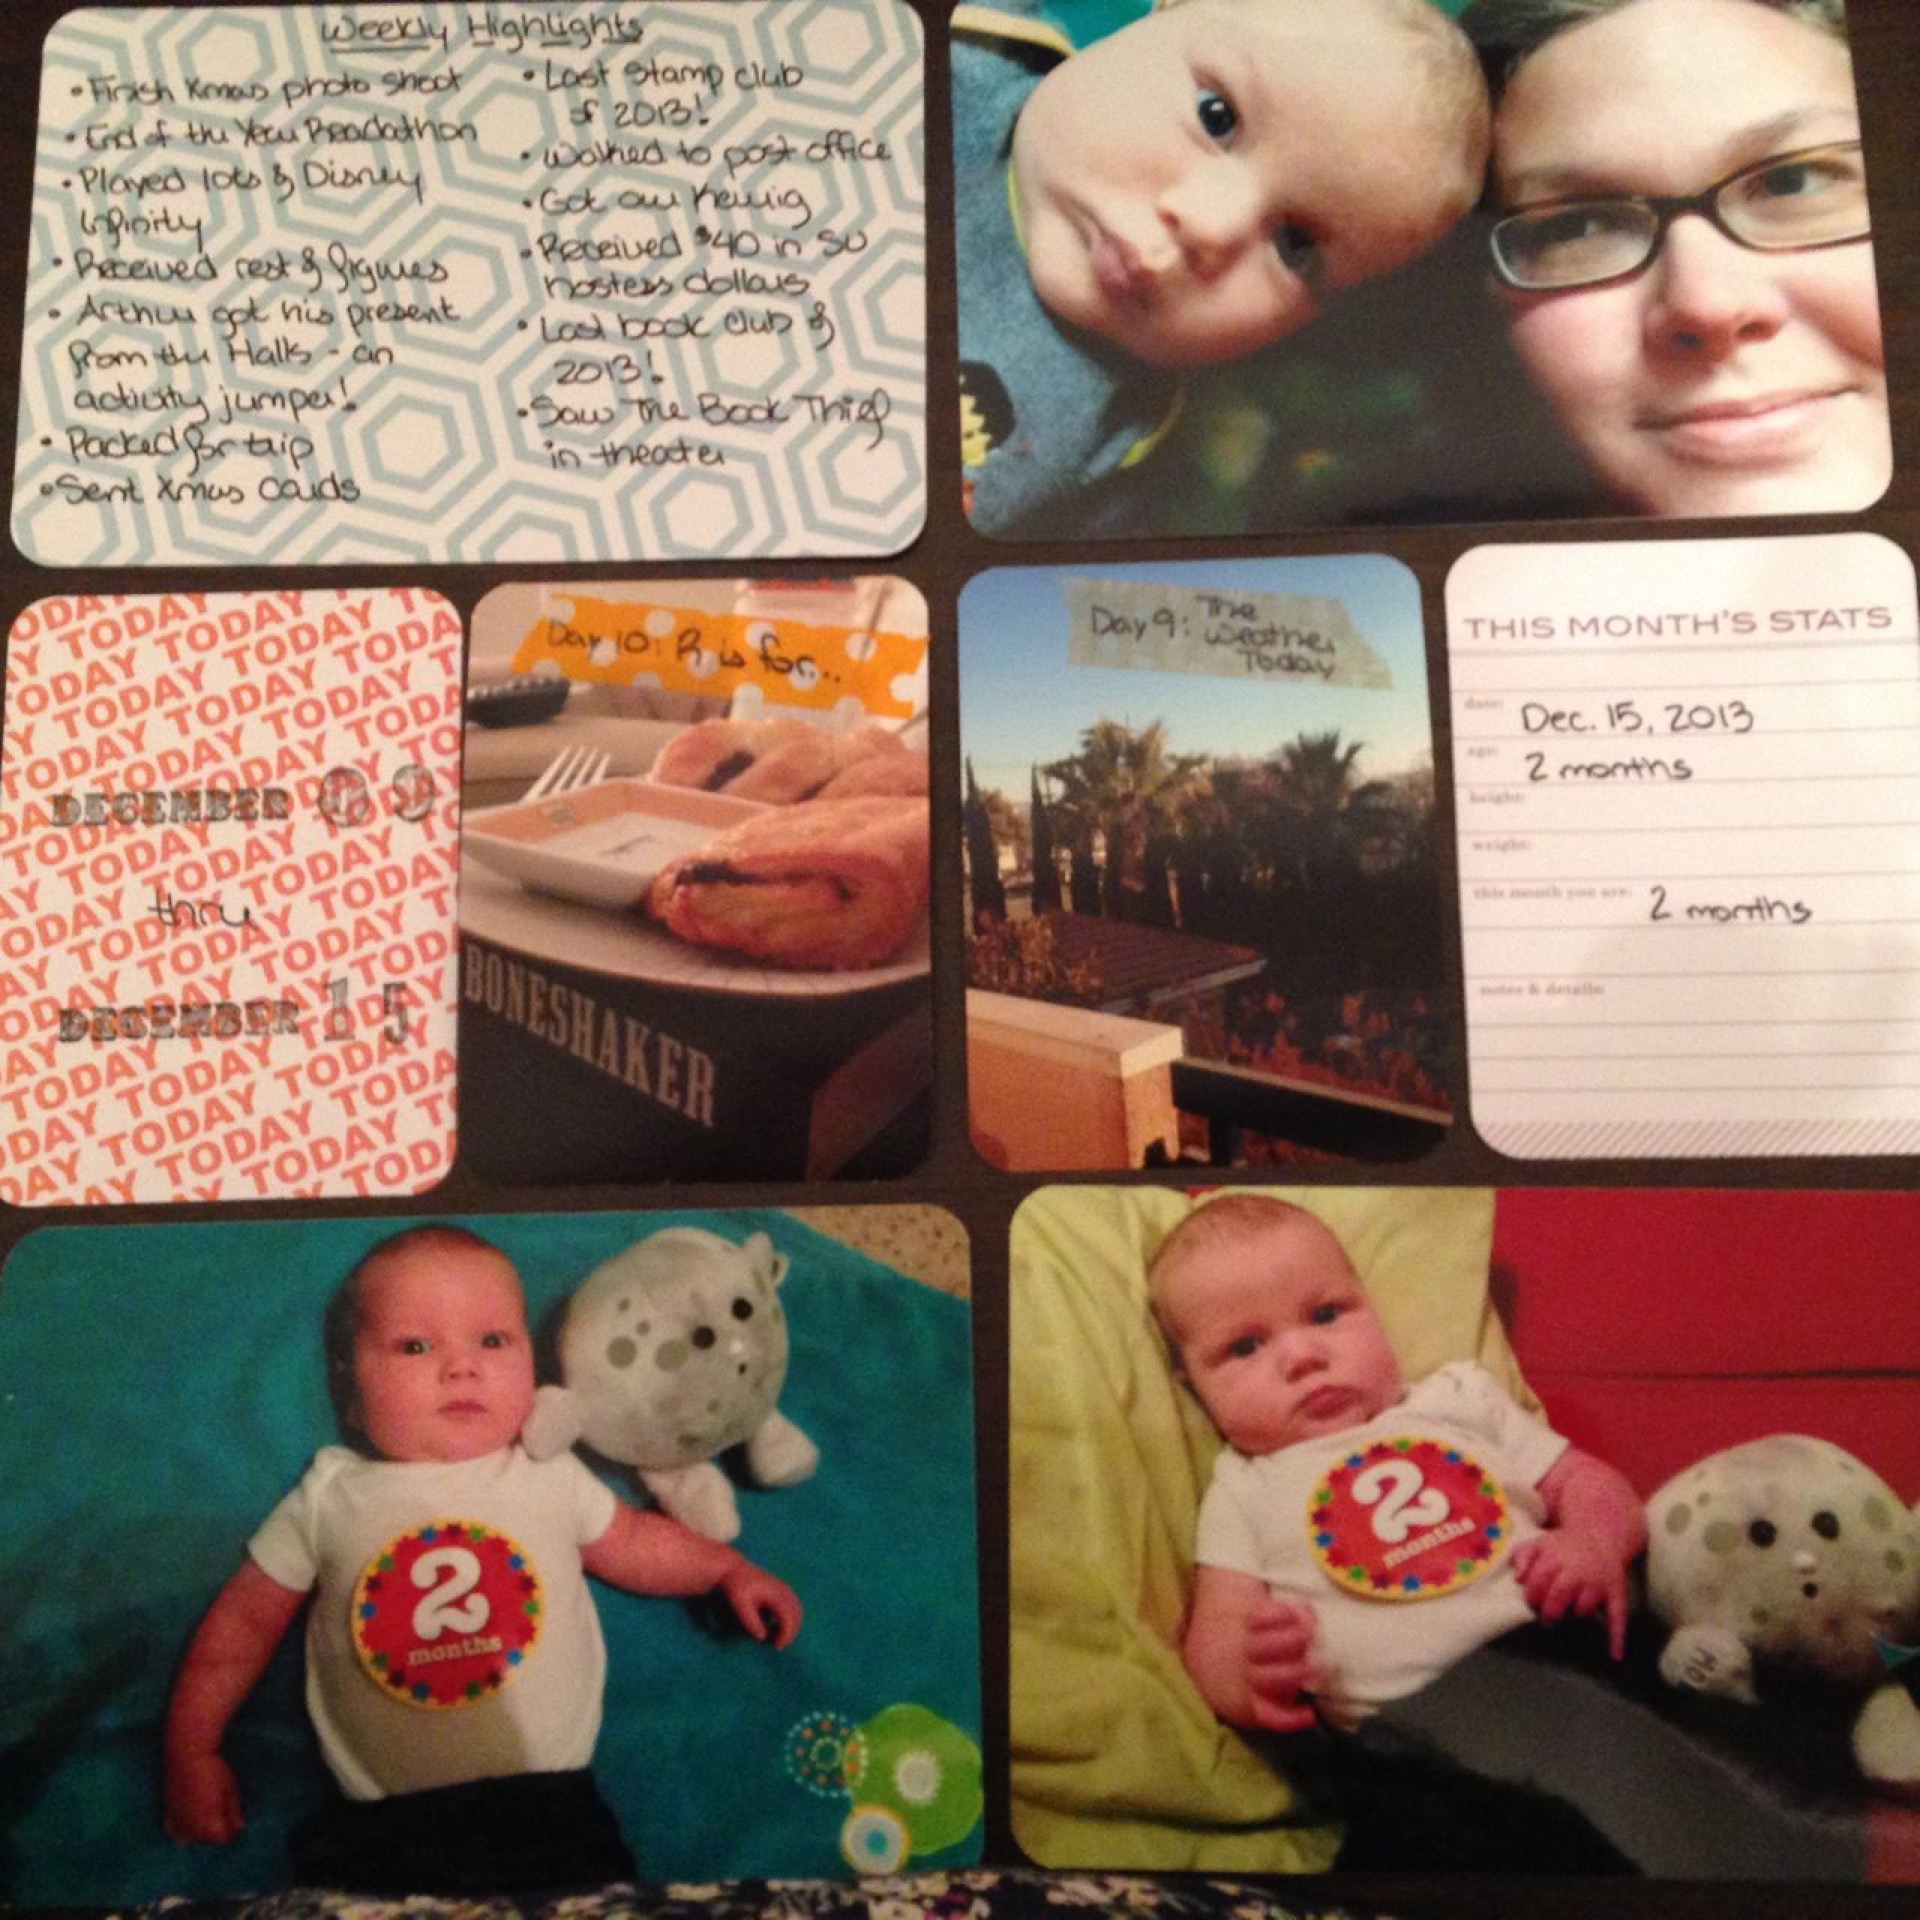
Dec. 9 - 15

Highlights: Arthur turned 2 months old this week!  I had to include his 2 month photo shoot pictures.  If you look closely, the monthly stats insert isn't filled out.  I finished doing that yesterday.  I wanted to get his stats from the doctor's appointment.  Since we didn't do much this week, I condensed my day-by-day journaling inserts into one weekly highlights insert.  This allowed me to include more Arthur and photo-a-day pictures.

IMG_5349 (1920).jpg
 
IMG_5347 (1920).jpg
 
tags: Project Life
categories: Crafting
Monday 12.16.13
Posted by Tobe Buffenbarger
 

Project Life October

With my new method of scrapping, I journal and lay out the spreads every Sunday, but don't print pictures every week.  Instead, I will be printing them monthly for convenience and hopefully to use some of the printing deals at Snapfish and Walgreens. I started the weekly spreads with Arthur's birth.  Overall, his and the family album are very similar.  I usually only have a few minor differences (I don't think he will care what I was blogging about in any given week or what I was reading).  I think I'm going to stay pretty constant week to week with the family album.  I love the idea of having inserts for each day that I can use to jot down what we did.  I can always change the format, but this seems really appealing right now.

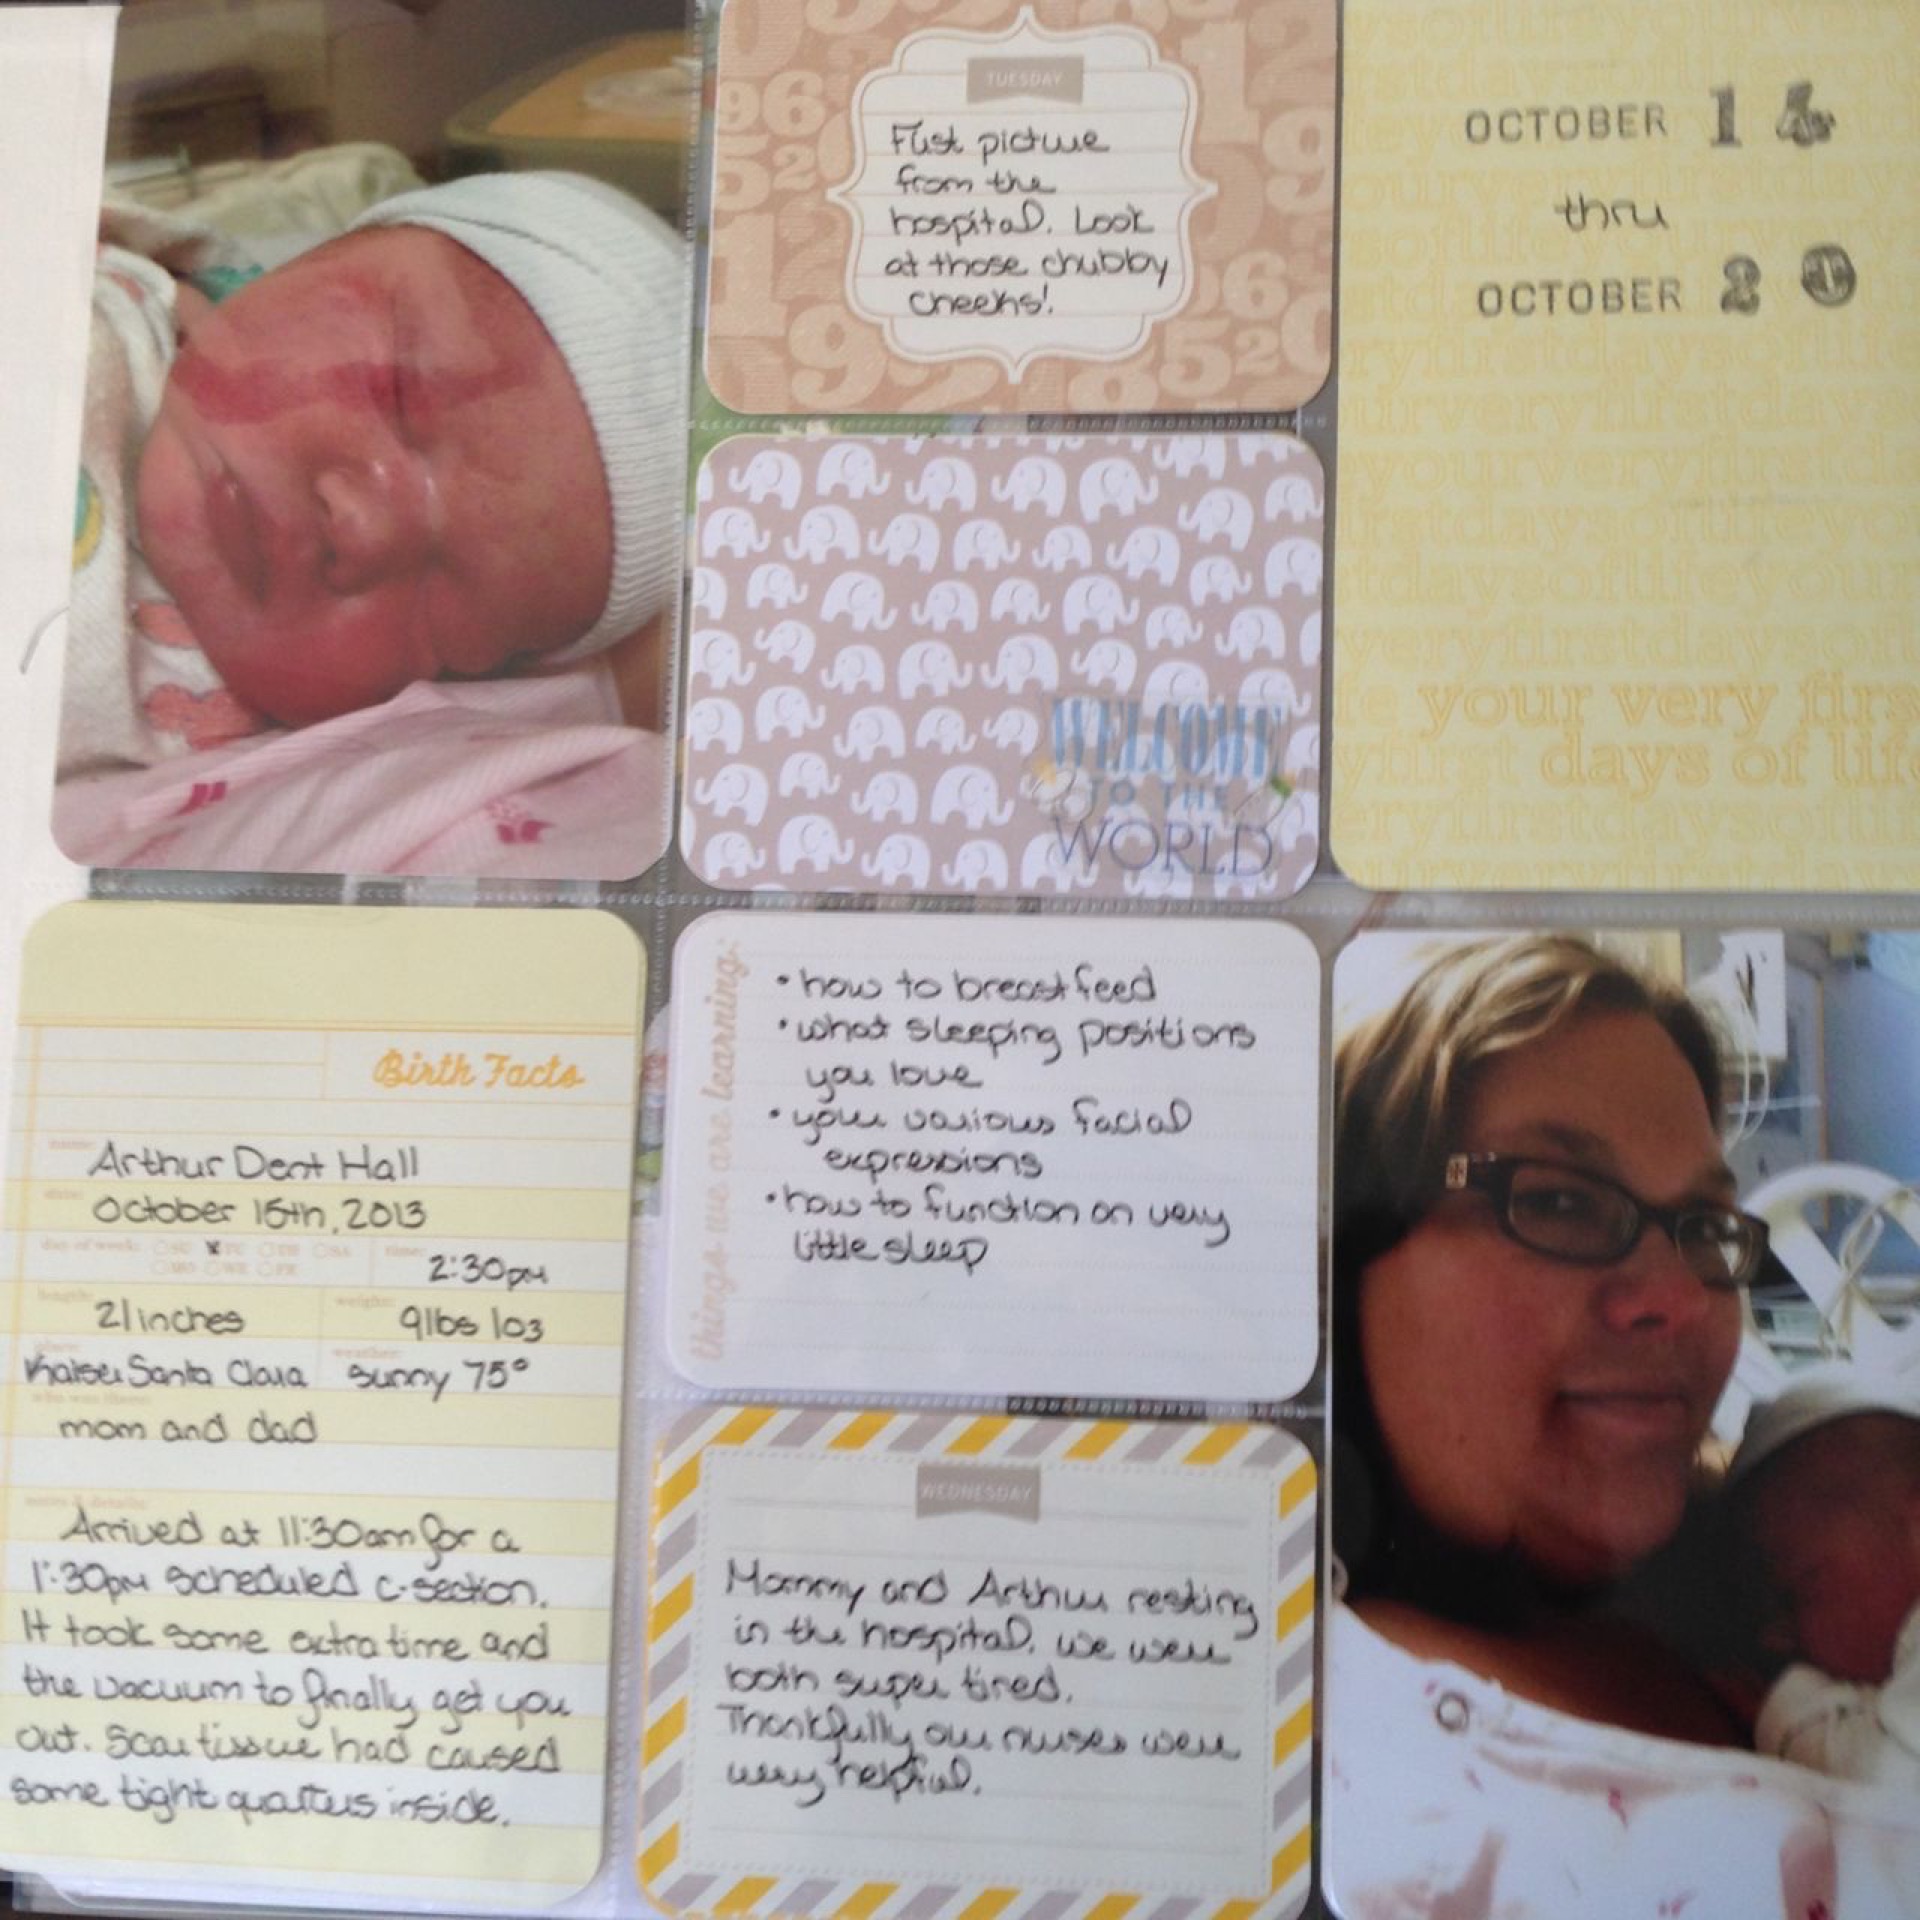
Oct. 14 - 20

The big highlight of the week was that Arthur arrived, of course!  The first two photos are the weekly spread from Arthur's album.  I added the week's dates stamped onto an insert card (I will continue to do this for every week, I love the look!).  I also added some informational cards about his birth our journey home.  The second two photos are the weekly spread from the family album.  I used many of the same pictures, but instead of random inserts, I did a card for each day.  I wrote a quick list of what we did each day to remember the week better.  I love the colors on the Sunshine kit inserts and went with a fun collection of colors for this week.  Plus, I added some baby related stickers to one of the inserts to give it some more character.

IMG_4511 (1920).jpg
 
IMG_4512 (1920).jpg
 
IMG_4504 (1920).jpg
 
IMG_4505 (1920).jpg
 

Oct. 21 - 27

The highlight of the week was lots of visitors!  Arthur met his first people outside of mom, dad, and hospital staff.  He looks like he's crying in the picture with Auntie Cecilia, but he's actually yawning.  They caught us right before nap time.

Again, I did a bulleted list of weekly happenings.  I also added Arthur's inked footprint.  The ones they did in the hospital were horrible and the ink bled throughout the entire paper.  I did mine using the standard Stampin' Up ink and paper.  They're not super dark, but I still got them.

IMG_4513 (1920).jpg
 
IMG_4514 (1920).jpg
 
IMG_4506 (1920).jpg
 
IMG_4507 (1920).jpg
 

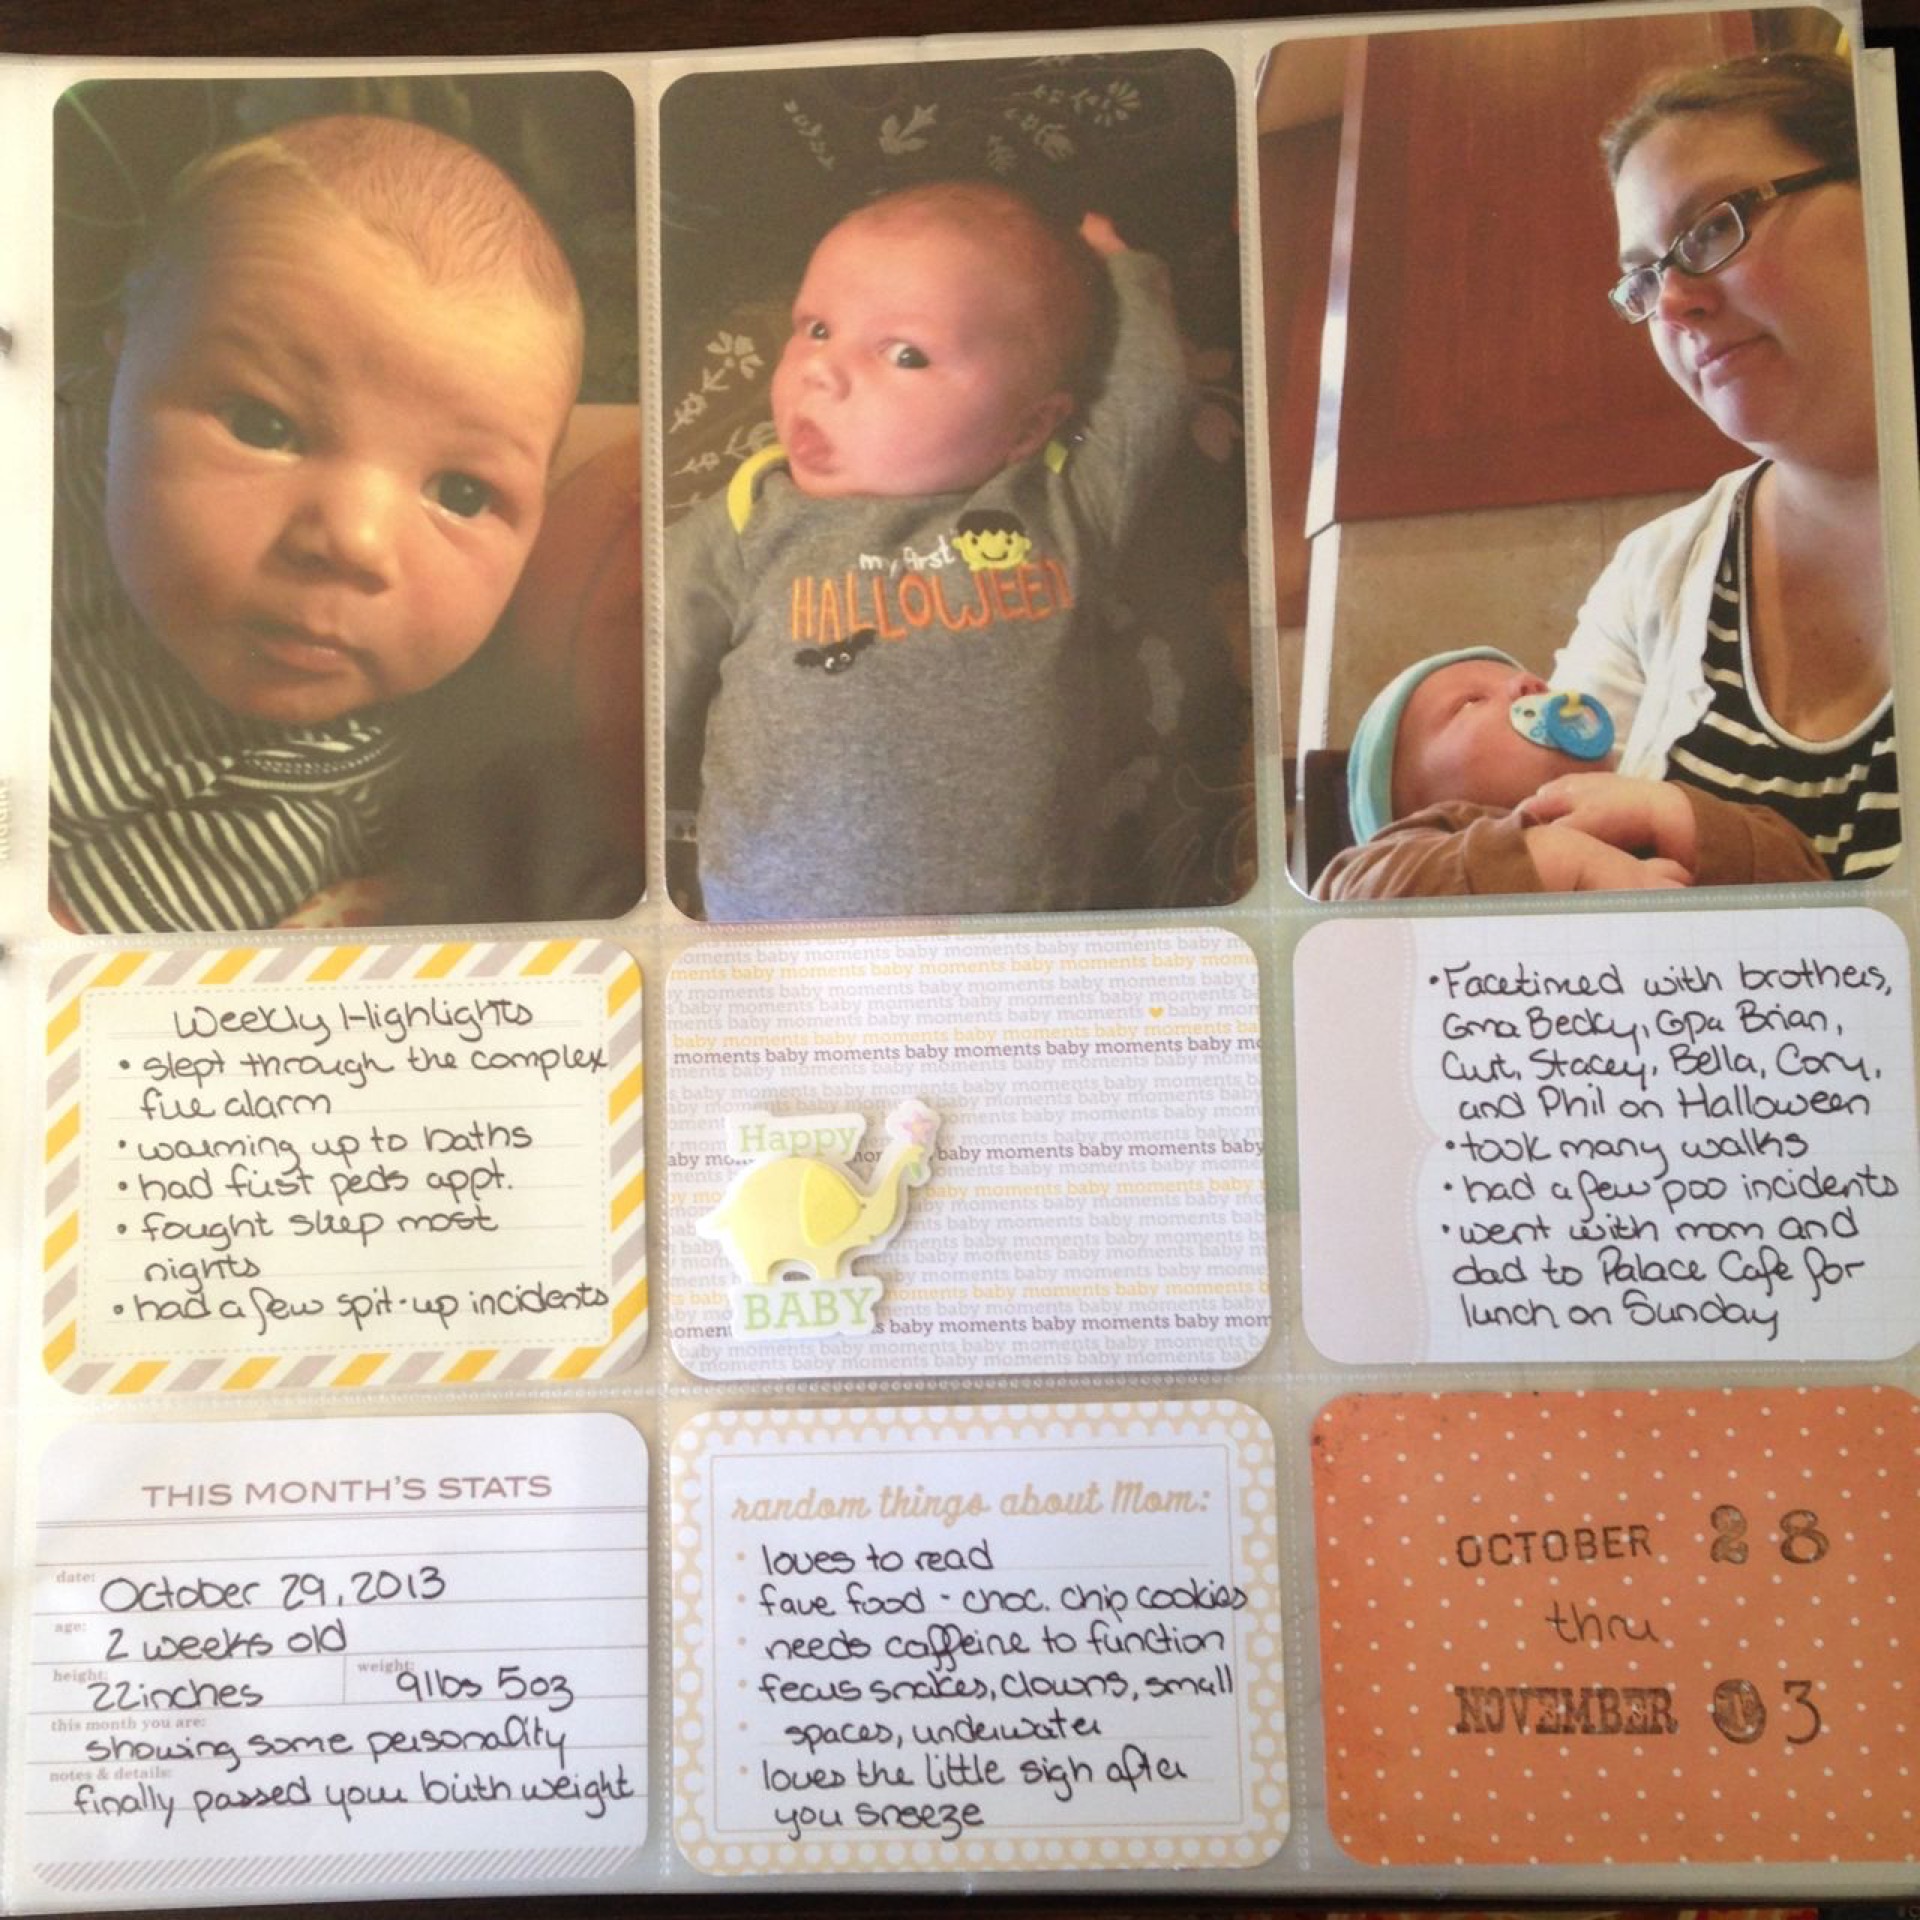
Oct. 28 - Nov. 3

It's Halloween!  Not that we actually did anything with a two week old baby, but still I had to add some Halloween themed inserts.  I bought the PL Holidays Mini-kit.  I love the insert designs and the fact that you get two large inserts and eight small inserts for each of the holidays.  I added the three dimensional Halloween themed stickers and the Happy Baby sticker from my scrapbooking stash.  For the 3x4 pictures, I just printed a regular 4x6 and cut it down to the right size.  Thankfully I had a few pictures that could be cropped to fill the slots.

IMG_4509 (1920).jpg
 
IMG_4510 (1920).jpg
 
IMG_4515 (1920).jpg
 
IMG_4516 (1920).jpg
 

Until next month...

tags: Project Life
categories: Crafting
Thursday 11.07.13
Posted by Tobe Buffenbarger
 

Project Life Transition

With the birth of my third child, I realized that my previous method of scrapbooking was not going to work.  Mainly it took too much time and thought.  I would also let it go for months and then have to do a marathon session to catch up.  I'm sure events and commentary were lost in the process.  To be fair, I started scrapping in 2007.  I went back to scrapbook the twins' lives from their birth in 2003.  I also went back and scrapbooked my entire life in an attempt to decrease the boxes of random memorabilia and photographs.  It worked well, but I won't be able to keep up with four different albums at one time. I started seeing more and more bloggers using the Project Life method.  I did a bit of research.  I thought about it.  And I finally decided that this method would work better for our new life.  Although I do have a few modifications to fit our life.  The twins' individual albums will stay the same.  As I don't see them everyday, it makes sense to focus on events rather than a weekly time table.  The family album and baby Arthur's album are transitioning to Project Life.  My goal is to create a spread a week or at the very least biweekly. I want to focus on meaningful moments and journaling our lives.  I love the idea of small events.  I love the idea of flexibility with PL.

In preparation, I bought a few kits to get me started.  I picked up the Baby Edition for Arthur's album (gender neutral edition full of grays and yellows), the Seafoam Edition for the family album, a mini Holiday Kit for both, and the Sunshine Edition (designed by A Beautiful Mess) for the family album.  I wasn't planning on buying that many kits, but the Holiday mini kit seemed like a good investment, plus I snapped it up for 40% at Michaels.  The Sunshine kit was just released and I love their designs too much to pass it up.  This means that I am stocked with paper inserts for probably a few years (at least a year for each album).  I also bought a Seafoam and a Baby designer paper pack to cut at my discretion.  This seems like a lot of supplies, but I keep reminding myself that this is almost all I need to create interesting scrapbooks.  I won't be randomly picking up stickers, paper, and embellishments.  I plan on using scraps and already bought supplies to doctor some of the inserts.  Some will go in as is.  It's all about customization, but I do love a clean look without lots of embellishments or layering.

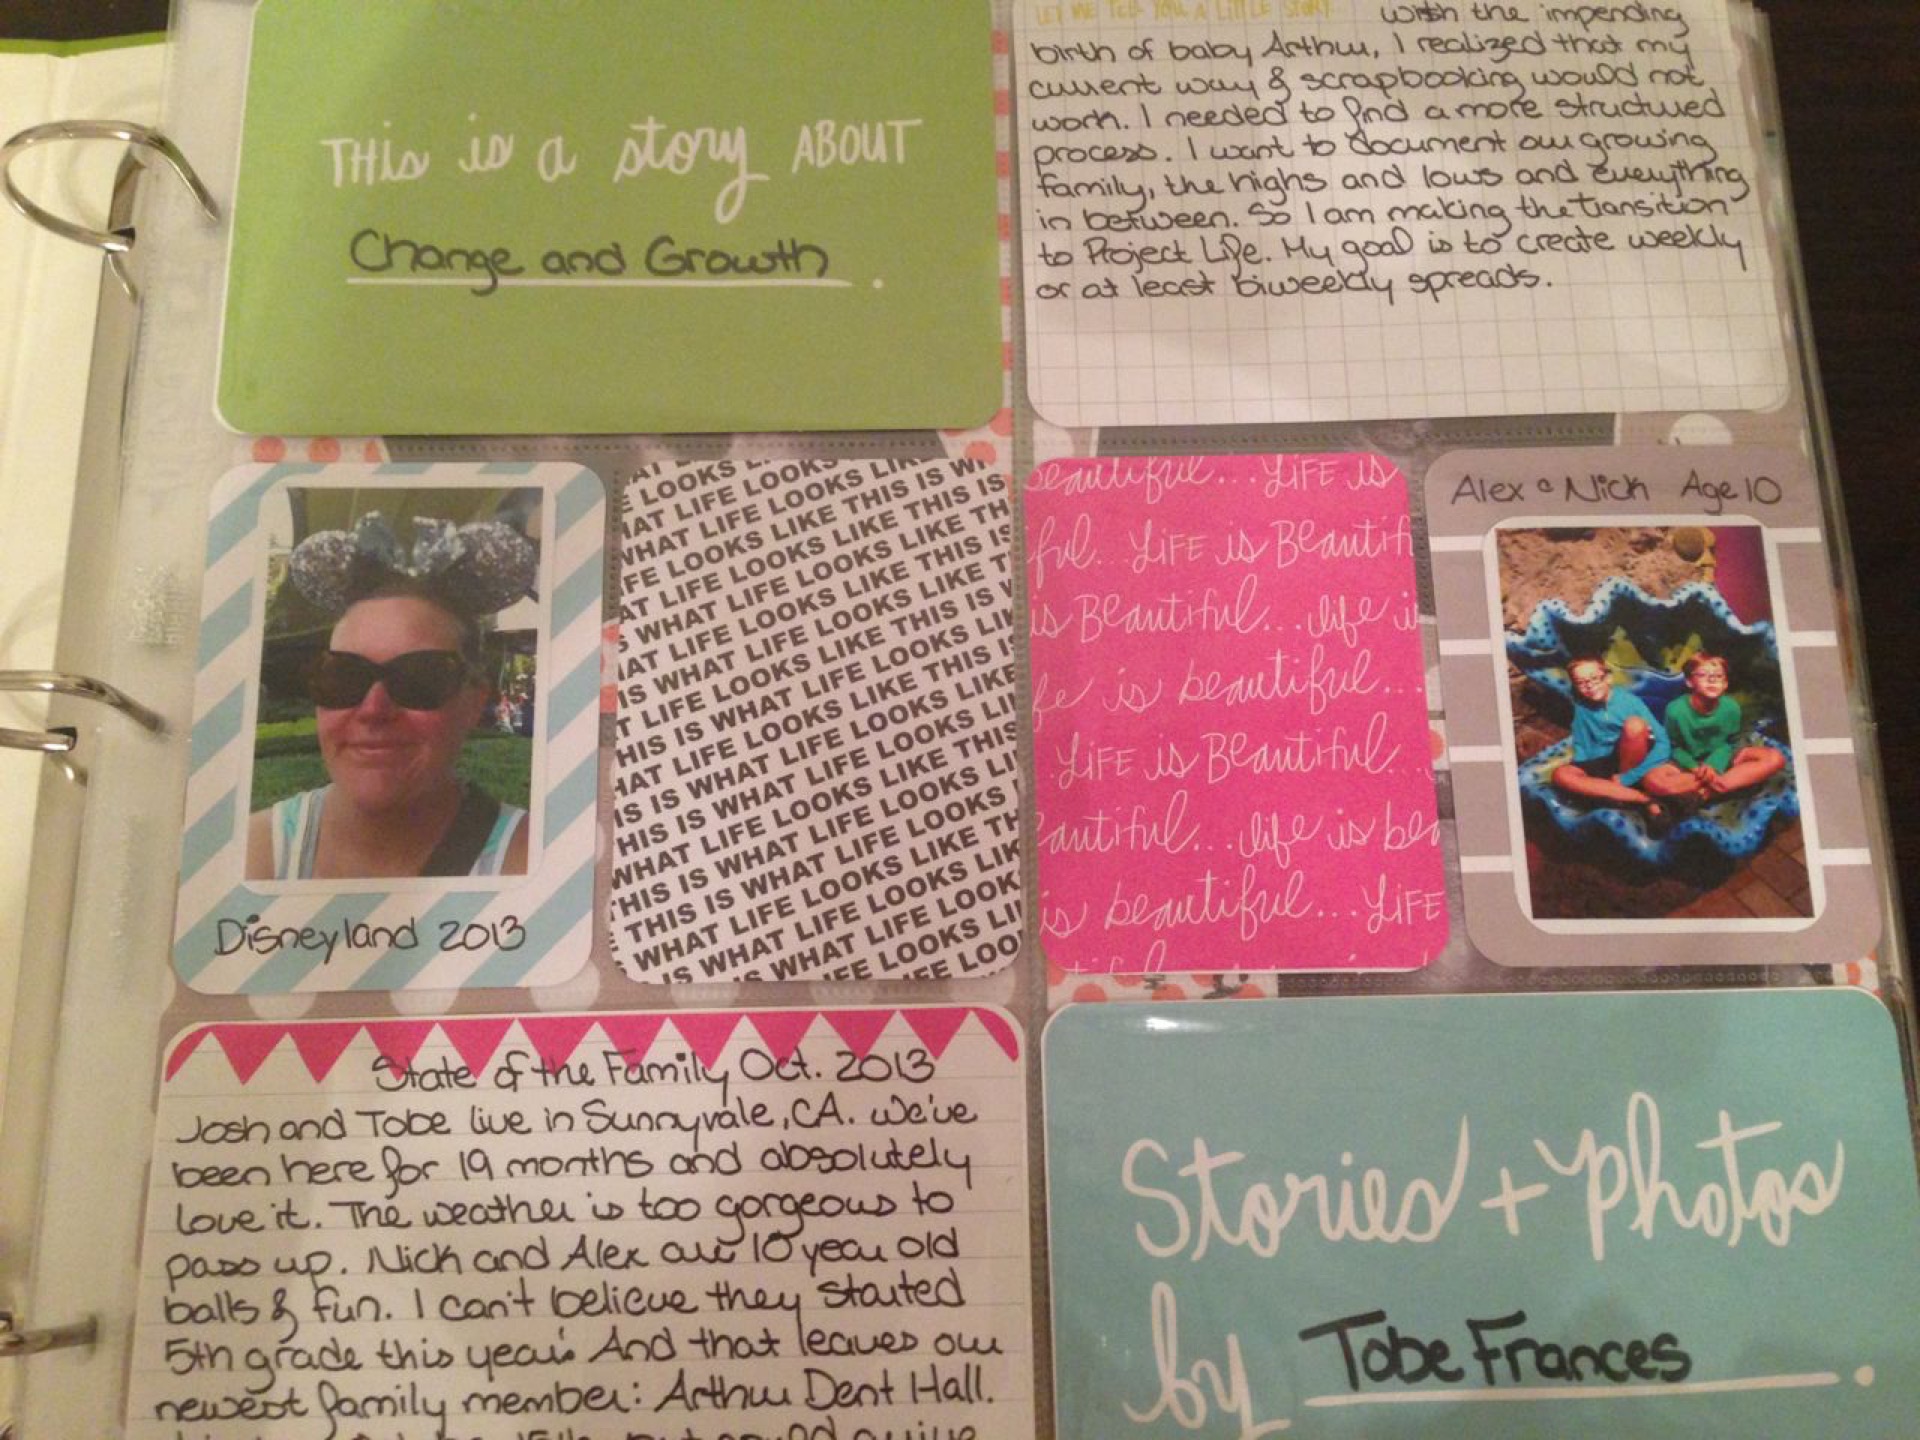
So, I am officially embarking on the Project Life adventure this month.  I plan on starting the weekly spreads now that the baby has arrived. To prep, I have created a few transition/introduction pages to start the albums.  I made a nice introduction page for the family album with journaling about the transitions and my theme for the album: Change and Growth.  I journaled a bit about why we are changing scrapbooks and our family.  I added pictures of our current (before baby) family and some facts about them.  For Arthur's album, I used the same idea with different papers and inserts.

IMG_4354 (1920).jpg
 
IMG_4355 (1920).jpg
 
IMG_4362 (1920).jpg
 
IMG_4363 (1920).jpg
 

I then added in a page highlighting all my ultrasound pictures to document that part of the journey.  I duplicated that page in Arthur's album just with different designer paper.

IMG_4356 (1920).jpg
 
IMG_4357 (1920).jpg
 
IMG_4364 (1920).jpg
 
IMG_4365 (1920).jpg
 

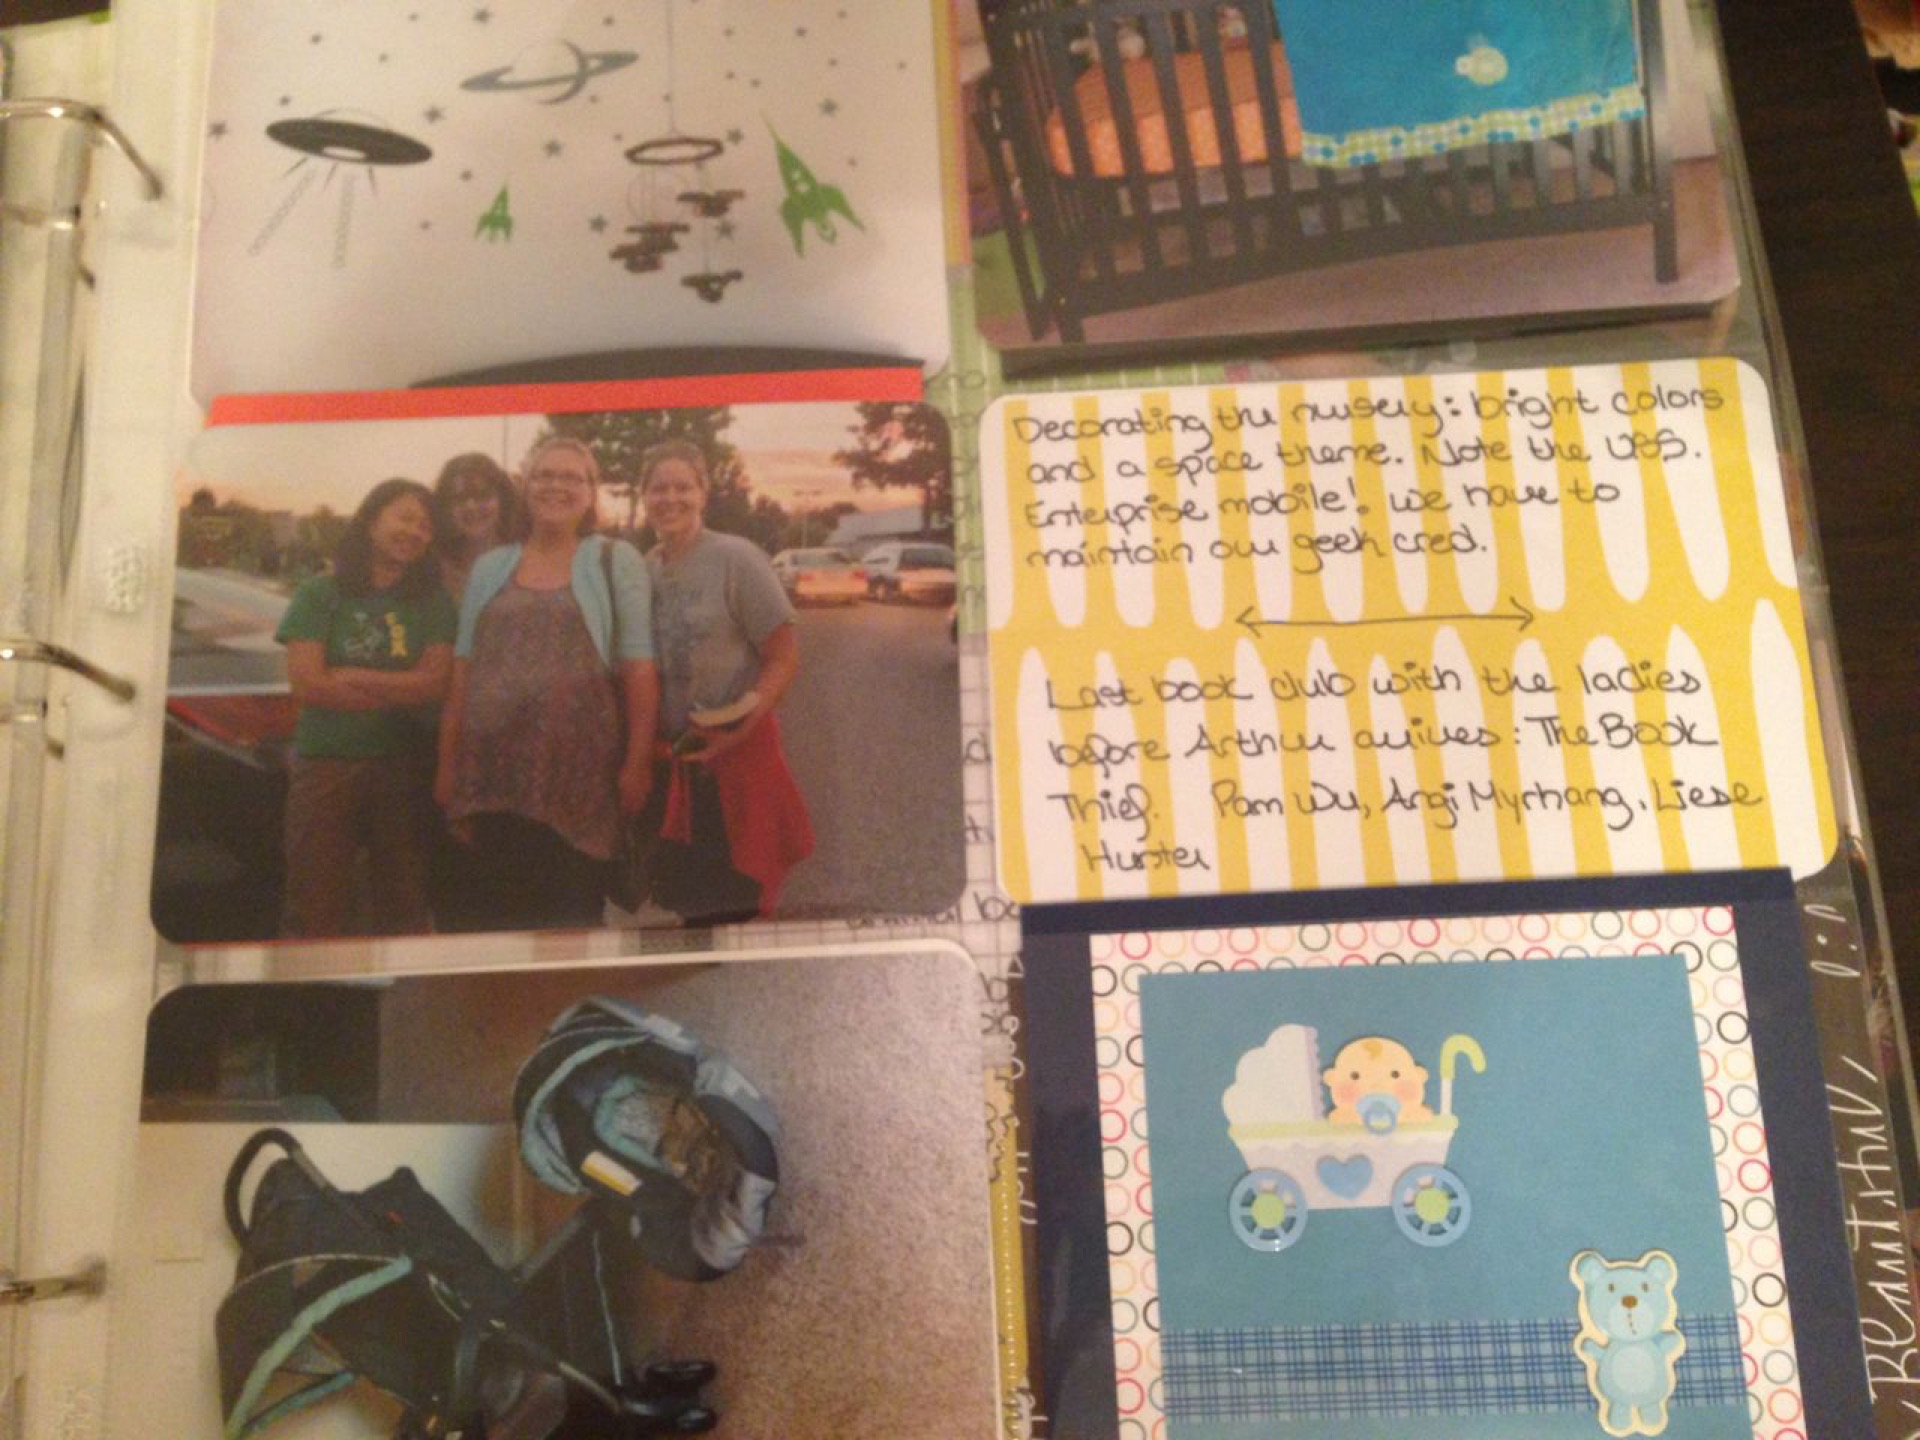
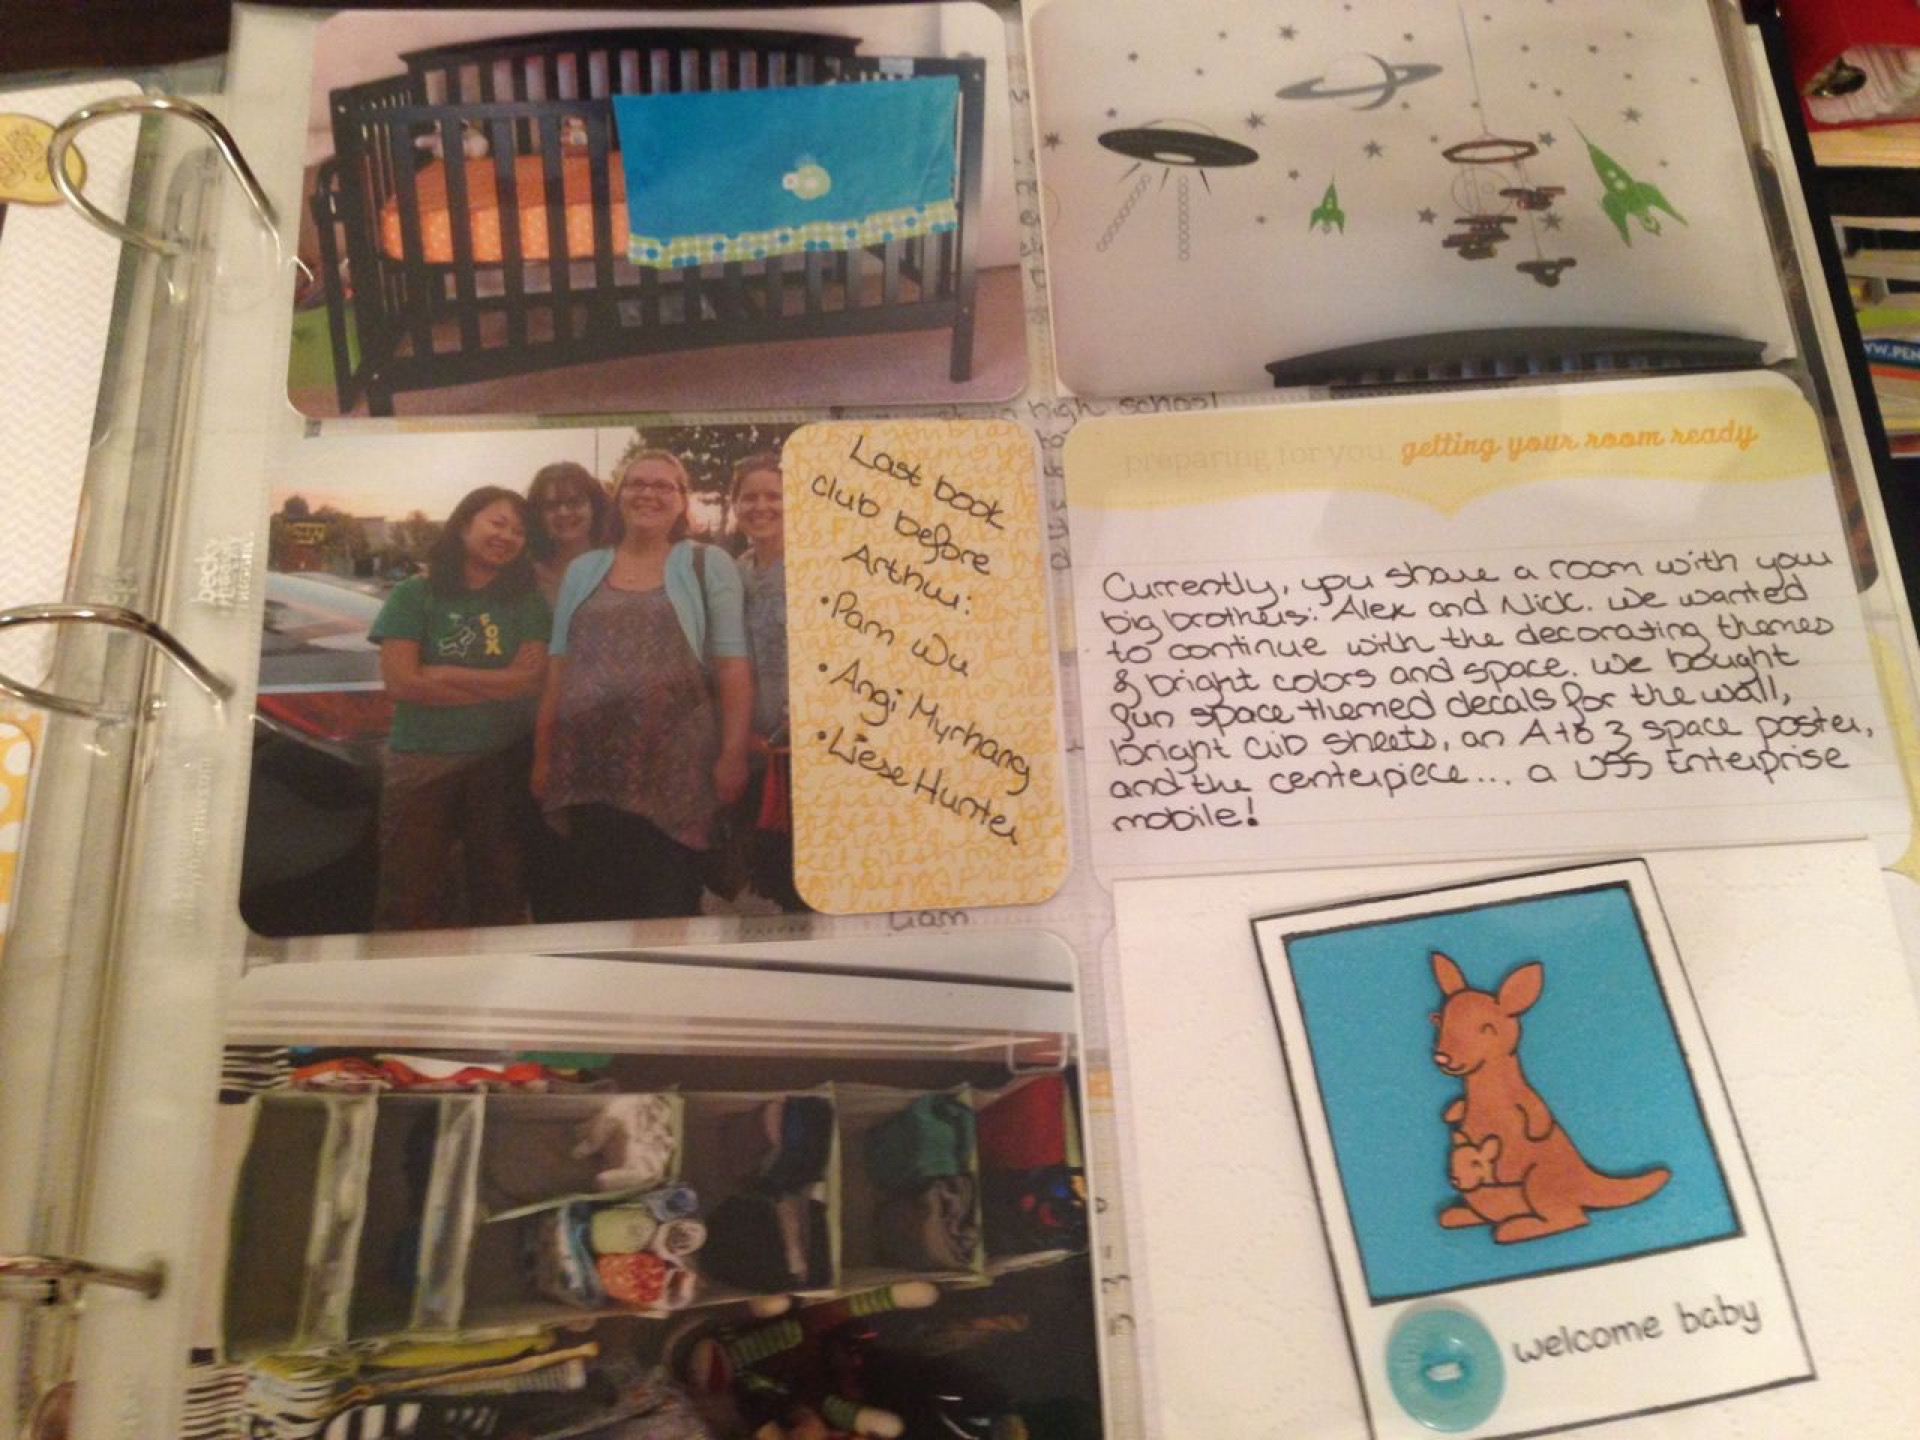
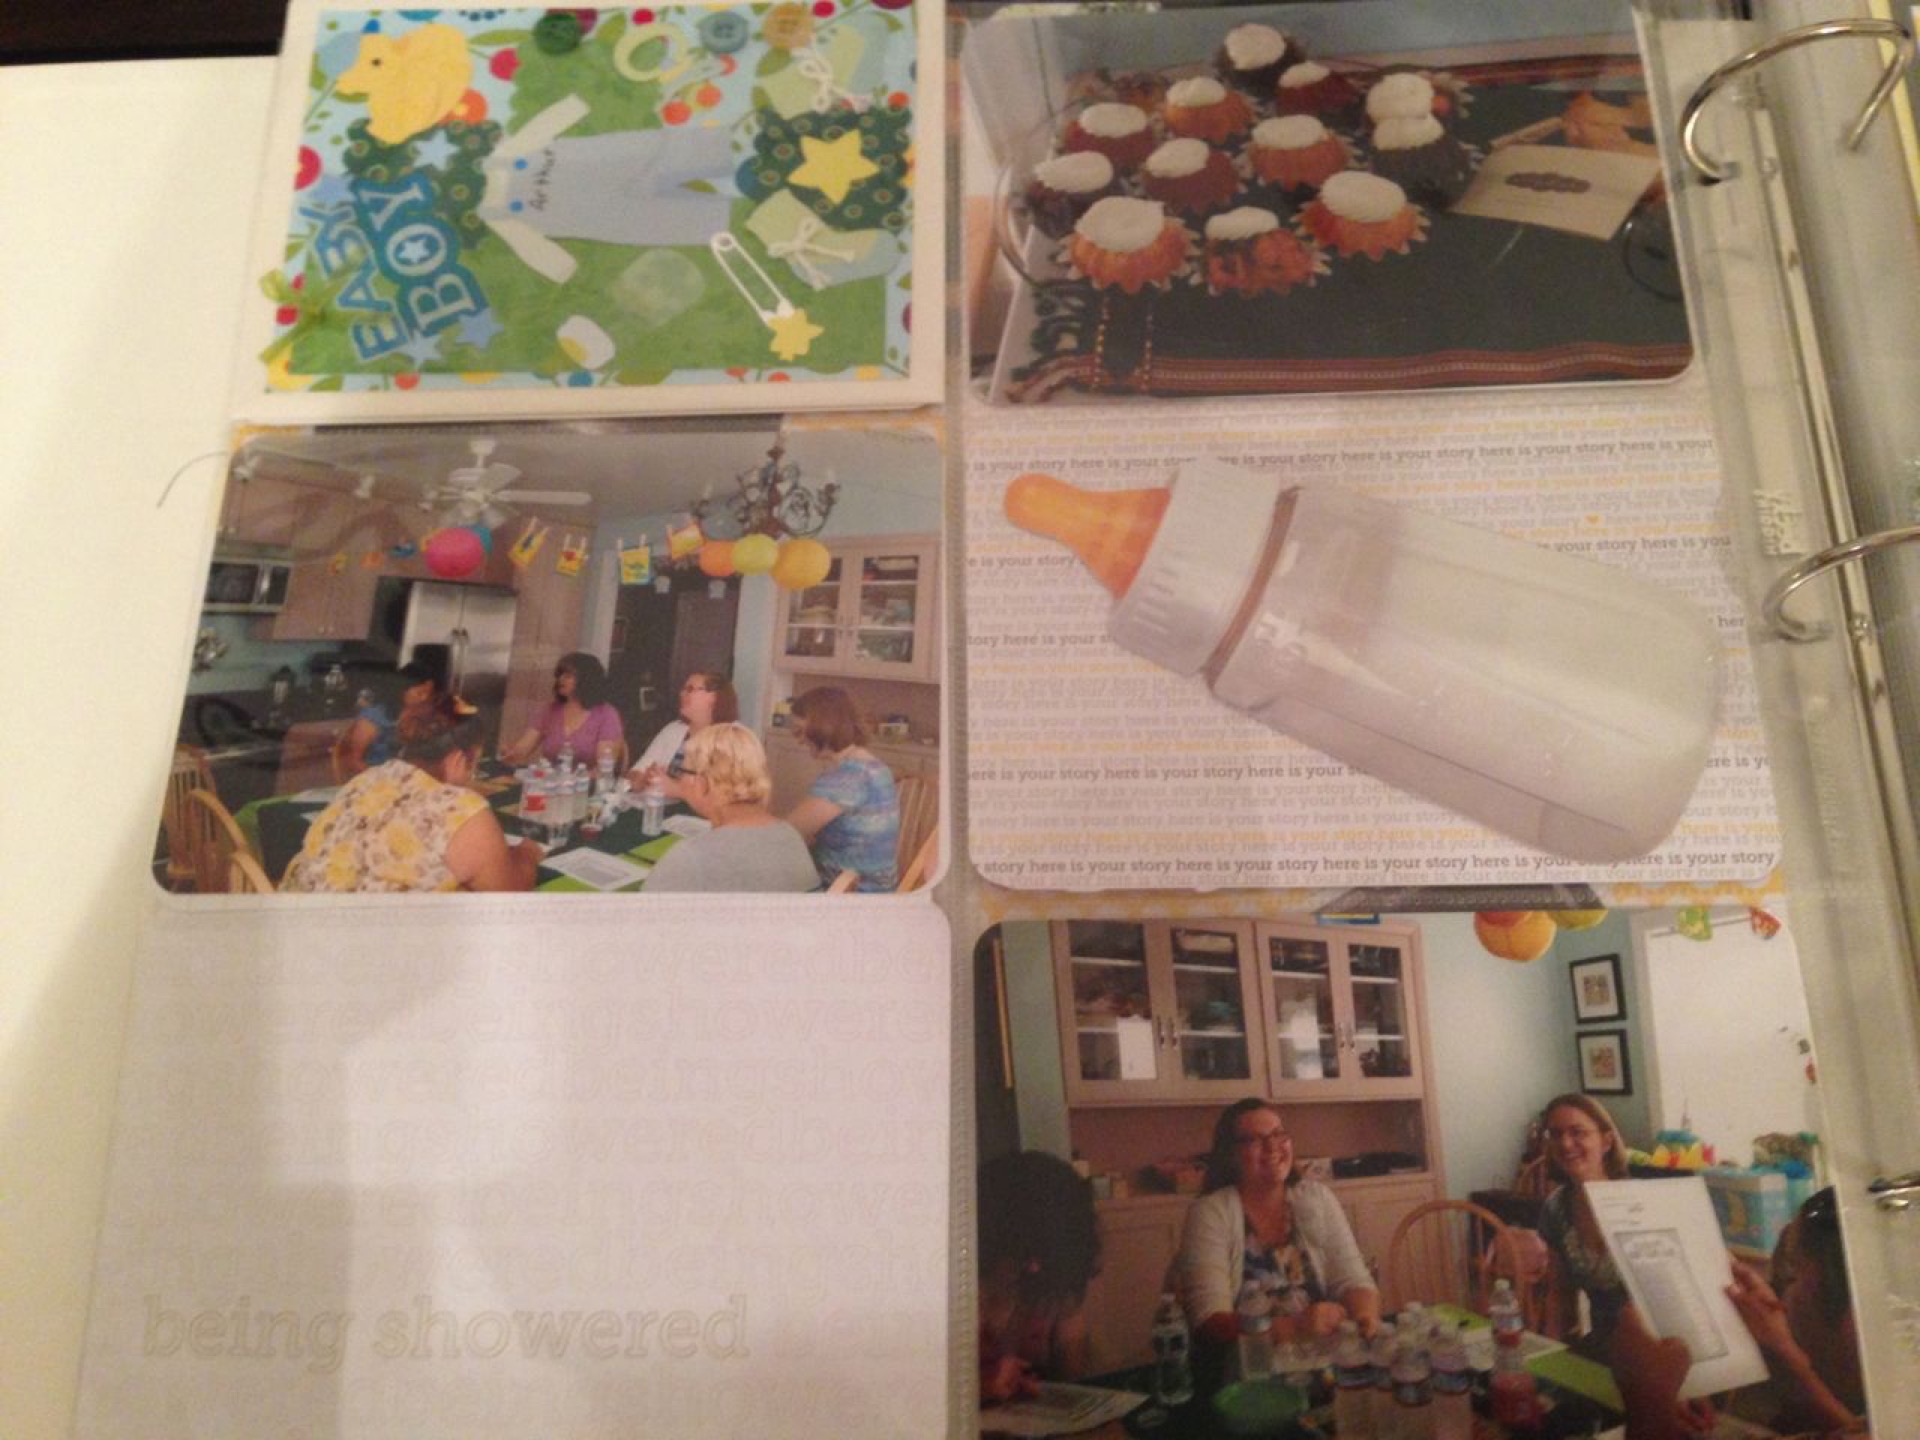
The next pages highlight the nursery and baby shower thrown by my crafting friends.  I also inserted a few of the handmade cards I received from friends.

IMG_4358 (1920).jpg
 
IMG_4361 (1920).jpg
 
IMG_4360 (1920).jpg
 
IMG_4366 (1920).jpg
 
 
IMG_4367 (1920).jpg
 

Overall, I am really happy with the flexibiloty of the PL system.  I can make spreads that fit our events or weeks.  But I also have a limited supply of inserts and page dividers.  It forces me to make decisions instead of getting lost in the possibilities.  Slowly, it is coming together.  I can't wait to start highlighting our weekly adventures.  I plan on sharing them on the blog on a monthly basis.  Look for them soon...

Supplies used:

  • PL Seafoam edition kit
  • PL Seafoam designer paper
  • PL Sunshine edition kit
  • PL Baby edition kit
  • PL Baby designer paper
  • American Crafts D-ring binder (black and lime green)
  • Corner rounder
  • Date stamp
  • Random baby stickers from stash
  • Black marker
tags: Project Life, scrapbooking
categories: Crafting
Thursday 10.24.13
Posted by Tobe Buffenbarger
 

Weekly Crafting

I figured I should finally dedicate posts to my card crafting  and scrapbooking.  Over the past two weeks, I've done a lot of crafting.  My first task was to finish the boys' scrapbooks for last summer.  I am determined to be completely caught up before the baby comes in October.  I've ordered our pictures from last September to now; should get those in a few days.  Then I can get started on that section of pages to catch up.  I'm planning on switched to Project Life for the family album in October.  I want to start with a clean slate.  The baby will also start with a Project Life album.  The boys will stay the same, but I still want them all caught up. Now on to the card making...

Last month I snapped up the Round Array Bundle (Stampin' Up) with the stamp set and punch.  I couldn't wait to try it out.  I used a pretty dark pink paper as a card base with a light pink paper to stamp onto.  For the white paper, I used my swiss dot embossing folder and the Big Shot to give some dimensions.  I like the randomness to this card.

IMG_3246 (1920).jpg
 

A card class card.  The original design was different.  I messed up my designer paper piece, so I changed the design to work with what I had.  I like the simpleness of this card.  All supplies are from Stampin' Up.

IMG_3248 (1920).jpg
 

A new technique I was trying.  We made an awesome card at class using Versa mark and a brayer.  I bought some glossy paper and tried it out.  Unfortunately the color did not adhere evenly.  I want to try it again and see if I get different results.  I do kind of like the tie dye effect I attained by mistake.  (Looks better in person)

IMG_3249 (1920).jpg
 

Another class card.  I like the simplicity of this card.  The colors work well together to create a masculine multipurpose card.

IMG_3251 (1920).jpg

Class card.  We were focusing on retiring stamps.  I love the play of pattern with the designer paper and the embossed piece.

IMG_3252 (1920).jpg

I love the designer paper on this card.  The colors are bright and very cheery!  Class card.

IMG_3253 (1920).jpg

This card came from me grabbing some random supplies and working with what I got.  I'm not in love with this card, but something about the mix of patterns intrigues me.  After finishing the card, I went back to add the metallic jewels.  Without them, the card just looks plain.

IMG_3254 (1920).jpg

Another random supply card.  I would have loved to see a thicker font for better contrast.  But I do love the flower I constructed.  I layered different sizes and shades to create a better embellishment.

IMG_3255 (1920).jpg

Class card.  I never bought them, but the button stamps really grew on me in the last month or so.  Plus, I love the designer paper.

IMG_3256 (1920).jpg

Class card.  Love the mix of patterns on this one.

IMG_3257 (1920).jpg
 

Class card. I love the rock n roll technique to create two color stamps.  But overall I'm not a fan of the colors and stamps on this card.

IMG_3258 (1920).jpg
 

Class card.  Love, love, love this card.  I love the combo of purple, pink, and orange.  I love the simple sentiment.  

IMG_3259 (1920).jpg
 

The following two cards were part of my homework assignment for stamp club.  We had a general sketch.  I decided to play with the alignment of the card to make two different cards.  Both cards used Stampin' Up paper, stamps, and punches.  I just love the Print Poetry designer paper pack from the spring catalog.  I'm rationing the paper to make it last.

IMG_3260 (1920).jpg
IMG_3261 (1920).jpg
 

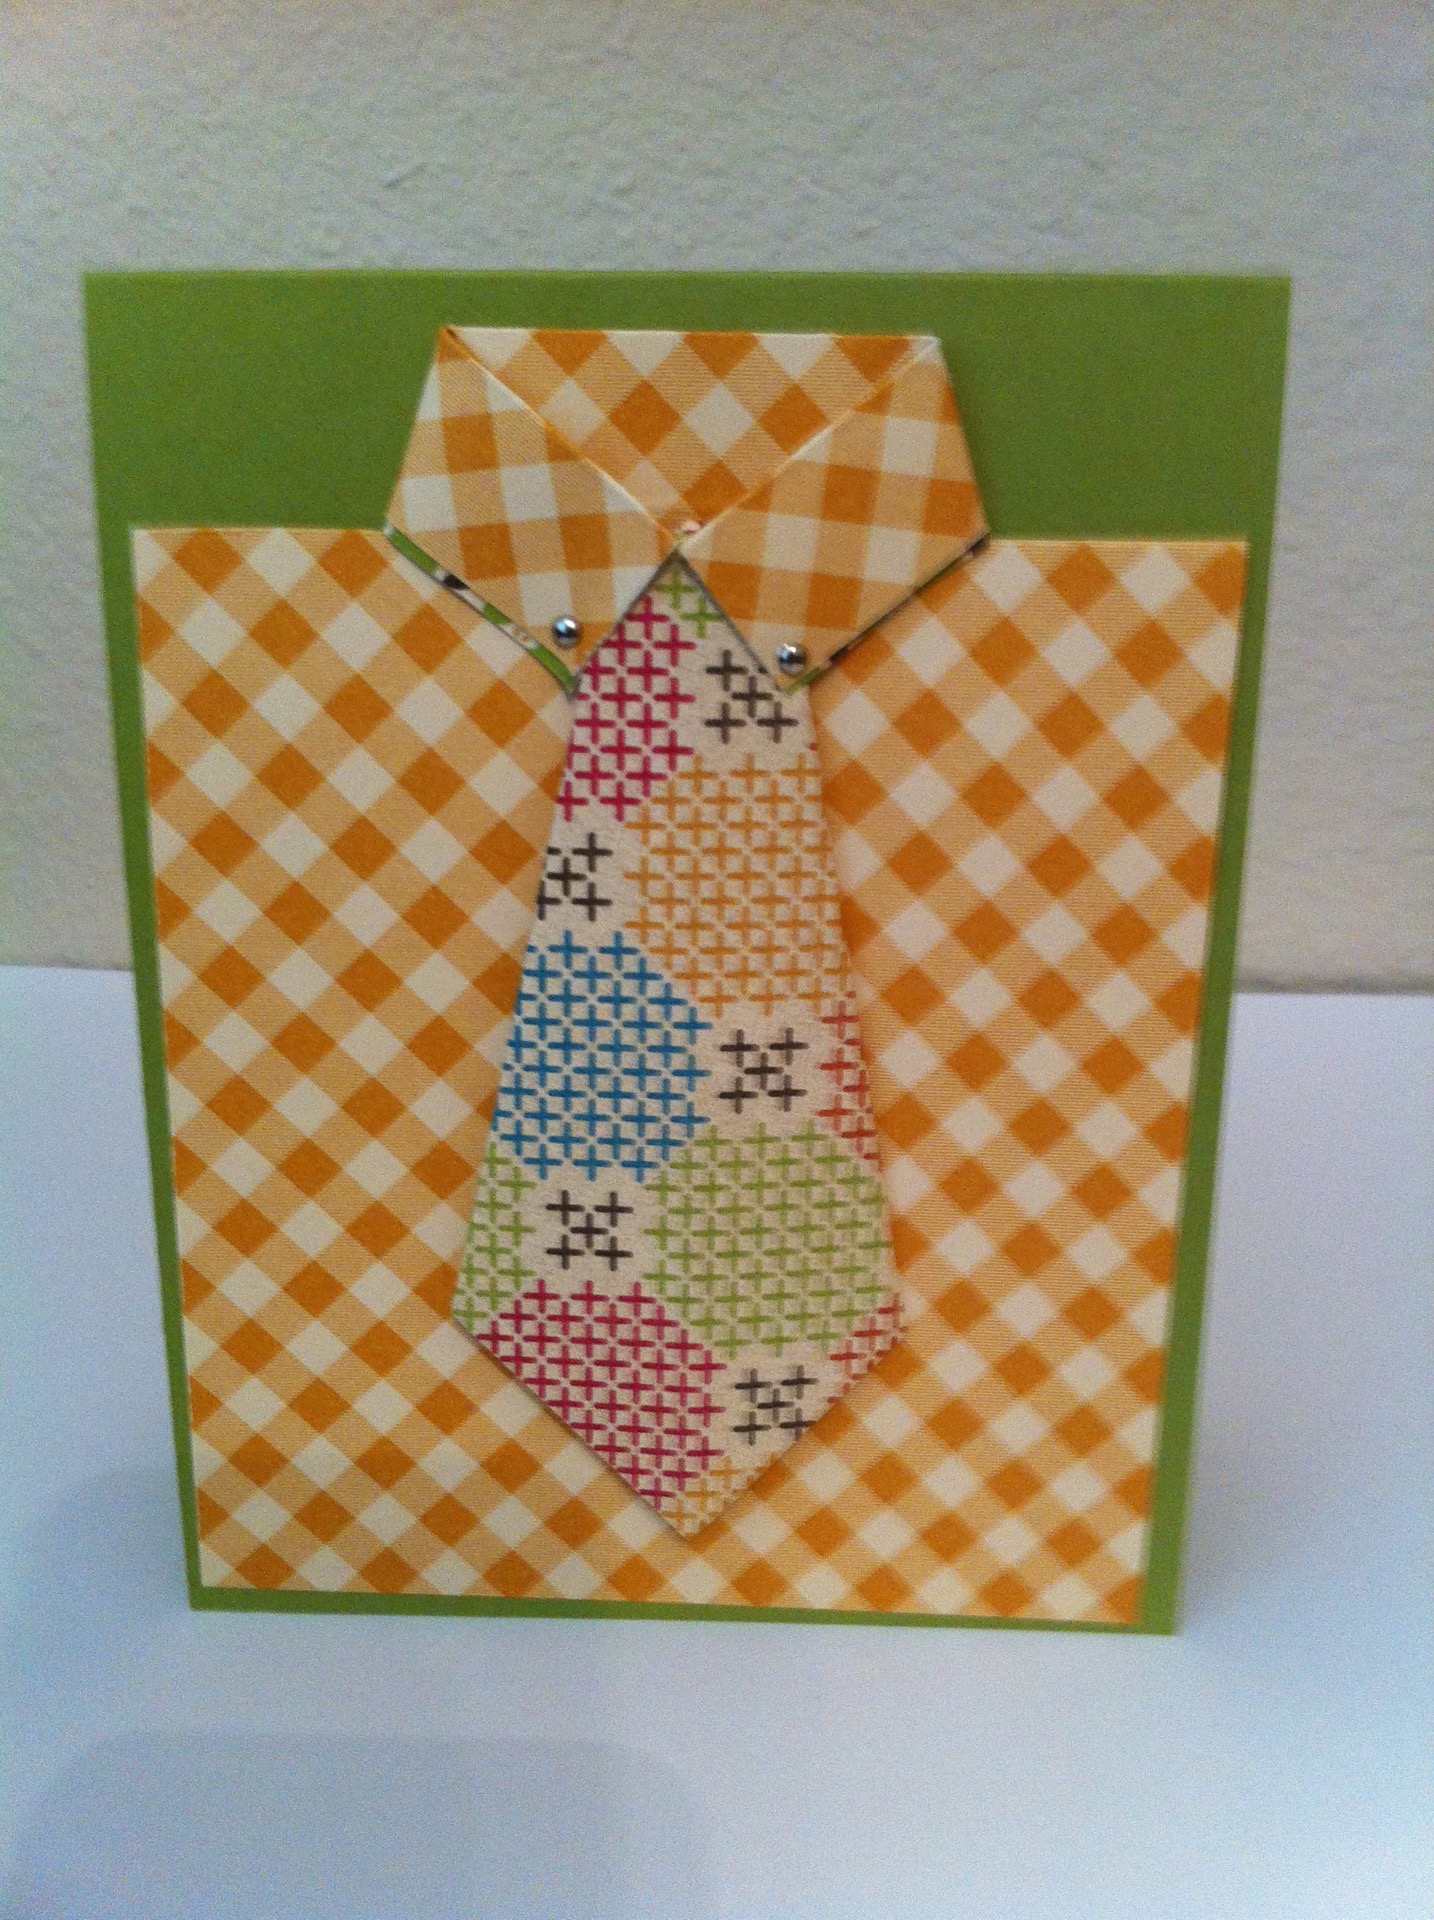
Class card.  I love the 3D tie we created and it really wasn't that hard to do.  

IMG_3262 (1920).jpg
 

Class card.  I'm not a huge fan of the color/designer paper combo, but I loved work with the Shimmer paint and the coloring techniques.

IMG_3264 (1920).jpg

More random supply cards.  I'm on a mission to use a ton of my paper scraps.  This strips were leftovers from cards made a long time ago.  

IMG_3267 (1920).jpg
 
IMG_3266 (1920).jpg
 
IMG_3265 (1920).jpg
 

Class card.  Love, love, love the color and pattern combinations on this card.  I think this is my favorite card from this entire post.

IMG_3268 (1920).jpg

Class card.  I want to do a replica of this card with different colors.  I have all the stamps to do it!

IMG_3269 (1920).jpg

Very cute little card.  I didn't end up buying this stamp set, but I still like the look.

IMG_3270 (1920).jpg
 

Class card.  Like the layout, don't like the color combos that much.

IMG_3271 (1920).jpg
 
tags: card making
categories: Crafting
Monday 06.03.13
Posted by Tobe Buffenbarger
 

Book of Lists: Perfect Day

I ran across this idea on At Random, I followed her links to Kapachino's original post.  This month's topic is "perfect day."  I decided to write up an ideal itinerary...

 
  • Sleep in, breakfast in bed
  • Morning spent lounging at the beach (no swimming, the Pacific is too cold)
  • Lunch at a cafe
  • Afternoon at a museum
  • Swim in the pool
  • Dinner with wine at a good restaurant (perhaps The Fish Market)
  • Movie at the theater
  • Dessert, something chocolate
  • Sex (just being honest)
  • Curling up in bed with a good book

An entire day spent with J with no technology or chores.

Next month:We’ll be posting on March 4 and the topic is “I’m good at.” We can all stand to have a little more self-confidence, I think, so let’s talk about it.

tags: book of lists, composition notebook
categories: Books, Crafting, Life, Writings
Monday 02.04.13
Posted by Tobe Buffenbarger
Comments: 1
 
Newer / Older

Powered by Squarespace.